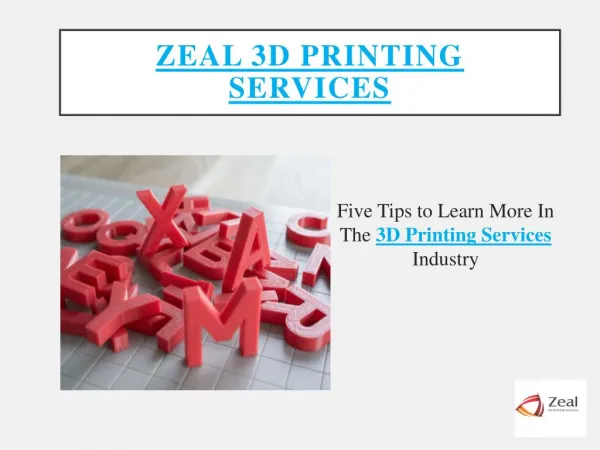
Download
1 / 85
850 likes | 1.07k Views
Education of new LBP STORK (ML-4550). Digital Printing R & D 3 group. May , 2005. Agenda. General Specification Process Disassembly Troubleshooting. Ⅰ. General Specification. Objectives. Understanding the General specifications of ML-455x.

E N D
Education of new LBP STORK (ML-4550) Digital Printing R & D 3 group May, 2005
Agenda • General Specification • Process • Disassembly • Troubleshooting
Ⅰ. General Specification Objectives • Understanding the General specifications of ML-455x. • Comprehension of the feature of major elements.
Ⅰ. General Specification General Feature Printer Size(WxDxH) 396x453x353mm Weight Gross: 21 kg Net : 17 kg Power Consumption Avg Operation 600 W Sleep mode 40 W Noise Operating 57 db Standby 35 db
Ⅰ. General Specification Print Printing Type Laser Print Speed Up to 43 ppm(A4); 45 ppm (LTR)Duplex : Up to 30 ipm(A4); 31 ipm(LTR) Resolution Up to 1200 x 1200 dpi effective output FPOT Sleep mode 45 seconds Stand by 8 seconds Warm-up Time 37 seconds Toner Cartridge Single cartridge 20,000 Pages (for starter, 10,000 Pages)
Ⅰ. General Specification Paper Handling Capacity (20 lb) Tray1 or Optional Tray2,3,4 500 sheets MP Tray 100 sheets Optional Cassette N/A Output Capacity 250 sheets (Face Down) 100 sheets (Face Up) Printing from the MP Tray to Rear output tray provides the straight paper path for printing special materials like envelopes, labels, postcards, transparencies, etc.
Ⅰ. General Specification Softwore & H/W Emulation PCL6, PostScript3, IBM ProPrinter, EPSON Random Access Memory (RAM) 128 MB (Max. 512 MB) 256 MB optional memory available(2 Slot) Fonts 1 bitmap, 45 scalable, 136 PS3 fonts Interface • IEEE 1284 Bidirectional Parallel Standard • USB Interface Standard (USB 2.0) • Network Interface • (10/100 Base TX, 802.11b Wireless LAN) • Serial Interface Interface Switching Automatic (Parallel, USB, Network) OS Compatibility Windows 95/98/Me/NT4.0/2000/XP/2003, Various Linux OS including Red Hat, Caldera, Debian, Mandrake, Slackware, SuSE, and Turbo Linux, Mac 8.6~9.2/10.1~10.4
Ⅰ. General Specification Options Memory DIMM 256 MB (2 slot) (Use only the Samsung-approved DIMM) Network Card or Serial Interface Card 10/100 Base TX, 802.11b Wireless LAN Serial Interface Card Hard Disk Storing or spooling a print job to the Hard Disk Optional Paper Tray (Tray2,3,4) 500 Sheets of paper (Increasing the paper handling capacity) Duplex Unit Automatically printing on both sides of a sheet of paper (letter, legal, folio,and A4)
Ⅰ. General Specification Review ML-455x is Mono Laser Printer and its print speed is up to 45ppm(Letter).
Ⅱ. Process Objectives • Understanding the basic structures and operating principle of each parts • Studying the printing process and electronic photo process • Comprehension of System Layout
Ⅱ. Process System Layout 4 3 5 6 2 7 1 Paper Input (Cassette) Transfer Roller 2 1 Develop Unit LSU (Laser Scan Unit) 4 3 Fuser Unit 5 6 MP Tray Duplex Unit 7
Ⅱ. Process Printing Process
Ⅱ. Process Electronic Photo Process
Ⅱ. Process System Layout 1. Cassette (Main and Optional Tray) Main and Optional Tray Feeding Method : Cassette Type Feeding Standard : Center Loading Feeding Capacity : Cassette 500 Sheets(75g/㎡, 20lb Paper Standard) Paper Detecting Sensor : Photo Sensor Paper Size Sensor : Yes
Ⅱ. Process System Layout 1. Cassette MP Tray Feeding Standard : Center Loading Feeding Capacity : 100 Sheets (75g/㎡, 20lb Paper Standard) Transparency (50 typical) Labels (50 typical) Envelopes (up to 10)
Ⅱ. Process System Layout 2. Transfer Ass’y The life span: Print over 150,000 sheets (in 15~30 ℃)
Ⅱ. Process System Layout 3. Driver Ass’y It is a power delivery unit by gearing By driving the motor, it supplies the power to the feeding unit, the fusing unit, and the distributing unit. Two motors(Main motor & Deve motor) used for driving gears. A solenoid used for change paper direction for duplexing.
Ⅱ. Process System Layout 4. Fuser Ass’y Pressure roller and Heat roller heated by E-coil Thermistor – Temperature Detecting Sensor Two Thermostat – Temperature-Intercepting Device
Ⅱ. Process System Layout 4. Fuser Ass’y The fuser is consisted of the Heat Roller with E-coil, Pressure Roller, Thermistor, and Thermostat. Error Phenomenon Engine Fuser Error A problem has occurred in the fuser inside the printer. Engine Fuser Low Heat Error The temperature in the fuser is abnormally low. Engine Fuser Low Heat Error The temperature in the fuser is abnormally high.
Ⅱ. Process System Layout 5. LSU(Laser Scan Unit) Consisted of LD(Laser Diode) and Polygon Motor Control. Error Phenomenon Engine LSU Error A problem has occurred in the LSU in the printer
Ⅱ. Process HANDLE Dr.BLADE C/R CLEANING ROLLER CLEANING BLADE AGITATOR D/R OPC 200 ㎛ OPC TURBINE D/R S/R New Toner Capa. : 1400 CC Used Toner Capa. : 368 CC System Layout 6. Toner Cartridge Developing Method: Non-magnetic 1 element non-contacting method Toner: Non magnetic 1 element shatter type toner (Averag Dia. 0.8㎛) The life span of toner cartridge : 10,000 Sheets or 20,000 Sheets (N/N, Simplex,ISO 5% Coverage Pattern)
Ⅱ. Process System Layout 6. Toner Cartridge OPC Cleaning: Collect the toner by using Cleaning Blade Management of disusable toner: Collect the toner by using Cleaning Blade OPC Drum protecting Shutter : Yes
Ⅱ. Process System Layout 7. Duplex Unit Automatically print on both sides of a sheet of paper with an optional duplex unit Supports the following paper sizes : Letter, Legal, Folio, and A4
Ⅱ. Process System Layout 8. Optional Paper Tray Increase the paper handling capacity by installing optional Tray2,3 and 4 Holds 500 sheets of paper (Cassette is same as printer Tray1 cassette)
Ⅱ. Process Review • What is the function of paper-sensor? • How long is life of Transfer-Roller? • What is the function of Thermistor and Thermostat.
Ⅲ. Disassembly Objectives • Practicing the skill of decomposition and assembly. • Understanding the basic structures of major part (Engine, Scan).
Ⅲ. Disassembly General Precautions on Disassembly
Ⅲ. Disassembly 1. Transfer Roller Open the Open Cover. 1 Hold the lever at both ends of the roller, then remove the roller 2
Ⅲ. Disassembly 2. MPF Ass’y Open the MPF Ass’y 1 Remove the Tray Link from the MP Cover 2 Remove two springs from the Knock Up Plate Ass’y 3 Push the MP Cover and remove it, as shown below 4
Ⅲ. Disassembly 3. Holder Pad Ass’y Unplug the connector and remove the three screws. 1 Remove the Photo Interrupter and the MP Actuator. 2
Ⅲ. Disassembly 4. Idle-Roller Ass’y Remove the lock as shown below and take out the Idle-Roller Ass’y 1 Idle-Roller Ass’y
Ⅲ. Disassembly 5. Feed2 Idle Ass’y Remove four screws. Then lift the Idle Unit, as shown below 1
Ⅲ. Disassembly 6. Cover Right Pull the Cassette out of the Printer. 1 Remove two screws and take out the right side, as shown below. 2
Ⅲ. Disassembly 7. Main PBA Unplug the all Connectors, as shown below. 1 Remove two screws and take out the Dummy Bracket 2 Remove six screws and take out the Main PBA 3
Ⅲ. Disassembly 8. Main Drive Ass’y Unplug the two Connectors from the Main Motor Ass’y and the Connector PBA 1 Take out the FEED-GEAR 2 Remove five screws and take out the Main Drive Ass’y 3 When separating the Main Motor, just remove four screws, and then remove the Main Motor 4
Ⅲ. Disassembly 9. Deve Drive Ass’y Unplug the Connector from the Deve Motor Ass’y. 1 Remove four screws and take out the DEVE Drive Ass’y 2 When separating the DEVE Motor, just remove four screws, and then remove the Deve Motor 3
Ⅲ. Disassembly 10. Connector PBA Unplug the all Connectors from the Connector PBA and take it out. 1 The Connectors are located, as shown below 2 We don’t use “Clutch” Connector.
Ⅲ. Disassembly 11. Solenoid Unplug the MP Solenoid Harness and the Main Solenoid Harness from the Connector PBA. 1 Remove one screw and take out the MP Solenoid. 2 Remove one screw and take out the Main Solenoid. 3
Ⅲ. Disassembly 12. Cover Left Pull the Cassette out of the printer. 1 Open the Open Cover and remove two screws and take out the left side. 2 Take out the Cover Left. 3
Ⅲ. Disassembly 13. Rear Cover Open the Rear Cover, and then take out the Stopper. 1 Remove the Rear Cover in the direction of arrow. 2
Ⅲ. Disassembly 14. Top Cover Open the MPF Ass’y, the Rear Cover, the Open Cover. 1 Unplug the two Connectors after you remove the three screws from the Main PBA 2 Unlatch both ends of the Top Cover. 3 Unlatch the hook and take out the Top Cover. 4
Ⅲ. Disassembly 15. Open Cover Remove two screws and take out the Stopper 1 Take out the Open Cover, as shown below. 2
Ⅲ. Disassembly 16. Inner Cover Remove two screws and take out the Inner Cover. 1
Ⅲ. Disassembly 17. Fuser Ass’y Remove two screws and pull the Locking Lever. Then take out the Fuser Ass’y. 1 Remove two screws and take the Thermostat out of the Fuser Ass’y. 2 Remove tow screws securing the Electrode L, R and remove it. 3 Remove tow screws securing the Fuser Upper unit and remove it, as shown below. 4
Ⅲ. Disassembly Remove two screws securing the Release Lever L, R and remove it, as shown below Remove two screws securing the Release Lever L, R and remove it. 5 5 Remove two screws and take out the Gear Bracket. 6 Take out the Heat Roller Ass’y. 7 Remove the screws securing the Thermistor and remove it, as shown below. 8
Ⅲ. Disassembly 18. Exit Solenoid Ass’y Unplug the Exit Solenoid Hamess from the Main PBA. 1 Remove three screws and take out the Exit Solenoid Ass’y. 2 Remove two screws and take out the Exit Solenoid . 3
Ⅲ. Disassembly 19. Exit Roller Take out the Actuator. 1 Remove Exit Roller and Bearing. 2 Remove the Exit Gear, as shown below . 3 Remove the Duplex Exit Roller as same method . 4 Release the Duplex Exit Gear, as shown below . 5
Ⅲ. Disassembly 20. LSU Remove the Cover-Frame Exit and unplug the Connector from the main PBA. 1 Remove three screws and take out the LSU. 2
Ⅲ. Disassembly 21. DC Fan Unplug the two Connectors from the Toner Sensor PBA. 1 Remove the screw for taking out the Stopper, and then take out the DC Fan. 2
Ⅲ. Disassembly 22. Toner Sensor PBA Unplug the all Connectors from the Toner Sensor PBA. 1 Remove two screw and taking out the Toner Sensor PBA. 2 Remove the screw securing the Cover Open PBA and remove it. Then unplug the Connector from the Main PBA. 3 Remove three screw and taking out the LSU Lower Cover. 4