Download
1 / 82
820 likes | 924 Views
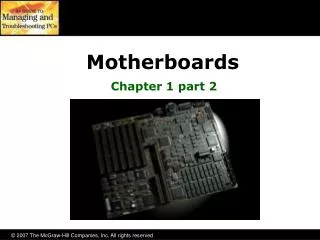
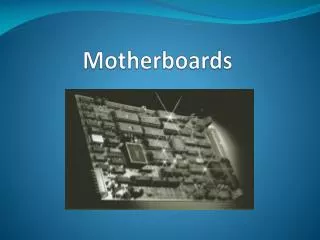
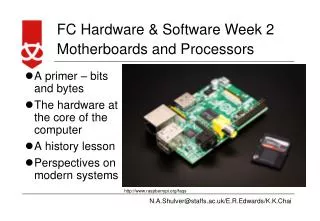
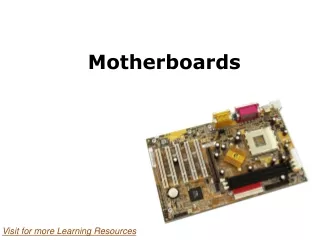
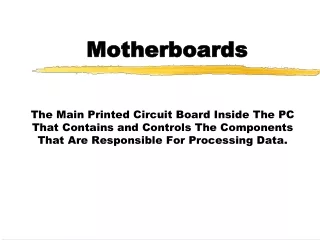
Motherboards and Their Components. Motherboard (Main Board, System Board, Desktop Board) Overview.

E N D
Motherboard (Main Board, System Board, Desktop Board) Overview • The motherboard is the part of the computer to which every other component is connected. It contains the processor socket(s), memory slots, expansion card slots, ports for mouse, keyboard, printer, et cetera, and electronic parts, known as the chipset, to make everything run. • Most motherboards contain some built-in components such as video, sound, network adapter, and others, and they therefore have ports for whatever built-in components they have.
Form Factors • Since the first PC was introduced, several types of motherboards have been used; the types referred to as form factors. • What differentiates form factors of motherboards is their size, arrangement of components on the boards, and other details. • Cases and power supplies are also classified into the same form factors; they all have to match to some extent for the components to fit properly into the case.
Form Factors • The following form factors of motherboards are among those that have been used for PCs: • AT (Baby AT) • ATX (Advanced Technology eXtended) • LPX (Low Profile eXtension) • Micro ATX • NLX (New Low Profile Extended) • and Flex ATX
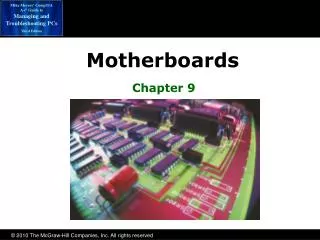
Motherboard Components • It is important for technicians to be able to identify the parts of any motherboard. Figure 3.1 shows an ATX motherboard. Figure 3.1: ATX motherboard.
Motherboard Components • CPU slot/socket: We discuss CPUs in detail later in this chapter. • Memory slots: Physical configurations of memory chips have changed over the years, but the industry seems to have settled on dual inline memory modules (DIMMs). These chips have 72 or more pins per side,
Motherboard Components Figure 3.2 shows DIMM slots.
Motherboard Components • BIOS chip: We discuss BIOS chips in greater detail later in this chapter. • Chipset: Every motherboard has a number of integrated circuits (chips or ICs) permanently installed on different parts of the board. Each chip has a separate function. It is most common for these chips to all be from a single manufacturer.
Motherboard Components • AGP slot: All motherboards made in the last several years that don't have built-in video, and some that do, have an accelerated graphics port (AGP) slot. This is the slot for a video adapter. Figure 3.3 shows an AGP slot. Figure 3.3: AGP video slot.
Motherboard Components • Expansion slots (ISA and PCI): Expansion devices in card form, such as modems and network adapters, go into these slots. Newer motherboards have only Peripheral Component Interconnect (PCI) slots, while some middle-aged boards have a combination of PCI and the older Industry Standard Architecture (ISA) slots.
Motherboard Components Figure 3.5: A combination ISA/PCI slot.
Motherboard Components Figure 3.6: ISA cards' pins are much bigger and farther apart than PCI cards' pins.
Motherboard Components • See the video "Removal and Replacement of Expansion Cards" for more information. The filename is Removal_and_Replacement_of_Expansion_Cards.mpg.
Motherboard Components • Power connectors: Every motherboard has power connectors that look something like the one shown in Figure 3.7. Figure 3.7: ATX power connector.
Motherboard Components Figure 3.8: If the motherboard has this 12-volt connector, it must be connected. The connector from the power supply is in the inset.
Motherboard Components • Note that an AT (form factor) motherboard power connector is different from an ATX connector. The AT connector has two parts, each with black wires on one end. They must be installed with the black wires next to each other at the center of the motherboard's connector, as shown in Figure 3.9.
Motherboard Components Figure 3.9: AT power connector.
Motherboard Components • Battery: We discuss the motherboard battery later in this chapter. • Disk drive connectors: Virtually every motherboard has two IDE connectors for up to four IDE devices, usually one or two hard drives and one or two optical (CD or DVD) drives. With the proper cables, each connector can support two drives. In addition, there is a connector for the floppy drive. Figure 3.10 shows IDE connectors.
Motherboard Components Figure 3.10: IDE and floppy disk drive connectors
Motherboard Components • Header connectors: These are multi-pin connectors that are similar to but smaller than the disk drive connectors for ports such as serial, parallel, USB, audio, case speaker, and so forth. • Ports: Motherboards have some or all of the following ports: serial, parallel, game, PS/2 mouse, PS/2 or AT keyboard, and USB.
Identifying a Motherboard • While many motherboards are easily identifiable, a few aren't. Here are some identification methods: • Look for the brand name, model number, and revision number printed on the circuit board. • Look for a sticker underneath the lowest expansion slot. It might not be visible without disassembling the computer and removing the board, or at least by using a small mirror on a handle (preferably nonconductive). • On boot-up, look on the first screen—if the information does appear, you won't have long to see it unless you press the Scroll Lock key. • The information might appear somewhere in the BIOS. • If the computer is a brand-name computer, you can often find the board used by going to the computer manufacturer's Web site.
Selecting a Quality Motherboard • While the chipset manufacturer can make a difference in the quality of a motherboard, the manufacturer of the board itself makes the most difference. • To select the best, most appropriate board, • first decide on the features the user needs such as type and number of expansion slots plus the needed built-in components. • Also note that motherboards take only one type of memory. Generally, the faster the memory, the more expensive it is. Therefore, decide on the best memory you can afford and select the motherboard accordingly.
Selecting a Quality Motherboard • Next, evaluate the manufacturer based on its available technical support and its Web site. • Then, consider warranty and cost. • Another useful method is to go to the processor manufacturer's Web sites for recommendations of motherboards (intel.com, amd.com).
Built-In (Onboard) Components • It is easy to tell when a board has these systems built in—just look for the appropriate connectors. If the computer is fully assembled, look at the back to determine the functions that are built in. • The computer shown in Figure 3.11, for example, has built-in video and sound. This is apparent because these connectors are closer to the top of the computer. • By the way, the shiny metal plate surrounding the ports for the built-in components is called the I/O shield.
Built-In (Onboard) Components Figure 3.11: A computer with built-in sound and video.
Built-In (Onboard) Components • Certain instances call for replacement of a built-in component, usually when that component fails or when the user desires a better component or one with more features. • It is practically impossible to replace the individual parts on the motherboard, so the answer is to add an expansion card with the desired function.
Removal and Replacement of Motherboards • When would you need to replace a motherboard? • There are a few situations when doing so makes sense; for example, when the board fails while under warranty, or the user wants to upgrade a good quality computer but the motherboard won't support a faster processor or more memory.
Removal and Replacement of Motherboards • Tip: Unless the new motherboard is identical to the old one, most or all drivers will be different. For this reason, you'll want to back up data on the hard drive containing Windows, if necessary, and format (erase) the hard drive before going any further. • When you have installed a new board, be prepared to install Windows and all programs from scratch and to restore data from the backup.
Removing the Existing Motherboard • This is a fairly simple matter. • First, with the power off, disconnect every cable from the outside of the computer. • After opening the case , make sure to use a grounding strap and perhaps other anti-static devices. • Then, disconnect all cables you can access from inside the computer, including the disk drive cables and small audio cables. You will most probably have to remove the drive cage. • Remove any remaining cables and all cards in expansion (PCI, ISA, AGP, etc.) slots and place them on an anti-static surface. It is probably best to leave the processor and memory in their places for now. • Now, remove the screws holding the motherboard to the case, and carefully remove the board. If it is still usable and/or the CPU and memory is still in place, place it on the anti-static surface.
Installing the New Motherboard • First, make sure that the new motherboard is the same form factor as the case. • Then, make absolutely certain that the power supply is set for the correct voltage to avoid zapping the new board. • Next, make sure that no conductive surface comes in contact with any metal parts of the case. While some cases have elevated mounting holes that hold the board away from the case wall (see Figure 3.13), other cases call for standoffs. Standoffs are small spacers that go between the board's and the case's mounting holes (see Figure 3.14).
Installing the New Motherboard Figure 3.13: Elevated mounting holes. Figure 3.14: Standoff assortment.
Installing the New Motherboard • After screwing in the screws, you need to install the power connectors and then follow the manufacturer's instructions for setup, which we discuss next. • After you've done this, reinstall all of the compatible peripheral devices (if any) that were connected to the old motherboard.
Diagnosing Motherboard Problems • The most obvious sign of a damaged motherboard is a burnt or otherwise visibly damaged part. • Naturally, motherboards can die without any visual signs. • If you are sure the power supply works and is turned on, set for the correct voltage, and is connected correctly, and the CPU is good, but you attempt to boot and absolutely nothing happens, it is likely that the motherboard is dead.
Diagnosing Motherboard Problems • The only answer here is to try to replace the board with one that is compatible with the case, CPU, power supply, memory, and peripherals. • If this is not feasible, a new computer can often be built with at least some of the existing parts.
Motherboard Batteries • Motherboards come with batteries, usually replaceable lithium coin cells. • These batteries are in place primarily to keep the time/date clock running and maintain BIOS setup program settings. • The batteries usually last at least six years. • If a computer loses its BIOS settings and time/date memory every time it is shut down, you'll need to replace the battery, if possible. • The POST might show an error message if the battery has died.
Motherboard Batteries • Moreover, if someone has set a supervisor password in the setup program, and now has forgotten it, and the computer cannot boot, the only way to reset or cancel the password is to remove and replace the battery.
Battery Replacement • If the BIOS settings are still valid and you need to replace the battery, know that the motherboard might have a capacitor that will hold a charge just long enough for you to replace the battery without losing your settings. • However, whether or not it has such a capacitor, it is recommended to write down all non-default BIOS settings before changing the battery. • Changing a replaceable battery is a simple but delicate operation. Carefully remove the old battery and insert the new one, as shown in Figure 3.15. Just make sure that the new one is of the correct type and that it outputs the correct voltage.
Battery Replacement • Note: There is a long thin tab on some battery holders that at first glance looks as though it should be pulled up to remove the lithium coin cell. • It is really just a spring tab, and if pulled up will permanently lose its ability to hold the battery down and make contact, thus almost always ruining the board. In this case, slide the battery to the open side and remove it, as shown in Figure 3.15.
Battery Replacement Figure 3.15: Replacing a lithium coin cell battery.
Central Processing Units (CPUs, Processors) • Often called the brains of the computer, the CPU is the device that performs the calculations that make computing possible. • Although there are several CPU manufacturers, Intel and Advanced Micro Devices (AMD) make the vast majority of processors used in Windows-based PCs, so we will limit our discussion mostly to Intel Celeron and Pentium II, III, and 4 processors, and AMD K6-2, K6-3, Athlon, and Duron processors.
Central Processing Units (CPUs, Processors) • For more information, go to intel.com or amd.com. • One other processor family worth mentioning is the very inexpensive VIA C3 family from VIA Technologies (via.com.tw), which has started to show up in some similarly inexpensive systems. • Time will tell if the quality will match that of Intel or AMD.
Selecting an Appropriate Processor • When selecting a processor, the first consideration is compatibility with the motherboard.
Motherboard-CPU Compatibility • A given motherboard can accept certain CPUs. • The most obvious limitation is whether the motherboard has a CPU socket or slot, and which type of either it has. • Of the two most popular CPU brands, Intel and AMD, some boards can accept one and some can accept both.
CPU Terminology • For you to be able to select the most appropriate CPU, it will be helpful to understand some terminology: • Front Side Bus (FSB): Measured in megahertz (MHz), the FSB is the channel that connects the processor with main memory. The faster this is, the better the performance will be. This number will range between 33 and 800 MHz.
CPU Terminology • Cache (pronounced "cash"): All new CPUs have cache memory. Cache, as it pertains to CPUs, is expensive high-speed memory used for storing frequently used instructions. This saves the time needed for the CPU to get all of its instructions from slower main memory. All other things being equal, the more cache a CPU has, the better its performance will be.
CPU Terminology • Fans and heat sinks: All processors made in the recent past require heat sinks and fans. Heat sinks are little radiators used to radiate the heat away from the processor. Heat sinks are crucial; remove the heat sink from some processors while they're running and they will melt, or even catch fire almost immediately. Some Intel processors have built-in temperature protection; they will shut down if the temperature gets too high, but they could still sustain damage.
CPU Terminology • Fans and heat sinks: The heat sink and fan work together to keep the processor's temperature within a safe range. It is necessary to use a thermal pad, thermal grease, or silver thermal compound between a processor and the heat sink, which not only helps to transfer heat from the processor but also evens out the surface to reduce the possibility of cracking the processor. Use the compound sparingly. The silver thermal compound has the highest heat transfer capacity of all of these. Figure 3.18 shows the thermal pad on the bottom of the heat sink.
CPU Terminology Figure 3.18: The thermal pad goes on the bottom of the heat sink.
Selecting a Replacement CPU • When building or buying a new computer, it might make more sense to select the CPU first, and then select a motherboard to accommodate it. • However, in the context of repair, you'll usually have to find a CPU that matches an existing motherboard. Therefore, the first consideration is to review the motherboard documentation to see which processors are compatible with it, as discussed earlier in the chapter.
Selecting a Replacement CPU • You'll then want to select the best of the compatible processors you can afford. • "Best" is usually defined as fastest with the most cache. However, you should also consider the usage of the computer. • A computer used primarily for e-mail, to read news on the Web, and to write letters does not need as good a processor as one used for heavy-duty number crunching or video production, for example.