1 / 40

Vent window installed

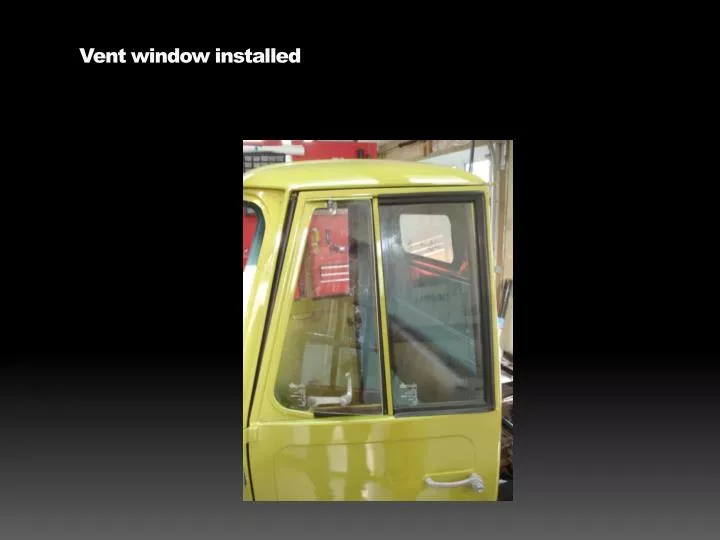
Vent window installed. Install door frame side latch. The other door. Windshield. Finish windshield installation. Radio antenna installed. Door strap. Cooling shrouds to be cleaned/repaired. Painted the frame black. Other side of the frame. From the rear.

demont
Download Presentation

Vent window installed

An Image/Link below is provided (as is) to download presentation Download Policy: Content on the Website is provided to you AS IS for your information and personal use and may not be sold / licensed / shared on other websites without getting consent from its author. Content is provided to you AS IS for your information and personal use only. Download presentation by click this link. While downloading, if for some reason you are not able to download a presentation, the publisher may have deleted the file from their server. During download, if you can't get a presentation, the file might be deleted by the publisher.

E N D

Presentation Transcript


  1. Vent window installed

  2. Install door frame side latch

  3. The other door

  4. Windshield

  5. Finish windshield installation

  6. Radio antenna installed

  7. Door strap

  8. Cooling shrouds to be cleaned/repaired

  9. Painted the frame black

  10. Other side of the frame

  11. From the rear

  12. Top, sides, bottom – some tiny spaces to paint

  13. New brakes and cylinders

  14. Brake hub turned – painted Aluminum

  15. 13mm wrench to adjust brakes

  16. New wide tires for the rear - radials

  17. brake adjusters

  18. Brake cleaner used prior to finish painting and mounting brakes and cylinders

  19. Tremclad gloss black paint

  20. Original brake cylinders - seized

  21. Rear brakes finished

  22. Engine cover (bottom) repainted

  23. Engine cover repainted - top

  24. Engine mounting holes - front

  25. Arrow shows the speedo drive

  26. Speedo cable – engine mounted

  27. Square drive inside

  28. Speedo cable – side view – mounts on the motor

  29. Use the small brake fluid container for filling the reservoir

  30. Bleeder kit mounted to the front brake nipple – 8mm wrench required

  31. Pumped out brake fluid from the brake lines

  32. Dirty – should be clear

  33. Fill the reservoir

  34. Left rear brakes being bled – you can do this by yourself, just look under the cabin

  35. Keep refilling the reservoir as you bleed the brakes

  36. Right rear ready

  37. Watch through the door gap when you do the front brake

  38. Brake bleeder kit – you can make your own

  39. How to make a brake bleeder – start in the kitchen

  40. Get yourself a plastic container with a lid, clear tubing to fit tightly over the bleeder nipple and a vent hole in the lid

More Related