Download
1 / 30
300 likes | 492 Views
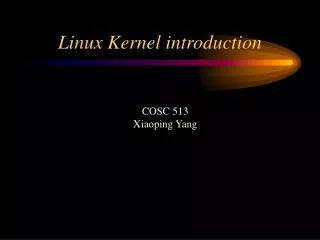
Linux Kernel Programming newsyscall (since 2004~ textbook 7 th 2006~). ※ 부팅 grub menu 의 generic Linux “ 운영체제 ” 를 선택하여 sh415_OS 로그인 ( 입력 : sh415) Linux 커널의 새로운 시스템 호출 구현은 아래 두 가지 작업으로 구성 커널 수정 시스템 호출 번호 할당 커널 영역 : /usr/src/mylinux/arch/x86/include/asm/unistd_64.h

E N D
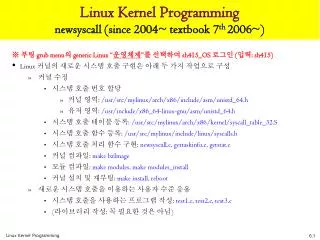
Linux Kernel Programmingnewsyscall (since2004~ textbook7th 2006~) ※ 부팅 grub menu의 genericLinux “운영체제”를 선택하여 sh415_OS 로그인 (입력: sh415) • Linux 커널의새로운 시스템 호출 구현은 아래 두 가지작업으로 구성 • 커널 수정 • 시스템 호출 번호 할당 • 커널 영역: /usr/src/mylinux/arch/x86/include/asm/unistd_64.h • 유저영역: /usr/include/x86_64-linux-gnu/asm/unistd_64.h • 시스템 호출 테이블 등록: /usr/src/mylinux/arch/x86/kernel/syscall_table_32.S • 시스템 호출 함수 등록: /usr/src/mylinux/include/linux/syscalls.h • 시스템 호출 처리 함수 구현: newsyscall.c, gettaskinfo.c, getstat.c • 커널 컴파일: make bzImage • 모듈컴파일: makemodules, make modules_install • 커널 설치 및 재부팅: make install, reboot • 새로운 시스템 호출을 이용하는 사용자 수준 응용 • 시스템 호출을 사용하는 프로그램 작성: test1.c, test2.c, test3.c • (라이브러리 작성: 꼭필요한 것은 아님)
네트워크 설정 2000 운영체제 • 윈도우 환경에서 컴퓨터 네트워크 설정 값을 확인한다 Windows: C:\WINDOWS\system32\ipconfig.exe Linux: # ifconfig • 시스템 설정에서 네트워크를 클릭한다 • 네트워크 옵션 유선을 선택한다
네트워크 설정 2000 운영체제 IPV4 탭을 선택한다 네트워크 설정 값들을 입력한 후 저장한다 IP : 10.80.77.84 ~ 131 넷마스크 : 255.255.255.0 게이트웨이: 10.80.77.254 DNS 서버 : 117.16.191.6 ※ 할당된 IP 확인 Windows: ipconfig 또는 Linux: ifconfig
커널 소스 다운로드 ※ 모든 작업은 “super user (root)”권한으로 수행해야 합니다! $ su [Enter] (입력: unixlinux) 또는 $ sudo su • 커널을 수정하기 위해서는 커널 소스 필요 • # cd/usr/src 디렉토리로 이동 • 커널 다운로드 • # ftp ftp.kernel.org id: anonymous password: [Enter] ftp> binary ftp> cd pub/linux/kernel/v3.x ftp> get linux-3.2.37.tar.gz • 다운 받은 커널 소스를 압축해제 # tar xvfz linux-3.2.37.tar.gz • 설치한 소스 디렉토리를 mylinux로 심볼릭 링크로 연결 # ln –s linux-3.2.37 mylinux ppt reader 설치: $ yum install @libreoffice
시스템 호출 과정 ENTRY(system_call) /*arch/x86/kernel/entry_32.S 502*/ SAVE_ALL …. call *sys_call_table(,%eax,4) …. main { … syscall (__NR_newsyscall); } IDT(IVT) divide_error() 0x0 degug() nmi() ENTRY(sys_call_table) /*arch/x86/kernel/syscall_table_32.S*/ … sys_restart_syscall() 0 1 2 3 4 … syscall() { … movl 312, %eax int $0x80 … } … /*real handler*/ asmlinkage int sys_newsyscall() { printk(…); } system_call() 0x80 sys_exit() … sys_fork() sys_read() sys_write() 312 sys_newsyscall() IDT: Interrupt Descriptor Table = IVT: Interrrupt Vector Table 커널 영역: /usr/src/mylinux/arch/x86/include/asm/unistd_64.h 유저영역: /usr/include/x86_64-linux-gnu/asm/unistd_64.h
(참고) syscall() /usr/include/unistd.h line1176/ extern long int syscall (long int __sysno, ...) __THROW; /usr/src/mylinux/arch/x86/um/shared/sysdep/stub_32.h line 15 static inline long stub_syscall0(long syscall) { long ret; __asm__ volatile ("int $0x80" : "=a" (ret) : "0" (syscall)); return ret; } static inline long stub_syscall1(long syscall, long arg1){ long ret; __asm__ volatile ("int $0x80" : "=a" (ret) : "0" (syscall), "b" (arg1)); return ret; } static inline long stub_syscall2(long syscall, long arg1, long arg2) { long ret; __asm__ volatile ("int $0x80" : "=a" (ret) : "0" (syscall), "b" (arg1), "c" (arg2)); return ret; } … … …
커널 수정 (1) 64비트 • (Ubuntu 64비트) 커널영역 시스템 호출 번호 할당 • Linux 커널이 제공하는 시스템 호출은 각각 고유한 번호를 갖는다 ①# su 명령으로 root 권환 획득 ②# vi /usr/src/mylinux/arch/x86/include/asm/unistd_64.h 파일 수정 또는 # gedit/usr/src/mylinux/arch/x86/include/asm/unistd_64.h 312번 __NR_newsyscall 추가
커널 수정 (2) 64비트 • (Ubuntu 64비트) 유저영역시스템 호출 번호 할당 • Linux 커널이 제공하는 시스템 호출은 각각 고유한 번호를 갖는다 ②# vi /usr/include/x86_64-linux-gnu/asm/unistd_64.h 파일 수정 312번 __NR_newsyscall 추가
커널 수정 (3) 64비트 • 시스템 호출 테이블 등록 (32비트 64비트 동일) • 시스템 호출 처리 함수를 sys_call_table 테이블에 등록 ③ # vi /usr/src/mylinux/arch/x86/kernel/syscall_table_32.S 에 등록
커널 수정 (4) 64비트 • 시스템 호출 함수 등록 (32비트 64비트 동일) • ④ # vi /usr/src/mylinux/include/linux/syscalls.h 에 등록
커널 수정 (5) • 시스템 호출 처리 함수 구현 • 일반 적으로 태스크 관리자 관련 함수는 /usr/src/mylinux/kernel/ 에 구현 • 파일 시스템 관련 함수는 /usr/src/mylinux/fs/ 밑에 구현 ⑤ # vi /usr/src/mylinux/kernel/newsyscall.c 코딩 /* 커널 코드 /usr/src/mylinux/kernel/newsyscall.c 코딩 */ #include <linux/linkage.h> #include <linux/unistd.h> #include <linux/errno.h> #include <linux/kernel.h> #include <linux/sched.h> asmlinkage int sys_newsyscall() { printk("Hello Linux, 1234567 Sung MeeYoungis in Kernel\n"); /* write your name in English*/ return 0; }
커널 수정 (6) ⑥ # vi /usr/src/mylinux/kernel/Makefile 수정(32비트 64비트 동일) • obj -y = 라인에 newsyscall.o추가
커널 수정 (7~11) • 커널 구성 ⑦ # cd /usr/src/mylinux (커널 소스의 상위 디렉토리로 이동) ⑧ # make mrproper (기존의 커널 설정 제거) • 커널버전 2.6부터 makedep 과 makeclean 불필요 ⑨ # cp ../linux-headers-3.5.0-23-generic/.config ./ ⑩ # make oldconfig (실행후 선택문 모두 엔터) 또는 # make menuconfig (범용적 커널 설정 스크립트 실행) • 옵션은 아래 사이트 참고 http://mauver.kr/wp/archives/252 • 커널 컴파일 ⑪ # make bzImage (컴파일, 새 커널 생성) 또는 # time make bzImage
커널 수정 (12~15) • 모듈 컴파일및 인스톨 • 모듈로 구성된 커널 내부 구성 요소를 알려주고, 이후 구성 요소들이 사용될 때 자동으로 커널에 적재되게 함 ⑫ # make -j modules (모듈 컴파일) ⑬ # make modules_install (모듈 인스톨) • 새 커널을 /boot 디렉토리에 설치 ⑭ # make install (아래 작업 자동 수행) [ # cp arch/x86/boot/bzImage /boot/vmlinuz-3.2.37 ] [ # cp System.map /boot/System.map-3.2.37 (새 System.map으로 대치 ) ] • Install한 커널로 들어가기 ⑮ 재부팅 후 grub 선택 메뉴에서 3번째 previous Linux 선택 후 linux-3.2.37 선택 실습 1: newsyscall() 사용자 수준 응용 코딩 & 컴파일 & 실행하여 결과 확인
실습 1: newsyscall() /* 사용자수준응용 test1.c 작성 $ vi test1.c $ sudo gedit test1.c */ #include <linux/unistd.h> #include <errno.h> #include <stdio.h> main() { int i; i=syscall(__NR_newsyscall); printf("%d\n", i); } 컴파일: $ gcc test1.c –o test1 실행: $./test1 • 결과 확인 방법 $ dmesg | tail • (참고) 라이브러리 작성(선택사항) /* contents of newsys.c */ …독립된 파일 #include <linux/unistd.h> #include <errno.h> call() { return syscall(__NR_newsyscall); } /* contents of test.c */ …독립된 파일 main() { int i; i = call(); } $ gcc –c newsys.c $ ar –r libnew.a newsys.o $ ranlib libnew.a $ vi test.c $ gcc test.c –L /root(libnew.a 있는 디렉토리) -lnew $ ./a.out
실습 2: gettaskinfo() sys_gettaskinfo() 라는 커널정보를 커널 모드에서출력하는 새로운 313번 시스템 호출 구현 /* 시스템호출 처리함수 gettaskinfo() */ $ vi /usr/src/mylinux/kernel/gettaskinfo.c #include <linux/linkage.h> #include <linux/unistd.h> #include <linux/errno.h> #include <linux/kernel.h> #include <linux/sched.h> asmlinkage int sys_gettaskinfo() { int i,cnt =0; printk("PID: %d\n",current->pid); printk("PPID: %d\n",current->parent->pid); if(current->state == -1) printk("Unrunable state\n"); else if (current->state == 0) printk("Runable state\n"); else if (current->state == 1) printk("Interruptable state\n"); else if (current->state == 2) printk("Uninterruptable state\n"); else if (current->state == 4) printk("Stopped state\n"); else if (current->state == 8) printk("Zombie state\n"); else if (current->state == 16) printk("Dead state\n"); else printk("Unkown sate\n"); printk("Priority: %lu\n", current->rt_priority); printk("Scheduling Policy: %lu\n",current->policy); printk("User CPU time: %lu ticks\n", current->utime); printk("System CPU time: %lu ticks\n", current->stime); printk("Start time: %lu \n", current->start_time); printk("Number of major faults: %lu\n", current->maj_flt); printk("NUmber of minot faults: %lu\n", current->min_flt); return(0); } /* 사용자 응용 test2.c 작성 */ #include <linux/unistd.h> #include <stdio.h> #include <errno.h> #include <sys/syscall.h> main() { int i; i=syscall(__NR_gettaskinfo); printf("%d\n", i); } (컴파일 ) $ gcc test2.c –o test2 (실행) $./test2 /* 새 커널 구성 않고 시스템 호출만 추가 */ $ make bzImage $ cp arch/x86/boot/bzImage /boot/vmlinuz-3.2.37 $ reboot
next_task prev_task next_task prev_task prev_task init_task … task_struct task_struct 태스크 리스트 • current(/usr/src/kernels/mylinux/arch/x86/include/asm/current.h 17행) 전역 변수가 task_struct (/usr/src/mylinux/include/linux/sched.h : 1167행) 자료구조를 포인팅
실습 3: getstat() sys_gettaskinfo() 라는 커널정보를 사용자 모드에서출력하는 새로운 314번 시스템 호출 구현 /* 사용자 응용 test3.c */ #include <linux/unistd.h> #include <stdio.h> #include <errno.h> #include "mystat.h" #include <stdlib.h> struct mystat *mybuf; int i; int main(int argc, char* argv[]) { int task_number; if(argc != 2) { printf("USAGE: a.out pid\n"); exit(1); } task_number = atoi(argv[1]); mybuf = (struct mystat *)malloc(sizeof(struct mystat)); if(mybuf == NULL) { printf("Out of Memory\n"); exit(1); } printf("PID %d\n",task_number); i = syscall(__NR_getstat, task_number, mybuf); printf("%d\n", i); printf("PID = %d\n", mybuf->pid); printf("PPID = %d\n", mybuf->ppid); if(mybuf->state == -1) printf("Unrunable state\n"); else if(mybuf->state == 0) printf("Running state\n"); else if(mybuf->state == 1) printf("Interruptable state\n"); else if(mybuf->state == 2) printf("Uninterruptable state\n"); else if(mybuf->state == 4) printf(" Stopped state\n"); else if(mybuf->state == 8) printf(" Zombie state\n"); else if(mybuf->state == 16) printf("Dead state\n"); else printf("Unknown state\n"); printf("Priority = %d\n", mybuf->priority); printf("Policy = %d\n", mybuf->policy); printf("Task.utime = %lu\n", mybuf->utime); printf("Task.stime = %lu\n", mybuf->stime); printf("Task.starttime = %lu\n", mybuf->starttime); printf("minor fault = %lu\n", mybuf->min_flt); printf("major fault = %lu\n", mybuf->maj_flt); printf("opened files = %u\n", mybuf->open_files); return 0; } /* 시스템 호출 처리함수 getstat.c */ $ vi /usr/src/mylinux/kernel/getstat.c #include <linux/unistd.h> #include <linux/errno.h> #include <linux/sched.h> #include <../arch/x86/include/asm/uaccess.h> #include "mystat.h" #include <linux/slab.h> #include <linux/file.h> asmlinkageintsys_getstat(int id, structmystat *user_buf) { structmystat *buf; inti = 0, cnt = 0; structtask_struct *search; search = &init_task; while(search->pid != id) { search = list_entry((search)->tasks.next, structtask_struct, tasks); if(search->pid == init_task.pid) return(-1); } buf = kmalloc(sizeof(structmystat), GFP_KERNEL); if(buf == NULL) return(-1); buf->pid = search->pid; buf->ppid = search->parent->pid; buf->state = search->state; buf->priority = search->rt_priority; buf->policy = search->policy; buf->utime = search->utime; buf->stime = search->stime; buf->min_flt = search->min_flt; buf->maj_flt = search->maj_flt; copy_to_user((void *)user_buf, buf, sizeof(structmystat)); return 0; } /* 헤더 파일 mystat.h */ struct mystat { int pid; int ppid; /* * pid_t pid; * pid_t ppid; */ int state; int priority; int policy; long utime; long stime; long starttime; unsigned long min_flt; unsigned long maj_flt; int open_files; }; /* 새 커널 구성 않고 시스템 호출만 추가 */ $ make bzImage $ cp arch/x86/boot/bzImage /boot/vmlinuz-3.2.37 $ reboot
커널 컴파일과 커널 교체 • 실습 2와 실습 3은기존의 컴파일된 커널을 수정된 커널로 교체만 함 • 모듈 컴파일이 완료 된 상태에서 모듈 설정없이 커널만 수정할 경우 모듈 컴파일은 하지 않고 커널 컴파일과 커널 교체 작업만 한다 • # pwd • /usr/src/mylinux • ① # make bzImage • 생성된 커널을 /boot 디렉토리에 복사 • (새 커널 버전 생성 원하지 않으면 커널 이미지만 복사) • ② # cp arch/x86/boot/bzImage /boot/vmlinuz-3.2.37 • (새 커널 버전 생성을원하면) • 또는 # make install (아래 작업 자동 수행하고새 커널 버전 생성) • [ $ cp arch/x86/boot/bzImage /boot/vmlinuz-3.2.37 ] • [ $ cp System.map /boot/System.map-3.2.37 (새 System.map으로 대치 ) ] • 부트로더 설정 • # vi /boot/grub/grub.cfg • default=0 • ③ # reboot • 부팅시 F5로 커널 선택화면 전환 후 부트로드에서 새로 컴파일 한 커널 선택
실습실 부트로더정리 os.sh • 다른수업 위해 실습실 부트로더 정리 /* os.sh */ #!/bin/sh sudo mount /dev/sda7 /mnt sudo cp /mnt/boot/grub/grub.cfg /boot/grub/grub.cfg sudo umount /mnt sudo grub-install /dev/sda # chmod +x os.sh # os.sh • 내 커널 버전 로그인 위한 grub 구성 파일생성 # update-grub /dev/sda
(Lab.2) Linux 커널에 시스템 호출 추가하기실습 요약 (커널 소스 다운로드) # wget http://www.kernel.org/pub/linux/kernel/v3.x/linux-3.2.37.tar.gz # tar xvfz linux-3.2.37.tar.gz # ln –s linux-3.2.37 mylinux (커널 수정 & 컴파일 & 설치 & 재부팅) ① # vi /usr/src/mylinux/arch/x86/include/asm/unistd_64.h 파일 수정 312번 __NR_newsyscall 추가 ② # vi /usr/include/x86_64-linux-gnu/asm/unistd_64.h 파일 수정 312번 __NR_newsyscall 추가 ③ # vi /usr/src/mylinux/arch/x86/kernel/syscall_table_32.S newsyscall() 등록 ④ # vi /usr/src/mylinux/include/linux/syscalls.h newsyscall() 등록 ⑤ # vi /usr/src/mylinux/kernel/newsyscall.c newsyscall() 처리 함수 코딩 ⑥ # vi /usr/src/mylinux/kernel/Makefile obj -y = 라인에 newsyscall.o 추가 ⑦ # cd /usr/src/mylinux (커널 소스의 상위 디렉토리로 이동) ⑧ # make mrproper (기존의 커널 설정 제거) ⑨ # cp ../linux-headers-3.2.0-29-generic/.config ./ ⑩ # make oldconfig (실행후 선택문 모두 엔터) ⑪ # make bzImage (컴파일, 새 커널 생성) ⑫ # make modules (모듈 컴파일) ⑬ # make modules_install (모듈 인스톨) ⑭ # make install (새커널설치) ⑮ # vi /boot/grub/grub.cfg default=0 첫 번 menuentry에 자기 이름 입력 ⑮+① # reboot (실습 결과 제출) ① Linux Kernel Compile Work Sheet 작성하여 제출 ② 사용자수준 응용 코딩 & 컴파일 & 실행하여 결과 확인 화면 캡처하여 제출 /* 커널코드 /usr/src/mylinux/kernel/newsyscall.c 작성*/ #include <linux/linkage.h> #include <linux/unistd.h> #include <linux/errno.h> #include <linux/kernel.h> #include <linux/sched.h> asmlinkage int sys_newsyscall() { printk("Hello Linux, StudentID, Student Name is in Kernel\n"); return 0; } /*사용자 코드test1.c작성 */ #include <linux/unistd.h> #include <errno.h> #include <stdio.h> main() { int i; i=syscall(__NR_newsyscall); printf(“%d\n”, i); } $ gcc –o test1 test1.c 컴파일 $./test1 실행
(Lab.2) Linux 커널에 시스템 호출 추가하기 Work Sheet학번 ( ) 이름 ( ) • Linux UbuntuKernel linux-3.2.37 커널 프로그래밍 실습을 수행하면서 아래 각 물음에 답하세요. • 시스템이 부팅될 때 부트 프로그램에 의해 구동되며 메모리에 상주하면서 시스템의 자원을 관리하며 사용자에게 서비스를 제공하는 운영체제의 핵심 부분을 무엇이라 하나요? • 오늘 현재 시점에서 가장 최신의 안정한 (stable) 커널 버전은 무엇인가요? ( http://www.kernel.org/ ) • 리눅스 파일 시스템의 어느 디렉토리 위치에서 커널 소스 코드를 다운로드 해야 하나요? • 커널 항목들을 커널에 포함시킬지 모듈로 동작하게 할지 등을 설정 (configuration)을 하기 위해 실행해야 하는 명령은 무엇인가요? • 새 시스템 호출의 명칭과 번호를 어느 파일에 새로 할당해 주어야 할까요? (두 개 파일의 전체경로로 답하세요) • 시스템 호출을 수행하는 system_call() 함수가 실행될 때 참조하는 테이블로서 새 시스템 호출 함수를 등록해 줘야 하는 테이블은 무엇인가요? (전체경로로 답하세요) • 커널 이미지 생성 (make bzImage)에 걸린 시간은 얼마나 되나요? • 모듈 컴파일 (make modules)에 걸린 시간은 얼마나 되나요? • 모듈 설치 (make modules_install)에 걸린 시간은 얼마나 되나요? • 사용자 수준 응용 ./test1 실행 후 $ dmesg | tail 수행 결과로 화면에 출력된 내용을 무엇인가요?
(Lab.2) Linux 커널에 시스템 호출 추가하기제출 방법 (숙제화면 캡처하기) • 재부팅후 그래픽 모드에서 시스템 호출 프로그램 test1.c test2.c test3.c를 실행한다 printk() 는 커널 모드로 출력하는 프로그램이기 때문에 유저 모드의 그래픽 화면에 아무런 내용이 출력되지 않는다 • $ dmesg | tail -12 명령을 입력하여 시스템 메시지 끝부분을 출력한다 • 화면에 출력된 내용을 확인하고 키보드의 [Print Screen] 키를 눌러 화면을 캡쳐한다 • 파일이름을영문(예, capture.png)으로 하여 저장한다 • (Linux에 복사하기) • capture.png가 위치한 디렉토리에서 • $ ftp 117.16.244.171 • Name: s자기학번 • Passwd: ******* • ftp> binary • ftp> put capture.png • ftp> bye • (Linux에서 Windows로파일가져오기) • Windows 명령 프롬프트 창에서 • C:\>D: [Enter] • D:\>ftp 117.16.244.59 • User (117.16.244.59:(none)): 자기아이디 • Password: ******* • ftp> cd /home/os2013hwa (또는 b) • ftp> binary • ftp> ls • ftp> get capture.png • get capture.png? y • ftp> bye
(참고) root 권한 획득 • 터미널에서 su root입력 암호 입력 • cd /etc/pam.d • vi gdm
(참고) root 권한 획득 • gdm 파일을 열어 세번째 줄인 #auth required pam_succeed_if.so user != root_quiet 라는 줄 앞에 #를 붙여 주석 처리 gdm: GNOME Display Manager pam_succeed_if.so: 인증 계정 테스트 quiet: 시스템로그에 기록하지 않음
(참고) root 권한 획득 • vi gdm-password • 이 파일도 gdm 파일과 동일하게 3번째 줄인#auth required pam_succeed_if.so user != root quiet 앞에 #를 붙여 주석 처리 • logout 또는 reboot
(참고) 커널 수정 (1) 32비트 • (Ubuntu 32비트) 커널 영역 시스템 호출 번호 할당 ① # vi /usr/src/mylinux/arch/x86/include/asm/unistd_32.h 파일 수정 __NR_newsyscall 349를 추가해준다 NR_syscalls로 시스템 호출의 총 개수를 써준다 예) __NR_newsyscall이 349 이면 NR_syscalls는 350 이다
(참고) 커널 수정 (2) 32비트 • (Ubuntu 32비트) 유저 영역 시스템 호출 번호 할당 ② # vi /usr/include/i386-linux-gnu/asm/unistd_32.h파일 수정 __NR_newsyscall 349를 추가해준다 NR_syscalls로 시스템 호출의 총 개수를 써준다 예) __NR_newsyscall이 349 이면 NR_syscalls는 350 이다
(참고) 커널 수정 (3) • 시스템 호출 테이블 등록 (32비트 64비트 동일) • 시스템 호출 처리 함수를 sys_call_table 테이블에 등록 ③ # vi /usr/src/mylinux/arch/x86/kernel/syscall_table_32.S 에 등록
(참고) 커널 수정 (4) • 시스템 호출 함수 등록 (32비트 64비트 동일) • ④ # vi /usr/src/mylinux/include/linux/syscalls.h 에 등록