Microcontrollers
240 likes | 455 Views
Microcontrollers. Module 4: Motion Control. Module Objectives. Upon successful completion of this module, students will be able to: Give examples of microcontroller motion control applications. Explain the basics of servo motors and control.

Microcontrollers
E N D
Presentation Transcript
Microcontrollers Module 4: Motion Control
Module Objectives • Upon successful completion of this module, students will be able to: • Give examples of microcontroller motion control applications. • Explain the basics of servo motors and control. • Program the BASIC Stamp Microcontroller to control the angle and speed of the Servo Motor.
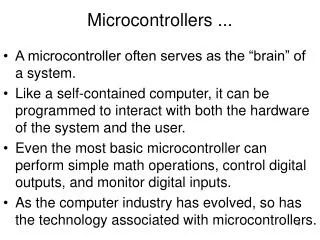
Introduction to Motion Control • Microcontrollers control the motion of many things in our daily lives; a few examples are given below: • Printer head movement • DVD and VCR mechanisms • automatic doors • Robotic movement
The examples of motion devices/motors are as follows: • DC Motors • AC Motors • Stepper Motors • Servo Motors • Instead of simple ON/OFF signals, most of these motion devices require very fast pulses of signals for position control or movement
Servo Motor • The hobby servo or the Servo motor is the simplest and most directly useful of all DC motors • could be controlled from the BASIC Stamp. • A servo motor can be found in many devices that we use every day. • Movement of the print head in an inkjet printer • Automatic eject feature in VCR and DVD players. • Opening and closing of automatic doors in shopping malls, hospitals and so on.
Unlike other motors, a servo motor does not have a continuous shaft Rotation can only rotate between two defined angles.
Servo Motor Control • Since the control signal of the servo motor is separate from the power signal. • all three wires should be connected as shown in Figure
A servo motor is controlled by very short high signalsor pulses spaced 20ms apart as illustrated in figure below. • The duration of a pulse is between 1ms and 2ms.
The duration of the high signal determines the targeted angle the servo motor should be positioned at. • For example, 1ms high signal duration causes the servo motor (red marked corner) to be positioned at angle zero degree, • 1.5ms sets it at 45 degrees and • 2ms sets the angle at 90 degrees as shown in figures
Programming the BASIC Stamp for Servo Control • PULSOUT Command: • The PULSOUT command is used to send the signal to control the movement of the servomotor. • The command syntax is as follows: • PULSOUT pin, duration • Pin: defines which I/O pin to use • Duration: defines the duration of a single pulse in microseconds.
Note : • The PULSOUT duration is in 2microsecond increments. • 1 s = 10-6 seconds. • 1000s = 1ms s - Microsecond
Example The command PULSOUT 14, 750 would be sending a pulse that lasts 750 x 2 s = 1500 s or 1.5ms on pin 14
To calculate the duration if the time period is in ms, the following formula could be used: • Duration = Time (ms) X 500
The following program code could be used to generate 150 pulses, each of duration 1000 (or 2ms) with 20ms pauses.
Exercise 1. Write the BASIC Stamp program code to generate 200 pulses, each of duration 1.5ms. 2. Write the BASIC Stamp program code to generate 150 pulses, each of duration 500
DEBUGIN Command • The DEBUGIN command is used to send a value from the debug terminal to the microcontroller, • And the value is stored in the declared variable. • Command Syntax: DEBUGIN DEC Variable
EXAMPLE In the command DEBUGIN DEC Pulses a decimal value will be sent from the debug terminal to be stored in the variable Pulses. • DEC indicates that the value stored is a decimal number.
COMPARE DEBUG COMMAND AND DEBUGIN COMMAND • DEBUG COMMAND • DEBUGIN COMMAND