Download
1 / 5
50 likes | 181 Views
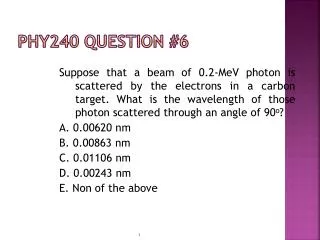
Question 6 Chloe Hannaford. What have you learnt about technologies from the process of constructing this product?. The Research Stage.

E N D
Question 6Chloe Hannaford What have you learnt about technologies from the process of constructing this product?
The Research Stage When deconstructing the three films that I chose to compare to my own 2 minute film introduction, I used YouTube to watch the introductions so that I could pause and play when I wanted, making it easier to deconstruct. I used Weebly to write this information on. I learnt how to create a blog, experimenting with formats to find the best fonts and colours to suit my genre which is horror. I then learnt how to add pages to my blog, including how to add titles and paragraphs. To upload the introductions from YouTube on to my Weebly I learnt that I had to use multimedia, and add the clip straight from YouTube. In the genre section I found the typical conventions of horror from the internet; www.Slideshare.net.
The Development Stage When writing the script I used Microsoft word; I learnt the format of a script, and how to write a script correctly. It must start with a slug line, showing whether it is Interior or Exterior, where it is, and whether it is day or night, this is to let the director know specifically where they are to film. Then the text for the dialogue is to be indented 2 spaces from the left and right, this is to make it easier for actors to run lines. All other text, such as directions are not indented. When creating the shot plan I first drew it on a table, I learnt that a shot plan is an aerial view of the camera movements and directions for the camera. I then re created this on Microsoft word, using this symbol for the camera. I then uploaded this as a file on to my Weebly using multimedia. For my storyboard and location shots, I took pictures using my iPhone, and uploaded them onto iPhoto, and dragged them onto my blog.
Continuity Task When creating my continuity task I used 2 pieces of hardware; the camera - Cannon 550, and a tripod. When filming I came across a few problems with the camera; when I first filmed my preliminary task the camera was set to a high exposure which made everything look too bright, and we had to then re shoot. To correct this I had to change the settings. I then used final cut as the software to cut it together. This is where I learnt how to cut a film together; the razor blade is the symbol used to cut, then delete the unwanted clip, and drag it back next to the previous clip. It is then CMD+R to render the film before you can watch it. I then uploaded it to my Weebly using the multimedia file.
2 Minute Film Intro The first thing that I learnt when filming this was to always have a spare fully charged battery, this is because after 30 minutes of filming on my first shoot, the camera ran out of battery and I didn’t have any spare. I took all of my productions to the shoot with me, this was to give me a plan of exactly what I was doing, and what shots I needed to take. This helped me because it saved time, and I needed to be as quick as possible because I had to film before it got too dark, and I needed the light. I then used Final Cut Pro to edit my film, and during this I noticed that as we filmed under a street light, the road looked grainy. I then experimented with trying to grade the film to hide it, but there was no setting that could recover it so I decided to re shoot.