Download
1 / 39
390 likes | 556 Views
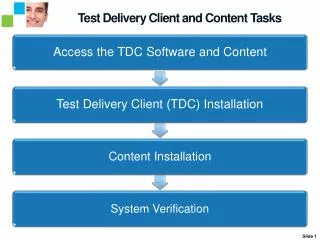
Test Delivery Client and Content Tasks. Slide 1. Student Workstation Minimum Requirements. Student Workstation Minimum Requirements. Can also be accessed from the RTS application on the Workstation Panel or www.ctb.com/ok. Slide 2. Test Delivery Client Installation - Method.

E N D
Student Workstation Minimum Requirements Student Workstation Minimum Requirements Can also be accessed from the RTS application on the Workstation Panel or www.ctb.com/ok Slide 2
Test Delivery Client Installation - Method TDC Step 3 – New 2012 TDC installer Other consideration: BYOD (Bring Your Own Device) sites Slide 3
Test Delivery Client Installation TDC Installation Slide 4
Test Delivery Client Installation - Network TDC Step 2 Install Ancillary software • Firewalls • Port 80 and 443 must be open • Proxy Servers • Do not Cache Dynamic Pages • Prioritize/allow HTTP and HTTPS traffic for *.ctb.com • Users need credentials if proxy authentication is enabled • IPs are: Text to Speech TTS IP 204.8.131.40. • Web Content Filtering • Allow MP3 (Necessary for Text to Speech) Name: tms-oas-55.ctb.com Address: 12.167.24.52Name: tms-oas-ew.ctb.com Address: 204.8.131.239 Slide 5
Test Delivery Client Installation - Ancillary TDC Step 2 Install Ancillary software Java Runtime Environment JRE 6.24 ® Minimum. Later versions of such as JRE 6.29 and 6.30 work as well. Adobe Air 1.5 ® Minimum (PC, Linux). Later versions of Air such as 3.1 works as well. Adobe Flash 9 ® Minimum (MAC) Slide 6
Looking Ahead Access the DEMO TAS Services - Test Delivery Client Software and Content Test Administration System Web site OAS Click on Services, then on Workstation Setup and Choose Install Software or Download Test Slide 7
Looking Ahead Access the DEMO TAS Services - Test Delivery Client Software and Content Test Administration System Web site OAS Click on Services, then on Workstation Setup and Choose Install Software Slide 8
Looking Ahead Access the DEMO TAS Services - Test Delivery Client Software and Content Test Administration System Web site OAS Click on Services, then on Workstation Setup and Choose Install Software Slide 9
Test Delivery Client Setup – Standard TDC Step 3 – New 2012 TDC installer **It is not necessary to enter District and School ID #s during install. It is ok to skip this step. Slide 10
Test Delivery Client Setup – Standard TDC Step 3 – Access 2011 TDC installer (Click for animation) Standard Installer – Download executable and run installer on each machine 1. Click the appropriate link above 3. Follow Installation Steps 2. Choose to Run the File Slide 12
Test Delivery Client Setup Proxy – Standard TDC Step 3 – Set Proxy Credentials Enter Proxy Information if Required at Site 1. Open “etc” folder 2. Open “proxy.properties” file in text editor. 3. Enter proxy info (if needed) and save. Slide 13
Test Delivery Client Setup Content – Standard TDC Step 4 – Install content Access the Content on OAS. Install on each workstation into objectbank folder 1. Open “objectbank” folder 2. Add test content files into “objectbank” folder Slide 14
Test Delivery Client Setup Verify – Standard TDC Step 5 – Confirm Readiness • Confirm application installation and connectivity by using the TDC network utility. • From the online application, launch the Network Utility. • On the First Tab (Network Connectivity Test), click Start. • Questions 1, 2 and 3 should return “Yes” which indicates that the application has been correctly installed. • This does not confirm content installation. From the “Network Connectivity Test” tab, click “Start”. The first three questions should result with “Yes” which confirms that the application has been correctly installed. Slide 15
Test Delivery Client Setup Verify – Standard TDC Step 5 – Confirm Ready – 2nd method • Launch Test Delivery Client software • Login using a fake login from the (OAS) training site • If the application launches and login completes, then the application and content have been setup correctly. Slide 16
Test Delivery Client Setup – Custom TDC Step 3 – New 2012 TDC installer Slide 17
Test Delivery Client Setup – CustomOption 1 TDC Step 3 – New 2012 TDC installer Slide 18
Test Delivery Client Setup – CustomOption 1 TDC Step 3 – New 2012 TDC installer Place executable, shortcut and content on a workstation. Use shortcut to launch the testing client. 1. Click the appropriate link above 3. Choose Close. 2. Choose to Save executable to desktop. Slide 19
Test Delivery Client Setup – CustomOption 1 TDC Step 3 – New 2012 TDC installer 4. Create a content folder on the workstation. (example: EarlyStressContent). 5. Add the early stress test content into the workstation content folder you just created. Slide 20
Test Delivery Client Setup – CustomOption 1 TDC Step 3 – New 2012 TDC installer 6. Next, right click on the test delivery client exe and create a shortcut. 8. Next, right click on the shortcut and choose properties. You can set the configuration points for the application for proxy and content. 7. Now there are 2 OAS TDC icons on the desktop Slide 21
Test Delivery Client Setup – CustomOption 1 TDC Step 3 – New 2012 TDC installer 8. Add configuration points for Proxy (if applicable at site) and Content Choose to apply, save and close the shortcut. Content Only "C:\Documents and Settings\[your_computer]\Desktop\OAS.exe" /content=C:\Early_Stress_Test_Content Proxy and Content "C:\Documents and Settings\[your_computer]\Desktop\OAS.exe" /proxy=[domain]\[user]:[password]@hostname: port/content=C:\Early_Stress_Test_Content It is not necessary to name the content folder Early_Stress_Test_Content. This is just an example. You will use this folder for all content. Slide 22
Test Delivery Client Setup – CustomOption 1 TDC Step 3 – New 2012 TDC installer 9. Students will click on the shortcut to run the application. On first run, the shortcut will access the executable and locally install the TDC software, grab the content from the location you indicated and copy to the objectbank folder on the workstation, set proxy (if you added to the configuration) and launch the TDC. The student can then begin the test. Login … Begin Test… **Note - You can copy the content folder and shortcut you created, along with the TDC executable to other testing workstations rather than repeat these steps on all machines. Slide 23
Test Delivery Client Setup – CustomOption 2 TDC Step 3 – New 2012 TDC installer Slide 24
Test Delivery Client Setup – CustomOption 2 TDC Step 3 – New 2012 TDC installer Place executable, shortcut and content on a server. Copy the shortcut to the workstations. Use shortcut to launch the testing client. 1. Click the appropriate link above 2. Choose to Save executable to server. 3. Choose Close. Slide 25
Test Delivery Client Setup – CustomOption 2 TDC Step 3 – New 2012 TDC installer 4. Create a content folder on the server. (example: EarlyStressContent). 5. Add the early stress test content into the server content folder you just created. Slide 26
Test Delivery Client Setup – CustomOption 2 TDC Step 3 – New 2012 TDC installer 6. Next, right click on the test delivery client exe and create a shortcut. 8. Next, right click on the shortcut and choose properties. You can set the configuration points for the application for proxy and content. 7. Now there are 2 TDC icons on the Server Slide 27
Test Delivery Client Setup – CustomOption 2 TDC Step 3 – New 2012 TDC installer 9. Add configuration points for Proxy (if applicable at site) and Content . Content Only " \\Testing\Server1\TDCLocation” /content=\\ Testing\Server1\TDCLocation\Early_Stress_Test_Content Proxy and Content " \\Testing\Server1\TDCLocation” /proxy=[domain]\[user]:[password]@hostname: port/content=\\ Testing\Server1\TDCLocation\Early_Stress_Test_Content 10. Choose to apply, save and close the shortcut. UNC/Mapped Drives are ok to use in the configuration. It is not necessary to name the content folder Early_Stress_Test_Content. This is just an example. You will use this folder for all content. Slide 28
Test Delivery Client Setup – CustomOption 2 TDC Step 3 – New 2012 TDC installer 11. The Server should now contain a Content Folder, OAS.exe and Shortcut to OAS.exe. Copy the Shortcut to all testing workstations. Note – It is not necessary to name the content folder Early_Stress_Test_Content. This is just an example. You will use this folder for all content. Slide 29
Test Delivery Client Setup – CustomOption 2 TDC Step 3 – New 2012 TDC installer 12. Students will click on the shortcut to run the application. On first run, the shortcut will access the executable from the server, locally install the TDC software, grab the content from the location you indicated and copy to the objectbank folder on the workstation, set proxy (if you added to the configuration) and launch the TDC. The student can then begin the test. On subsequent runs, the application will verify the content and only download locally if newer content exists on the server. Login … Begin Test… Slide 30
Test Delivery Client Setup – CustomOption 3 TDC Step 3 – New 2012 TDC installer Slide 31
Test Delivery Client Setup – CustomOption 3 TDC Step 3 – New 2012 TDC installer Place executable and shortcut on workstations. D) Push shortcut out to all testing workstations. B) Place content on a server,. E) Use shortcut to launch the testing client. C) Pre-set the configuration on the shortcut before you copy to workstations. 1. Click the appropriate link above 2. Choose to Save executable to desktop. 3. Choose Close. Slide 32
Test Delivery Client Setup – CustomOption 3 TDC Step 3 – New 2012 TDC installer 4. Create a content folder on the workstation. (example: Create a content folder on the desktop). 5. Add the early stress test content into the workstation content folder you just created. Slide 33
Test Delivery Client Setup – CustomOption 3 TDC Step 3 – New 2012 TDC installer 6. Next, right click on the test delivery client exe and create a shortcut. 8. Next, right click on the shortcut and choose properties. You can set the configuration points for the application for proxy and content. 7. Now there are 2 TDC icons on the desktop Slide 34
Test Delivery Client Setup – CustomOption 3 TDC Step 3 – New 2012 TDC installer 8. Add configuration points for Proxy (if applicable at site) and Content. 9. Choose to apply, save and close the shortcut. Content Only "C:\Documents and Settings\[your_computer]\Desktop\OAS.exe" /content=\\Testing\Server1\TDCLocation\Early_stress_Test_Content Proxy and Content "C:\Documents and Settings\[your_computer]\Desktop\OAS.exe" /proxy=[domain]\[user]:[password]@hostname: port/content=\\Testing\Server1\TDCLocation\Early_stress_Test_Content Slide 35
Test Delivery Client Setup – CustomOption 3 TDC Step 3 – New 2012 TDC installer 9. Students will click on the shortcut to run the application. On first run, the shortcut will access the executable and locally install the TDC software, grab the content from the location you indicated and copy to the objectbank folder on the workstation, set proxy (if you added to the configuration) and launch the TDC. The student can then begin the test. Login … Begin Test… **Note - You can copy the content folder and shortcut you created, along with the TDC executable to other testing workstations rather than repeat these steps on all machines. Slide 36
Test Delivery Client Setup – Access Help TDC Step 3 – Set configuration How to Access Help Help Options Double clicking the shortcut will display the below help options. Create a shortcut from the Testing Executable. Add /help as the switch. Slide 37
Test Delivery Client Setup Verify – Custom TDC Step 5 – Confirm Ready – 2nd method • Launch Test Delivery Client software. • Login using a fake login from the (OAS) training site. • If the application launches and login completes, then the application and content have been setup correctly. Slide 38
For a Positive Testing Experience… Positive Testing Experience Slide 39