Download
1 / 53
570 likes | 864 Views
Topographic Maps and Compasses. Navigation Tools. Maps Road maps GPS (Global positioning system) Altimeter (altitude) Sextant (astronomy) Watch Topographic Maps Compass. Topographic Maps. What's the difference between a topographic map and a regular map?

E N D
Navigation Tools • Maps • Road maps • GPS (Global positioning system) • Altimeter (altitude) • Sextant (astronomy) • Watch • Topographic Maps • Compass
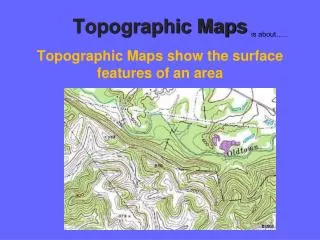
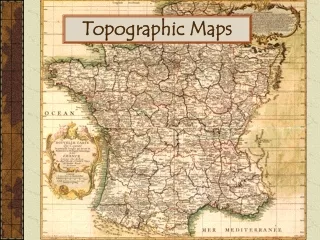
Topographic Maps What's the difference between a topographic map and a regular map? • Topographic maps allow you to see a three-dimensional landscape on a two-dimensional surface. • The contour and elevation information distinguishes them from other maps.
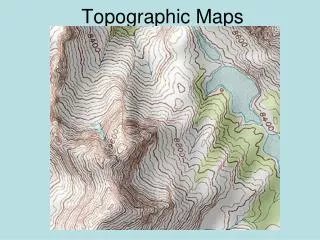
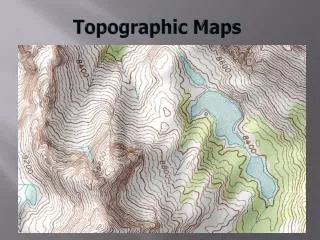
Topographic Maps • These maps show the land's contours, elevations, mountains, valleys, bodies of water, vegetation and more.
Topographic Maps Maps should always have a legend! • Blue = Water (lakes, rivers, swamps, glaciers) • Brown = Contour Lines • Red = Roads, major transportation areas, urban areas • Green = Vegetation/ forested areas • Orange = Unpaved roads & Unclassified Roads • Black = Man made structures (building, railroads, power stations, etc)
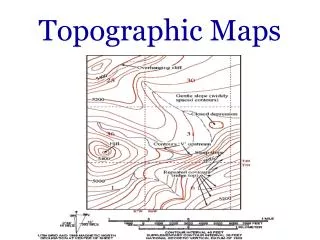
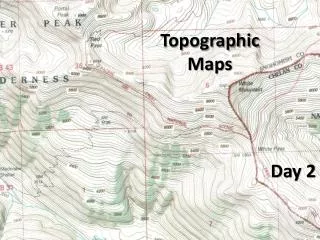
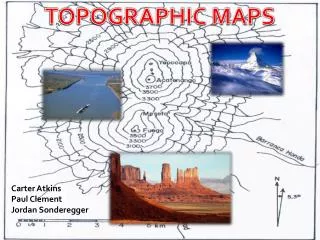
Topographic Maps Contour lines • Contour lines are lines drawn on a map connecting points of equal elevation; meaning if you physically followed a contour line, elevation would remain constant. • Contour lines show elevation and the shape of the terrain. They're useful because they illustrate the shape of the land surface -- its topography-- on the map. • In order to keep things simple, topographic maps show lines for certain elevations only. These lines are evenly spaced apart. We call this spacing the contour interval. • For example, if your map uses a 10-foot contour interval, you will see contour lines for every 10 feet of elevation -- lines at 0, 10, 20, 30, 40, and so on.
Topographic Maps • Different maps use different intervals, depending on the topography. • If, for example, the general terrain is quite elevated, the map might run at 80- to even 100-foot intervals. This makes it easier to read the map -- too many contour lines would be difficult to work with. • To make topographic maps easier to read, every fifth contour line is an index contour. • Because it's impractical to mark the elevation of every contour line on the map, the index contour lines are the only ones labeled.
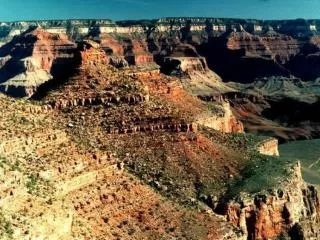
Topographic Maps • To determine elevations, pay attention to the amount of space in between lines. • If the contours are close together, you're looking at a steep slope. If the contours have wide spaces in between -- or aren't there at all -- the terrain is relatively flat. • Example of somewhere with steep lines? • Example of somewhere with relatively flat lines? • Grand Canyon or Kicking Horse • Saskatchewan!
Topographic Maps • Put on your thinking caps and complete Activity #1 (Matching!)
Topographic Maps Scale • Obviously, maps aren't life-sized. Otherwise we'd never be able to fit them in our backpacks! Instead, cartographers plot maps on a ratio scale, where one measurement on the map equals another larger amount in the real world. • Another way of saying this is that scale refers to the relationship between the distance on the map and the distance on the ground.
Topographic Maps • The first number of the scale is always one. It's your unit of measurement, usually an inch. • The second number is the ground distance. For example, if your U.S. Geological Survey (USGS) map has a scale of 1:24,000, it means that one inch on the map is equal to 24,000 inches (2000 feet or 609.6 meters) in the real world.
Topographic Maps • The scale corresponds to its intended use. • 1:250,000 – These maps cover a large area such as a country or province. • 1:62,500 – The maps cover a moderately sized area like a provincial park. • 1:24,000 – These maps cover a small sized area such as surveying a highway for repairs. • 1 unit – the measurement depends on the map.
Topographic Maps • Your map's scale legend will always be at the bottom of the map
Topographic Maps Hiking With a Topographic Map • Topographic maps are a valuable tool for hikers and campers. Planning a trip with a topographic map will greatly decrease your chances of any unpleasant surprises. • Your map can tell you a lot -- details about an area's elevation, the best way to ascend a peak or how to orient yourself using landmarks. • It's always best (and safer) to plan your hike in advance. Once you've selected the area in which you and your friends will be walking, get yourself a topographic map. • Trails appear on a topographic map as thin black lines. Roads will be thicker red or black lines.
Topographic Maps • As you choose your route from Point A to Point B, keep a close eye on your map's contour lines. • If the lines are far apart, any changes in elevation will be gradual. • If they're close together, though, you'll have a steep hike ahead of you. • You'll see the highest point or peak of your climb as a circle in the center of the lines -- sort of like the rings on a tree.
Topographic Maps • Once you've chosen the best route, take a look at the scale to find out the exact distance you'll be hiking. This way you'll know the amount of supplies you'll need in your backpack. Keep in mind you likely won't be hiking in a straight line, though. • Experts advise using a string to mark your route on the map -- including all the twists and turns -- and then translating your string distance to the map's scale. • Your map will also show you where to locate water as well as how to stay within the timberline in case you end up needing shelter. Don't forget to note the symbols on the map to ensure you're not hiking into any private property or dangerous areas such as mine shafts or caves.
<<<Upper Kananaskis Lake Lower Kananaskis Lake>>>
<<<Ready for our hike! View of the Lake>>>
<<<Giant Spider! View of the Trail>>>
Topographic Maps • The orientation of topographic maps is always north! In other words north is always pointing up on the map. • Topo maps are specifically designed to be used easily with a compass.
Topographic Maps • Topo maps also have a grid. • This grid separates the map into small square sections. This makes it a lot easier to read a map, use a compass, and discuss your location with other people. It is a lot easier to say “I am in grid A5” that it is to say “I am at N40’0.1” by W103’45.6”.” • This grid is made by drawing lines that run north-south and lines that run east-west.
Topographic Maps • Grids have two kinds of referencing systems: • Geographic • Most commonly used. • Shown in degrees, minutes, and seconds. • This is the Latitude (N & S) and Longitude (E & W) Example = “I am at N40’0.1” by W103’45.6” • Universal Transverse Mercator (UTM) • Mostly used by the military, in research, and for surveying. • These are the Easting and Northing numbers that are found on the map. You find the number and then estimate to the nearest tenth for the last number. • Always read Easting # First! Example = 916944 (91.6 and 94.4)
Topographic Maps • Important Map Information! • When looking at a topo map you should check the following: • Map name and code • Scale (1:50,000) • Contour Intervals • Date of Publication!!! • Declination (we will cover this next day!) • Military Grid References (MGR)
Topographical Maps • Put on your thinking caps and complete Activity #2 (Choosing a path!)
Video Break! Sun + Watch http://www.youtube.com/watch?v=BUzqlA-O2mk Magnetized Needle Compass http://www.youtube.com/watch?v=0HqW5m9yzgM&feature=related
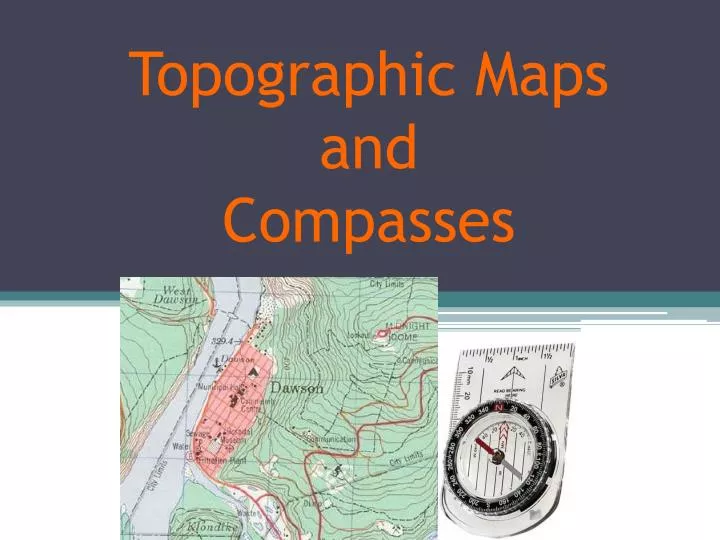
Compasses • An orienteering compass is specifically made for wilderness travel. • Here are the major features of the compasses we are using:
Compasses • The Main parts to a compass are: • The base plate (flat part) • The bezel ring/ rotating dial • The Magnetic Needle (Needle that moves) • The Orienting Arrow These parts seem to have different names depending on who is talking about them, but they all are referring to the same parts of a compass
Compasses • “Red to North Red” Arrow/Orienting Arrow – this arrow moves with the rotating dial to align with the compass needle. • Compass Needle – this needle points in the direction of the magnetic field. The red end points to magnetic north. • Read Bearing – after aligning the compass needle within the “red to north red” arrow, the bearing is read here. • Rotating Dial/Bezel Ring – rotating this dial allows you to align the red-to-north-red arrow with the compass needle. This dial has the direction on it. • Orienteering Lines – these lines are used with topographical maps. Topographical maps have grids on them that allow you to align the map and the compass.
Compasses • The compass needle always points towards the earths magnetic north pole. • We call this “Magnetic North” – this is different from True North. • I will discuss the difference between Magnetic North and True North next day!
Compasses • The most basic skill in using a compass is taking a bearing. This tells you what direction (or bearing) you are facing, or it can tell you the direction of a landmark, like a mountain or tree. • This skill is essential to anything one might do with a compass.
Compasses Taking a Bearing Using a Compass: • Face some object, like a mountain or tree (about 20-30ft away) that you wish to know its direction. • Put your compass against your stomach or belt so that it is perpendicular to your body and is facing straight ahead of you. • Rotate the rotating dial until the end of the compass needle lies between the “red to red north arrow” --- Think: RED IN THE SHED --- • Read the bearing from the compass (It says “Read Bearing Here”). Looking at the compass, this should be the number on the dial that is facing the front of the compass.
Video Break! • How to use a compass video example:http://www.youtube.com/watch?v=CNrs-tyWhR4&feature=related
Compasses • Put on your thinking caps and complete Activity #3 (Taking a Bearing!)
Activity Outside!? • Football? • Frisbee? • Soccer? • ??? Picture of Nose Hill Park, AB
Review from last day…. • What is the difference between a regular map and a topographical map? • What information can you tell from the contour lines on a map? • What does the scale refer to? For example 1:250,000.
Review from last day…. • Why would you look at a topographic map prior to going on a hike? • What are some of the features of a compass? • Why would you take a bearing?
Compasses • When you are hiking and you need to get back to your campsite. Right?! • If you knew your camp was west 270 degrees. How would you know how to walk in that direction? • -->You would “Shoot a Bearing” 270 degrees west!
Compasses Following a Bearing Using a Compass: • Rotate the rotating dial until the red end of the compass needle lies between the “red to red north arrow”. • Walk in the direction that you need to go. If you need to go west back to camp, look at the compass to see what direction west is. Then just walk in that direction. • It is often easy to start veering off from the direction you want to head. An easy solution to this is to place the compass on your stomach or belt so that you can always look down and make sure you are heading in the right direction.
Compasses • Put on your thinking caps and complete Activity #4 (Following a Bearing!)
Compasses Measuring a Bearing on a Map using a Compass • If you are planning a trip using a topo map, you can use your compass to find the bearing that you need to follow • First draw a line on the map from the starting point to the next point.
Compasses • Place the compass on the topographic map with the centre of the compass (or the side) on your starting point - and with the N (Red to North Red Arrow) on the rotating dial pointing up, parallel to the vertical lines on the map. • The bearing you need to follow is shown on the rotating dial at the point where it meets the line that you drew. This is wear you read the bearing of the line