Download

1 / 72
720 likes | 778 Views
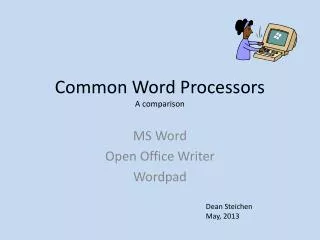
6.1 Introduction to Word Processors. Word processor A type of application software Allow you to create, edit, format, save and print documents such as letters, resumes, reports, newsletters and mailing labels Examples: Microsoft Word, OpenOffice.org Writer, WordPerfect.

E N D
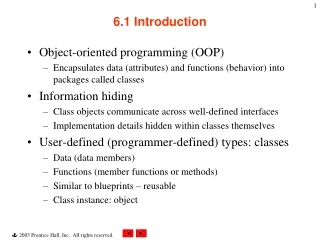
6.1 Introduction to Word Processors • Word processor • A type of application software • Allow you to create, edit, format, save and print documents such as letters, resumes, reports, newsletters and mailing labels • Examples: Microsoft Word, OpenOffice.org Writer, WordPerfect OpenOffice.org Writer Microsoft Word
6.1 Introduction to Word Processors • Word processor • Advantages over a traditional typewriter • Easier and faster to create a document with the formatting features and predefined templates • Documents can be saved in a digital form. • Documents can be easily transferred, retrieved and modified at any time. • Save time, space and cost • Grammar checker, thesaurus and mail merge can improve the accuracy and productivity.
Quick Access Toolbar Title bar Office button Ribbon Ruler Views buttons Status bar Zoom Slider 6.1 Introduction to Word Processors • Working Environment of Microsoft Word Working environment of Microsoft Word 2007
6.1 Introduction to Word Processors • Working Environment of Microsoft Word Descriptions of the elements in the working environment of Microsoft Word 2007
6.1 Introduction to Word Processors • Basic Operations of Word Processing • Create a new document file Insert text Save and print out the document • Choose ‘Blank Document’ in the ‘New Document dialogue box. 1. Click the Office button. • Click ‘Create’ to create a blank document. 2. Select the ‘New’ option. Create a blank document
6.1 Introduction to Word Processors • Basic Operations of Word Processing • Inserting Text • Type with a keyboard • Use a handwriting board • Use scanner with optical character recognition (OCR) software • Text formats such as typeface, font size, font colour and paragraph alignment can be applied to the inputted text. The text is inserted into the place where the cursor is located.
6.1 Introduction to Word Processors • Basic Operations of Word Processing • Saving Documents • The process of copying a document from the main memory in a computer to a secondary storage device such as a hard disk or a USB flash drive Mode of saving documents
6.1 Introduction to Word Processors • Basic Operations of Word Processing • Saving Document • Choose a location to store the new document 1. Click the Office button 2. Select the ‘Save’ option • Enter a filename • Click ‘Save’ Save a document
6.1 Introduction to Word Processors • Basic Operations of Word Processing • Text file formats Different types of text file formats and their applications
6.1 Introduction to Word Processors • Basic Operations of Word Processing • Text file formats Different types of text file formats and their applications
6.1 Introduction to Word Processors • Basic Operations of Word Processing 1. Click the Office button 4. Choose a location to store the new document 2. Select the ‘Save As’ option 3. Click ‘Adobe PDF’ 5. Enter a filename 6. Click ‘Save’ Save a document in PDF format
6.1 Introduction to Word Processors • Basic Operations of Word Processing • Printing a document • The process of sending a file to a printer to generate output on a physical medium such as paper (hard copy). • Suggest using the ‘Print Preview’ function before sending the print job to printer. Print preview of a document
6.1 Introduction to Word Processors • Basic Operations of Word Processing 1. Click the Office button 2. Select the ‘Print’ option 4. Click ‘OK’ 3. Select a suitable printer if necessary Print out a hard copy of a document
6.1 Introduction to Word Processors • Basic Operations of Word Processing 1. Click the Office button 2. Select the ‘Print’ option 4. Click ‘OK’ 3. Select a suitable printer if necessary Print out a hard copy of a document
6.2 Text Editing • Editing • Inserting text • Deleting text • Moving text • Copying text
6.2 Text Editing • Insertion and Overtype Mode • Default mode of typing is ‘Insertion’ in Microsoft Word • Insertion: when a user enters text, the existing text on the right of the cursor is pushed to the right. • Overtype: the newly entered text overwrites the text on the right of the cursor. • Press the ‘Insert’ key to switch between these two modes
6.2 Text Editing • Copying and Pasting text • Select the text, the selected text is highlighted in colour. • Click the ‘Copy’ button in the ‘Clipboard’ group or press the ‘Ctrl + C’ keys to copy text to the clipboard. • Place the cursor to the desired position. • Click the ‘Paste’ button or press the ‘Ctrl + V’ keys.
6.2 Text Editing • Copying and Pasting text 2. Click the ‘Copy’ button 1. Select the text Copy and paste text
6.2 Text Editing • Copying and Pasting text 5. Click the ‘Paste’ button 3. The text is copied to the clipboard 4. Place the cursor at the location where the text should be placed Copy and paste text
6.2 Text Editing • Copying and Pasting text 6. The text is placed at the new location Copy and paste text
6.2 Text Editing • Moving Selected Text • Method 1 • Select the text • Click the ‘Cut’ button or press the ‘Ctrl + X’ keys to cut the selected text and paste it on the clipboard • Place the cursor to the desired location • Click the ‘Paste’ button or press the ‘Ctrl + V’ keys • Method 2 • Select the text and drag the text to the desired position
6.2 Text Editing • Moving Selected Text 1. Select the text to move Drag 2. Drag the selected text to the new location Move text by dragging selected text to a new location
6.2 Text Editing • Paste Special • Allows user to insert text, graphics or OLE objects into the current position in a specific format • Click the lower part of the ‘Paste’ button and the ‘Paste Special’ dialogue box will display the available formats ‘Paste Special’ commands allow users to paste copied text in a specific format
6.2 Text Editing • Finding and Replacing • Find: search for text in a document • Replace: replace a specific text with another • Can further specify the options such as ‘Match case’ in the ‘Find and Replace’ dialogue box. Setting the search option in the ‘Find and Replace’ dialogue box
6.2 Text Editing Finding and Replacing Find: search for text in a document Replace: replace a specific text with another Can further specify the options such as ‘Match case’ in the ‘Find and Replace’ dialogue box. Setting the search option in the ‘Find and Replace’ dialogue box
6.3 Formatting Features • Formatting • The process of polishing the appearance of a document • Common formatting features: • Set the page layout • Change the alignment of paragraphs • Modify the text attributes • Insert and format graphics • Organize text and graphics with text frames, tables and columns
6.3 Formatting Features • Page Layout • Commands to modify the page margins, orientation and size Setting the page layout by using ‘Page Setup’ group
6.3 Formatting Features • Page Layout • Page orientation is set to portrait by default. • Reports and letters are usually produced and printed in the portrait orientation. • Landscape orientation is often used in leaflets, pamphlets and datasheets to provide a wider page width. A leaflet designed in the landscape orientation
6.3 Formatting Features • Page Layout • Paper size • A3, A4, Legal, Letter… • Page margins • Predefined: ‘Normal’, ‘Narrow’, ‘Moderate’, ‘Wide’ and ‘Mirrored • Customized
Formatting list such as bullets, numbering and multilevel list Change indentation Define the justification Adjust line spacing Show/hide paragraph marks 6.3 Formatting Features • Paragraph Properties • Examples: Line spacing, justification, indentation of text Formatting commands for paragraph
Right-aligned Centre-aligned Full-justified Left-aligned 6.3 Formatting Features • Paragraph Properties • Justification – the alignment of text relating to the left and right margins • Left-aligned, centre-aligned, right-aligned, full-justified Examples of paragraph justification
First line indentation Left margin Right margin Document edge Document edge Left indentation Right indentation 6.3 Formatting Features • Paragraph Properties • Indentation – the adjustment of space between the margins and the edge of a paragraph Examples of paragraph indentation
6.3 Formatting Features • Paragraph Properties • ‘Increase indentation’ button • ‘Decrease indentation’ button • Change the indentation in the ‘Paragraph’ dialogue box. Define the indentation setting in the ‘Paragraph’ dialogue box.
Typeface Font size Grow and shrink font Character border Font style Subscript and superscript Font colour Character shading 6.3 Formatting Features • Text Attributes • Can make a document more readable, emphasize the key concepts and present the passage in a desirable style • Examples: typeface, the font size, font colour, font styles and special effects Formatting commands for setting text attributes in the ‘Font’ group on the ‘Home’ tab
6.3 Formatting Features • Text Attributes Examples of different typefaces at different font sizes Examples of different font styles
6.3 Formatting Features • Manipulating Graphics • Insert graphics • Adjust the position, size and colour of the graphics • Organize text and graphics with text frames
6.3 Formatting Features • Manipulating Graphics • Insert digital images (from a digital camera or scanner) into a Word document. 1. Click the ‘Picture’ button in the ‘Illustrations’ group 2. Click the folder containing the required image file Insert an image into a document
6.3 Formatting Features • Manipulating Graphics 3. Click the thumbnail to choose an image file 4. Click ‘Insert’ to insert the image 5. Format the image with the commands on the ‘Format’ tab Insert an image into a document
6.3 Formatting Features • Manipulating Graphics • Clip art provides a collection of drawings, diagrams and photographs for users to insert into a document. 2. Enter a keyword in the ‘Clip Art’ dialogue box 3. Click ‘Go’ 1. Click the ‘Clip Art’ button in the ‘Illustrations’ group Insert a clip art into a document
6.3 Formatting Features • Manipulating Graphics 4. Relevant clip art is displayed 5. Click a thumbnail to insert a clip art 6. Format the clip art with commands on the ‘Format’ tab Insert a clip art into a document
6.3 Formatting Features • Manipulating Graphics 2. Click a shape in the ‘Shapes’ gallery 1. Click the ‘Shapes’ button in the ‘Illustrations’ group 3. Format the shape with the commands on the ‘Format” tab Insert a shape into a document
6.3 Formatting Features • Manipulating Graphics 1. Click the ‘WordArt’ button in the ‘Text’ Group 2. Enter the text into the ‘Edit Word Art Text’ dialogue box 3. Click ‘OK’ to insert the ‘WordArt’ object 4. Format the ‘WordArt’ object with the commands on the ‘Format’ tab Insert a ‘WordArt’ object into a document
6.3 Formatting Features • Manipulating Graphics • Organizing Graphics and Text with Text Frames • A text frame (also called a textbox) is a placeholder for text and other objects • Commonly used for labels and legends
6.3 Formatting Features • Manipulating Graphics 1. Click the ‘Text Box’ button in the ‘Text’ group 2. Select a text frame style in the ‘Text Box’ gallery 4. Format the text frame with the commands on the ‘Format’ tab 3. Enter text and insert images into the text frame Insert a text frame into a document
6.3 Formatting Features • Manipulating Graphics • Resizing Objects • Images, clip art and text frames can be placed at different locations in a document. • To change the size of an object, click the object and drag the circle appeared at the corner (or a square appeared in the middle of an edge).
6.3 Formatting Features • Manipulating Graphics 3. Drag and move to change the size of the image 4. The image is resized 1. Click the image in a document 2. A circle appears at the corner of the image Change the size of an image
6.3 Formatting Features • Tables • A group of cells arranged in rows and columns. • Each cell can contain text, graphics, embedded objects or even other tables. • An excellent tool for presenting information in groups such as statistical data, financial reports, calendars and timetables. • Ways to create a table in Microsoft Word. • ‘Table’ gallery • ‘Quick Tables’
6.3 Formatting Features • Tables • ‘Table’ Gallery • A graphical and intuitive way to create a table 1. Click the ‘Insert’ tab. 2. Click the ‘Table’ button. 3. Move the cursor over one of the boxes. At the same time, a preview of a table is shown. 4. Click the box to insert the table. Insert a table by using the ‘Table’ gallery
6.3 Formatting Features • Tables • Quick Table 1. Click the ‘Insert’ tab. 2. Click the ‘Table’ button. 3. Select the ‘Quick Tables’ option. 4. Select one of the designs to insert a table Insert a table with a predefined format
6.3 Formatting Features • Tables • Quick Table Component: Cell Attribute: Cell margins Alignment Component: Column Attribute: Column width Table attribute: Shading Options: Fill Patterns Component: Row Attribute: Row height Table attribute: Borders Options: Setting Style Colour Width Components and attributes of a table