Download
1 / 8
80 likes | 251 Views
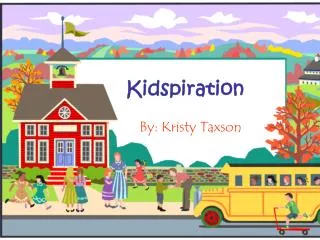
Kidspiration 3 tips and tricks. New : The undo button will now undo 8 consecutive steps and the redo button will redo up to 8 steps. Add more “bubbles”. Be sure that your main bubble is selected to add more. Make your own pictures. Super Grouper – use to create sorts. Switch to Writing View.

E N D
New: The undo button will now undo 8 consecutive steps and the redo button will redo up to 8 steps. Add more “bubbles”. Be sure that your main bubble is selected to add more Make your own pictures Super Grouper – use to create sorts Switch to Writing View NEW: Type in a word to search the 3000+ graphics! New: Word Guide with definitions, pronunciation, synonyms and antonyms, and more! Listen Put name on page when printed Use this to link symbols Lots of great graphics Show or hide captions on pictures Use these to change the font, font size, color, and style. Change bubble color
Super Sorter – Use the super sorters to create activities for students to sort or classify. Graphic Organizer - This is a great tool to help students organize their thoughts. They can easily add graphics to their work. Many different libraries of graphics are available or you can create your own.
Add an idea Return to Picture View Publish – send to Microsoft Word Change prefix
New: Kidspiration 3’s Math Tools allow your students to use interactive manipulatives! In addition, students can use the: -Math Text Box to express their math learning in words, numbers, and symbols -Cross-Out Stamp for a visual indicator to use when they mark, take away, or remove items -Step Workplace to document the steps they go through to solve a problem
To Create an Activity: • 1. Create the project. • 2. Enable Teacher Menu from Teacher on the menu bar. • 3. On the Teacher menu, click Save with Activity Wizard. • You can select all libraries or just specific libraries that you want the students • to use. • 5. There are other choices you can make – font color, etc. • Note: If you will be using this activity on a SMART Board, you may find it • helpful to lock some items. You can highlight the items you want to lock and • click on Locked Item on the Teacher Menu. • Give your activity a name and type a description. This will show up when • your activity is selected. • 8. Select the folder where you want to save the activity.
To Create a Custom Library: • 1. Enable the Teacher menu. • 2. On the Teacher menu, select New Symbol Library • In the Category list, select the category that you want the new • library to appear under on the Symbol palette. • 4. In the Library box, type a name for the new library. • 5. On the Teacher menu, click Edit Symbol libraries. • Select the symbols that you want to include. You can also copy/ • paste pictures into your library.
Important Notes on Creating Custom Libraries and Kidspiration Activities Teachers must be logged in as themselves (member of teacher group) in order to save Kidspiration activities using the Activity Wizard or to create a custom library. If you want an activity to be available to anyone from the main Kidspiration screen under “Activities,” you should create the lesson using the Activity Wizard under the teacher menu in Kidspiration. The Activity Wizard allows you to designate which libraries are available for the activity. You can create a new library of graphics for that activity. When you create a new library, make sure it is saved to “Custom Library” and NOT to personal library. Personal libraries are saved on the hard drive and will be deleted when the computer is turned off (in the lab). If a teacher creates a new library that is saved on the hard drive (in a personal library), it can be moved into the Custom Libraries folder on your school’s server and then the activity becomes available to everyone on the network. See your ITRT to help you do this.