Download
1 / 33
330 likes | 430 Views
The Setup and use of the IV-x11 Eco Series DVR. X11 ECO Series DVR. Price competitive with Wholesale Clubs Feature Rich High Reliability Field Upgradable Easy to setup Easy to support Easy to Use. Camera shows man walking when it is in motion. Shows network connectivity

E N D
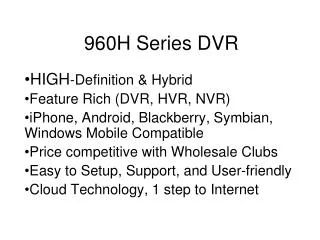
X11 ECO Series DVR • Price competitive with Wholesale Clubs • Feature Rich • High Reliability • Field Upgradable • Easy to setup • Easy to support • Easy to Use
Camera shows man walking when it is in motion. Shows network connectivity Shows presence of Disk in unit Shows how full the hard drive is. Red film indicates that it is recording Remote controls allow for instant local recording, taking snapshots and provides bandwidth control Main Live View Screen
Right click screen to bring up top menu bar. Pull mouse down from first icon to pull up main menu icon Click on Main Menu icon to pull up menu icons. Main Menu
Click on the Record setup icon The HHD Full setting determines what to do when the HDD is 99%. You can set it to overwrite data in a circular fashion or to stop recording. You can set up the OSD (On Screen Display) for each of the cameras If Video Preservation is enabled it will not overwrite any video until that amount of time has passed. If hard drive fills up before the end of that time it will stop recording. Max number is 999 hours or 41 days Quality and Frame Rate setup is usually the only button used. Record Setup
Quality and Frame Rate Setup • View Normal needs to be clicked to control all the time recording • View Event needs to be clicked to control recording by motion • 3 resolution settings • 5 quality settings • FPS allocation depends on resolution setting.
Click on the Event Setup Icon This has two choices. Sensor setup is for external inputs Motion Setup will bring up the next screen. If Motion Popup is enabled than the camera that has motion will show full screen Enable check turns motion detection on Sensitivity is used to determine level of motion Event Setup
Click on Mask Mouse Selection This allows the user to click on squares with the mouse to toggle between active and inactive detection. All area detection makes everything active Mask all area deactivates motion detection. Make choice regarding changes and exit. Motion Area Setup
Schedule Setup • Click on the Schedule Setup • Normal is full recording • Motion recording is set up separately • Sensor recording only relates to external inputs • 5 different schedules can be created • You can define Holidays (these vary from country to country) • This is done universally not on a per camera basis.
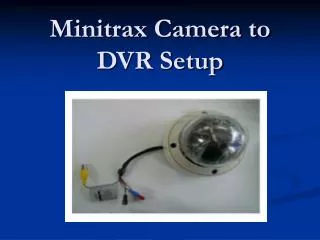
Click on camera setup icon Click on the number of the camera you want to work with. If you select “mask” the video will not be visible to users at the unit. Name allows user to assign a name that is associated to the picture. Camera Setup
Click on Account setup icon Clicking change underneath the icon in bottom left changes the icon associated with the admin account. Click on Permissions next to a user name to set up that user Changing the password in bottom right changes the password admin password Put in current, new and confirm the new password and then click “change admin password” Uncheck box next to user name to deactivate that account Account Setup
Password Expiry Date automatically terminates the rights of that user. If it is left unchecked the account will continue to work indefinitely. Clicking on setup, network, ptz, playback, utility, and backup gives the user rights to those functions Remote and playback mask means that user cannot see those images when they log in or upon playback. (they will see the video if downloaded) User Permissions
Click on network icon ADSL tab provides user name and password for authentication. DHCP allows the dvr to pull an dynamic address. LAN allows you to put in a static address. 3G works currently with HuaWei 3G devices. You will need to input dial up, pin, and APN information Network Setup
This allows users remote access into system. Port allows you to change remote access port. Quality and FPS determine bandwidth usage. Uncheck to make camera unavailable remotely HTTP Setup
Enable DDNS Chose DDNS service If ez-dns is chosen input host name of your choice. (It may take 4-6 hours to activate) If i-dvr.net is chosen input the username and password from the bottom of the DVR. Other DNS services require you to go to their web sites and set create user names and passwords on those servers. DDNS Setup
Mail Setup will enable the DVR to send emails when certain events occur Put check in box to enable notification Provide mail server info including user name and password Choose what events to trigger Click on receiver email and input up to ten addreess Mail Setup
Click PTZ setup Choose camera and check “enable PTZ” Choose protocol Choose ID (every camera must be unique) Choose Baud rate If using keyboard choose from list PTZ Setup
SYSTEM SETUP • DVR Name and location are for information only • User can change menu language • Display setup allows user to adjust OSD (On Screen Display)
Choose 24 hour time format or am pm Choose one of nine date display formats Choose top or bottom for date time position Manually change the time via the “change date and time button Date & Time
Time zone setup is done by offset from Greenwich Mean Time Enable or disable DST Input DST start and end time Check “automatically synchronize” for internet time. Put in IP address or name of time server Time Setup cont.
Mouse speed Click Buzzer and Relay to bring up next screen Enable or disable key beeps. Determine what output occurs when different events happen Device setup
Spot monitor only displays live images Check on Skip Video channels will prevent blank screens from being presented. Choose dwell time length. Check cameras to be included. Spot Monitor
Click on utility icon HDD Initialization will format the hard drive USB Initialization will format a USB device System Recover restores default settings Reset system events will clear the log Copy Setup to USB will save setup to be uploaded to a different unit by clicking on download setup from USB Upgrade is used to upload new firmware from a USB device Utility Setup
User does not interact with this page. It provides system info including firmware version, mac address and information about the hard drives. Diagnostic
On main menu click on the search setup icon Within Search setup you can search by event, (motion, external input) or by time Search Setup
Click on date Move Red slider bar Click on arrows next to numbers to advance hour, minutes and seconds Yellow means video present break in bar means no video 24hour clock Time Search
Click on Backup icon to enter menu Choose start and end time Choose save to device Click on calculate and if space required is lower than space available than start button will illuminate Backup
Event search provides a list of all events Click on Criteria to bring up a screen which will allow user to filter on 8 items. Upper right corner can be used to narrow the time frame to filter. Motion and video loss can be filtered on a per camera basis. Event Search
Click on PTZ control to bring up the control pad On control pad you use arrows to move camera around You can choose presets and start tours PTZ
Zoom allows user to focus in on a target area. The red slider bar can be moved up to 8x Pixilation will occur with higher zooms The highlighted screen can be moved around the image Zoom
Magnify Glass brings up zoom when in playback User can fast forward up to 64x User can rewind up to 64x Slow down can be ½, ¼, 1/8 Playback