Download
1 / 22
220 likes | 390 Views
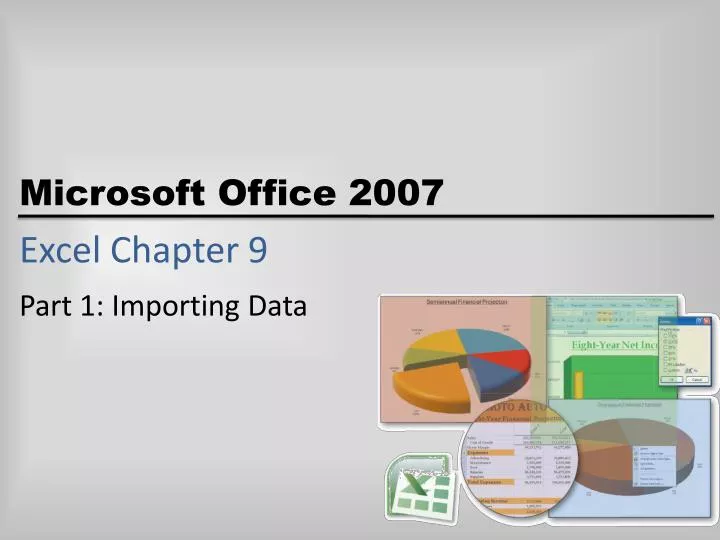
Excel Chapter 9. Part 1: Importing Data. Starting Excel and Opening a Workbook. Start Excel Open the file FasToast Ovens Analysis from the Data Files for Students and then save the workbook using the file name, FasToast Ovens Analysis1.

E N D
Excel Chapter 9 Part 1: Importing Data
Starting Excel and Opening a Workbook • Start Excel • Open the file FasToast Ovens Analysis from the Data Files for Students and then save the workbook using the file name, FasToast Ovens Analysis1. • If the Excel window is not maximized, double-click its title bar to maximize it • If the worksheet window in Excel is not maximized, click the Maximize button next to theClose button on its title bar to maximize the worksheet within Excel Microsoft Office 2007: Comprehensive Concepts and Techniques - Windows Vista Edition
Starting Excel and Opening a Workbook Microsoft Office 2007: Comprehensive Concepts and Techniques - Windows Vista Edition
Importing data from a Text File into a Worksheet • With the Repair Revenue Analysis worksheet active, if necessary, select cell A3 • Click the Data tab on the Ribbon • Click the From Text button on the Ribbon to display the Import Text File dialog box. If you have more than one Excel add-in installed, such as Solver, the From Text button may appear on a submenu that is displayed when you click the Get External Data button. The Get External Data group on the Ribbon may be collapsed to a single Get External Data button • When Excel displays the Import Text File dialog box, navigate to where you have saved your student data files. Microsoft Office 2007: Comprehensive Concepts and Techniques - Windows Vista Edition
Importing data from a Text File into a Worksheet • Double-click the file name, FasTo Ovens North Dakota Revenue 2008, to display the Text Import Wizard - Step 1 of 3 dialog box • Click the Next button to display the Text Import Wizard - Step 2 of 3 dialog box • When Excel displays the Text ImportWizard - Step 2 of 3 dialog box, click Comma in the Delimiters area to display the data fields correctly in the Data preview area • Click Tab in the Delimiters area to clear the check box • Click the Next button to display the TextImport Wizard -Step 3 of 3 dialog box Microsoft Office 2007: Comprehensive Concepts and Techniques - Windows Vista Edition
Importing data from a Text File into a Worksheet • Click the Finish button to display the Import Data dialog box • Click the Properties button • When Excel displays the External DataRange Properties dialog box, click ‘Adjust column width‘ in the ‘Data formatting and layout’ area to clear the check box • Click the OK button • When Excel displays the Import Data dialog box, click the OK button to import the data from the text file into the worksheet beginning at cell A3 Microsoft Office 2007: Comprehensive Concepts and Techniques - Windows Vista Edition
Importing data from a Text File into a Worksheet Microsoft Office 2007: Comprehensive Concepts and Techniques - Windows Vista Edition
Importing Data from an Access Table into a Worksheet • Select cell A8 • With the Data tab active, click the From Access button on the Ribbon to display the Select Data Source dialog box • When Excel displays the Select Data Source dialog box, navigate to where you have saved your student data files.) • Double-click the file name, FasToast Ovens South Dakota Revenue 2008 in the Name list to display the Import Data dialog box • Click the OK button to import the data in the database to a table in the range A8:G13 Microsoft Office 2007: Comprehensive Concepts and Techniques - Windows Vista Edition
Importing Data from an Access Table into a Worksheet • Right-click cell A8 and then point to the Table on the shortcut menu • Click Convert to Range • When Excel displays the Microsoft Office Excel dialog box, click the OK button to convert the table to a range • Right-click the row heading for row 8 to display the shortcut menu • Click Delete on the shortcut menu to delete row 8 Microsoft Office 2007: Comprehensive Concepts and Techniques - Windows Vista Edition
Importing Data from an Access Table into a Worksheet • Drag through the column headings of column A through G in the column heading area to select the columns • Double-click the column separator in the column headings area between columns A and B to change the widths of each column to best fit • If necessary, click the Home tab on the Ribbon and then select the range A7:G7 • Click the Format Painter button on the Ribbon and then drag though the range A8:G12 to copy the formats of the selected range to the range A8:G12 • Select cell A13 Microsoft Office 2007: Comprehensive Concepts and Techniques - Windows Vista Edition
Importing Data from an Access Table into a Worksheet Microsoft Office 2007: Comprehensive Concepts and Techniques - Windows Vista Edition
Importing Data from a Web Page into a Worksheet • With cell A13 selected, click the Data tab on the Ribbon • Click the From Web button on the Ribbon to display the New Web Query dialog box • When Excel displays the New Web Query dialog box, type e:\FasToastOvensNebr askaRevenue2008.htm in the Address bar and then click the Go button to display the Web page in the preview area. (If this does not work, navigate to where you have saved your Student Data Files.) • Click the ‘Click to select this table’ arrow to select the HTML table containing the Nebraska repair revenue report • Click the Import button to display the Import Data dialog box and display a marquee around cell A13 Microsoft Office 2007: Comprehensive Concepts and Techniques - Windows Vista Edition
Importing Data from a Web Page into a Worksheet • Click the Properties button to display the External Data Range Properties dialog box • When Excel displays the External Data Range Properties dialog box, click ‘Adjust column width‘ in the ‘Data formatting and layout’ area to clear the check box • Click the OK button • When Excel displays the Import Data dialog box, click the OK button to import the data from the Web page into the worksheet beginning at cell A13 • Drag through the row 13 and 14 row headings and then right-click to display the shortcut menu • Click Delete on the shortcut menu to delete rows 13 and 14, which contained the column headings from the Web Page Microsoft Office 2007: Comprehensive Concepts and Techniques - Windows Vista Edition
Importing Data from a Web Page into a Worksheet Microsoft Office 2007: Comprehensive Concepts and Techniques - Windows Vista Edition
Copying and Transposing Data from a Word Document to a Worksheet • Click the Home tab on the Ribbon and then select cell A24 • Start Word and then open the Word document named, FasToast Ovens Kansas Revenue 2008, from the Data Files for Students • In Word, if necessary, click the Home tab on the Ribbon • Drag through all of the cells in the second through last columns in the table in the Word document and then click the Copy button on the Ribbon to copy the contents of the table to the Office Clipboard • Quit Word and, if necessary, click the FasToast Ovens Analysis1 workbook taskbar button to make it active • Click the Paste button arrow on the Ribbon to display the Paste menu Microsoft Office 2007: Comprehensive Concepts and Techniques - Windows Vista Edition
Copying and Transposing Data from a Word Document to a Worksheet • Click Paste Special on the Paste menu to display the Paste Special dialog box • When the Paste Special dialog box appears, click Text in the As list • Click the OK button in the Paste Special dialog box to paste the contents of the Office Clipboard to the range A24:E29 • Select the range A24:E29 and then click the Copy button on the Ribbon • Select cell A18 • Click the Paste button arrow on the Ribbon and then point to Transpose on the Paste menu • Click Transpose on the Paste menu to transpose and paste the copied cells to a range beginning with cell A18 Microsoft Office 2007: Comprehensive Concepts and Techniques - Windows Vista Edition
Copying and Transposing Data from a Word Document to a Worksheet Microsoft Office 2007: Comprehensive Concepts and Techniques - Windows Vista Edition
Converting Text to Columns • If necessary, click the Home tab on the Ribbon • Select the range A24:E29 and press the DELETE key to delete the range • Select the range B18:F22 and then click the Cut button on the Ribbon to copy the range to the Office Clipboard • Select cell C18 and then click the Paste button on the Ribbon • Select the range C17:G17 and then click the Format Painter button on the Ribbon • Select the range C18:G22 to copy the formats in range C17:G17 down to the corresponding columns of range C18:G22 Microsoft Office 2007: Comprehensive Concepts and Techniques - Windows Vista Edition
Converting Text to Columns • Select the range A18:A22 and then click the Data tab on the Ribbon • Click the Text to Columns button on the Ribbon to display the Convert Text to Columns Wizard - Step 1 of 3 dialog box • Click the Next button to display the Convert Text to Columns Wizard - Step 2 of 3 dialog box • When Excel displays the Convert Text to Columns Wizard - Step 2 of 3 dialog box, click Comma in the Delimiters area to display the data fields correctly in the Data preview area • Click Tab in the Delimiters area to clear the check box • Click the Finish button to close the Convert Text to Columns Wizard - Step 2 of 3 dialog box and separate the data in column A to two columns Microsoft Office 2007: Comprehensive Concepts and Techniques - Windows Vista Edition
Converting Text to Columns Microsoft Office 2007: Comprehensive Concepts and Techniques - Windows Vista Edition
Replicating Formulas • Select the range H3:I3 • Drag the fill handle down through row 22 to copy the two formulas to the range H4:I22 and display the new values for the Revenue per Repair Person 2007 and Revenue per Repair Person 2008 columns • Click the Save button on the Quick Access Toolbar to save the workbook using the file name, FasToast Ovens Analysis1. Microsoft Office 2007: Comprehensive Concepts and Techniques - Windows Vista Edition
Replicating Formulas Microsoft Office 2007: Comprehensive Concepts and Techniques - Windows Vista Edition