Download
1 / 52
530 likes | 551 Views
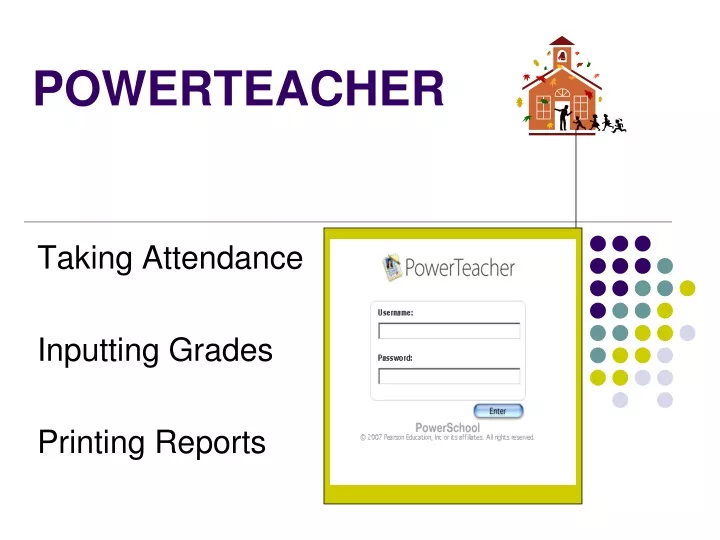
POWERTEACHER. Taking Attendance Inputting Grades Printing Reports. PowerTeacher. When you log into PowerTeacher, the start page appears. This page serves as the central point from which you begin your PowerTeacher session. The PowerTeacher start page consists of the following main areas:

E N D
POWERTEACHER Taking Attendance Inputting Grades Printing Reports
PowerTeacher • When you log into PowerTeacher, the start page appears. This page serves as the central point from which you begin your PowerTeacher session. The PowerTeacher start page consists of the following main areas: • Navigation bar • ID bar • Main menu • Current Classes
The navigation bar appears at thetop of the PowerTeacher start page and is common to every page in the application. The navigation bar includes the following information: Teacher Name The ID bar appears just below the navigation bar and displays your name.
Start Page - This is the home screen where you can view the current classes. Daily Bulletin – Click to read your school’s daily bulletin (if applicable.) Staff Directory – not used Personalize – Click to change your password. Gradebook – Click to launch PowerTeacher Gradebook Reports – Click to launch the Reports window MAIN MENU We will not be using the Meals Option.
Current Classes • Period – Course • Chair – To take attendance • Dot beside chair – • Clear Attendance not taken • Yellow Partial attendance taken • Green Attendance has been taken • Lunch Counts – We WILL NOT USE • Student Information – Demographics, Attendance, Schedule, Alerts, etc. • Printer Class Reports
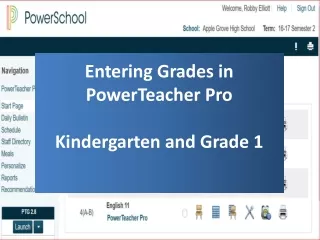
Accessing Student Information Using the student information pages, you can view a variety of student data, as well as enter final grades and log necessary issues. • Cumulative Grade Information • Demographics • Final Grade Entry (Standards) • Final Grade Entry (Traditional) • Meeting Attendance • Net Access Summary • Print A Report • Quick Lookup • Recommendations • Schedule • Standards • Student Photo • Submit Log Entry • Teacher Comments • Term Grades • Click the Backpack icon to access student information. • Click the last name of the student whose record you want to view. The student information displays the default page previously selected. The following pages are available from the Selected screens pop-up menu:
Accessing Student Information • Choose a different student page from the Select screens pop-up menu. The new page displays different student information. • Click the first name of another student. Note: Clicking the first name of a student displays the same page that opened for the previous student. Clicking the last name of a student displays the default student page. • In the navigation pane, click a class link under Change Class to open another class. The main menu displays the selected class roster. • Repeat Steps 2 and 3 to view the student information pages.
Alerts • When looking at the student demographics, there may be numerous Alert Symbols for the student you are viewing. • Click on a symbol to provide details of the alert information. • Medical Caduceus- Medical Alert • Silhouette-Parent Alert • Scales-Discipline Alert • Candle-Birthday Alert • Warning Triangle-Other alert • IEP Alert-IEP in effect
Taking Attendance • Click on the chair in which you want to take attendance. The Record Meeting Attendance page appears. • If all of your students are present, you will still need to click the chair icon to open the attendance screen and click Submit to save the attendance information.
Taking Attendance • Choose the attendance code you want to assign from the Current attendance code pop-up menu. • Click the field next to the name of each student to whom you want to assign this attendance code. • Repeat Steps 1 and 2 for each different attendance code you want to assign. It is not necessary to perform this task for students who are present. • Click Submit. The attendance codes are saved to the PowerSchool system, and the start page appears.
Using PowerTeacher Gradebook Click on Gradebook. The PowerTeacher Gradebook appears. Click “Launch Gradebook.” The File Download window appears accompanied by the Warning Security window. Click Run. Java 5 is required. The Java Web Start and Gradebook version windows briefly appear. Then, PowerTeacher gradebook opens.
Gradebook When you launch PowerTeacher gradebook, the main PowerTeacher Gradebook window appears. This window serves as the central point from which you begin your gradebook session.
View the Main Window • The PowerTeacher Gradebook window consists of the following main areas: • Menu Bar • ID Bar • Classes • Student Groups • Categories • Navigation Bar
ID Bar • The ID bar appears at the top of the PowerTeacher Gradebook window and displays your name and the name of your school
Classes • The Classes pane appears in the upper-left corner of the PowerTeacher Gradebook window and includes the Term Selector and Class List. • You can choose a term from the [Term Selector] pop-up menu. Classes for the selected term appear. • Note: The selected term becomes the new default setting • The first class in your daily schedule appears highlighted. Information that appears in the class list is defined by your section preferences. • Select a class. The window in which you were last working refreshes for the selected class. The selection is stored for the next time you log into the gradebook
Student Groups • The Student Groups pane appears in the middle-left side of the PowerTeacher Gradebook window and displays student groups for a selected class. (See documentation for creating and using student groups.)
Categories • The Categories pane appears in the lower-left corner of the PowerTeacher Gradebook window and displays assignment categories. Before you can create assignments, you must set up categories. Categories are groups of the same types of assignments. Categories are not class-specific, eliminating the need to create the same categories multiple times for each class.
By default, PowerTeacher gradebook includes four pre-defined categories: Homework Project Quiz Test Fill in the Points Possible which will be applied as default to any new assignments when created for this category. Categories Continued For each Category Change Score Type to Percentage (if applicable.) For each Category Check Include in Final Grade (if applicable.)
Adding Categories • From the gradebook menu bar, choose Tools > Categories. The Categories dialog appears. • Click the Plus(+) button. The new category appears on the left side of the window. • Enter the required information. • Click Close to save your changes. The Categories dialog closes.
Adding Categories Contd. • Name • Abbreviation • Color Points Possible • Extra Pts (if applicable) • Score Type (Change to Percentages) • Include in Final Grade should be marked (set by default) • Description (optional)
From the gradebook menu bar, choose Tools > Categories. The Categories dialog appears. Select the category you want to edit. Edit the information as needed. Click Close to save your changes. On the Categories pane, double-click the category you want to edit. The Edit Assignment Category dialog appears. Edit the information as needed. Click OK to save your changes. Editing Categories OR
From the gradebook menu bar, choose Tools > Categories. The Categories dialog appears. Select the category you want to delete. Click the Minus (-) button. The Categories dialog appears without the deleted category. If category has assignments or is used in weighting, the Alert window appears, displaying the message, "Unable to delete category because it has associated assignments." Click OK to close the window. Click Close to save your changes. On the Categories pane, select the category you want to delete. Click the Minus (-) button. A confirmation message appears. If category has assignments or is used in weighting, the Alert window appears, displaying the message, "Unable to delete category because it has associated assignments." Click OK to delete the category. Deleting Categories OR
Calculations • The category weight method calculates final grades based the value (or weight) of each category or assignment within the weighted Category weights.
Weighting Categories • Access Grade Setup on Menu • Select Category weights • Click add Category • Check the categories that are to be included in the final grade • Click OK
Weighting Categories • Under each Category enter the desired weight each will carry towards the final grade • Must add up to be 100% • See your administrator for category weighting guidelines
Grading Scales • PowerTeacher gradebook uses grade scales that are preset. • This scale comes from the administrative side of PowerSchool.
Adding Assignments • Select a class from the Classes pane. • Click the Scoresheet tab. Click the Add Assignment button + at the top right of the first column. The new Assignment Detail window appears at the bottom.
Adding and Publishing Assignments • Enter the required information. • To make the assignment visible to parents in the ParentPortal, click the Publish tab. • From the Publish Assignment pop-up menu, choose when to publish the assignment: • Immediately • On Specific Date • Days Before Due • On Due Date • Click Save
Copying Assignments • Select a class from the Classes pane. • Click the Assignments tab. The Assignment window appears. • Choose Tools > Copy Assignments from the gradebook menu bar. The Copy Assignments dialog appears. • Check the assignments that you wish to copy • Click next.
Copying Assignments Contd. • Select the classes in which to wish to have the assignments copied. • Click OK. • The assignment or assignments are copied to the selected classes.
Deleting Assignments • Select the assignment you want to delete. The Assignment Detail window appears. • Click the Minus (-) button. The Delete Assignment window appears. • If an assignment does not have scores, the Delete Assignment window states, "Are you sure you want to delete assignment [name]?" • If an assignment has scores, the Delete Assignment window states, "This assignment has scores. Are you sure you want to delete assignment [name] and all associated scores?" • Click Yes.
Adding Grades/Scores • Select a class from the Classes pane. • Click the Scoresheet tab. The Scoresheet window appears. • Select Assignments mode. • Click the assignment score field of the student for which you want to enter a score. The score field appears as an editable text field.
Adding Grades/Scores • Enter the score in the score field. • Press ENTER or RETURN. The score appears, the final grade automatically recalculates, and the cursor advances to the next assignment field. • Note: The score field and the final grade field appear shaded until you click Save. • Click Save. The score appears on the Scoresheet. • If you wish to enter scores down a column, enter the score and press Enter. • If you wish to enter scores across a row, enter the score and press Tab.
Editing Grades/Scores • Click the assignment score field of the student for which you want to edit a score. The score field appears as an editable text field. • Enter the new score in the score field. • Press ENTER or RETURN. The new score appears, the final grade automatically recalculates, and the cursor advances to the next assignment field. • Note: The score field and the final grade field appear shaded until you click Save. • Click Save. The new score appears on the Scoresheet window.
Deleting Grades/Scores • Click the assignment score field of the student for which you want to delete a score. The score field appears as an editable text field. • Highlight the score and press DELETE. • Press ENTER or RETURN. The score no longer appears on the Scoresheet window and the cursor advances to the next assignment field.
Filling Grades/Scores • Select a class from the Classes pane. • Click the Scoresheet tab. The Scoresheet window appears. • Click Assignments. • Select the assignment column for which you want to fill scores. • From the gradebook menu bar, choose Tools > Fill Scores. The Fill Scores dialog appears. • Indicate whether you want to only fill empty scores or replace all scores by selecting one of the following options: • Items with No Score • Replace All
Filling Grades/Scores • To indicate the assignment status, select one of the following: • Collected • Late • Exempt • Missing • Enter the score in the Score field. • Click OK. • You can also Fill a column with Grades/Scores by Right-clicking that column and choosing Fill Scores.
Printing Reports PowerTeacher gradebook offers a selection of reports to assist you in daily classroom activities, as well as with assessing student performance. Using the Reports window, you can generate reports for all students who are enrolled in a class, for all students who are enrolled in all your classes, or for a specific set, group, individual student, selection of students, or any combination.
Printing Reports • Attendance Grid report generates a student and date grid for taking attendance. You can use this report to take attendance at field trips or other out-of-classroom events. You can also use it as a convenient roster for taking notes during student presentations or to track class participation. • Category Total report generates a summary of the assignment category totals for each reporting term. It can be grouped by student and class. This report displays graphs for assignment count and average score per category. • Final Grade and Comment Verification report generates a list of final grades and teacher comments for students grouped by section, then by reporting term.
Printing Reports • Individual Student report generates section scores by assignment, and the final grade for each reporting term, listed in a one page per student layout. • Missing Assignments report generates a list of assignments that have not been scored. The report can be generated for assignments that are missing per assignment or per student. • The Scoresheet Report is a spreadsheet-style summary of student grade and assignment date. You can use this report to view final grades for all reporting terms and assignments that are within a specific date range, for all students.
Printing Reports • Student Multi-Section report generates section scores by assignment, and the final grade for each reporting term, listed in a one page per student layout. This report is similar to the Individual Student Report, but is able to present information from any section that the student is taking. • Student Roster report generates a summary of student demographic information on a student-by-student basis. When generating this report, you can specify which columns of student data to list on the report, and in what order. In addition, you can add up to six blank columns with customizable column headings.
Example of Printing Reports To run a report: Click the Arrow to the right of the Report Name. This will open the Report Criteria Page. Set the criteria for that report. Click Run Report.
Example of Reports Student Multi-Section Report
Example of Reports • The Multi-Section Report can be utilized as a Progress Report. • This can be run as a report for all classes in which the student is enrolled. • With the previous set-up example, the Homeroom teacher (or a designated teacher) can run this for his/her students. • This will eliminate each teacher having to run individual Progress Reports.
Example of Reports Student Roster Report
Example of Reports Scoresheet Report
Example of Reports Individual Student Report
E-mailing Student Progress • PowerSchool can be set to Email reports to parents once a month, if we have the parent email in PowerSchool. • On the ParentPortal, each parent has the ability to request Email notification more often • When parents log into PowerSchool ParentPortal • Access Email Notification • Select what information they would like to receive • Select how often they would like to receive it • Give their email address • PowerSchool will email requested information
Quitting Gradebook • When you are finished working in PowerTeacher gradebook, it is important to quit the application, which you can do from any gradebook window.