Download
1 / 19
190 likes | 196 Views
Lesson Two: Using the Patient Access List (PAL). Upon log in, eKiDs PowerChart will open to the Patient Access List , commonly referred to as the PAL. You will first be asked to select the time frame for which you want to view patient information from the PAL.

E N D
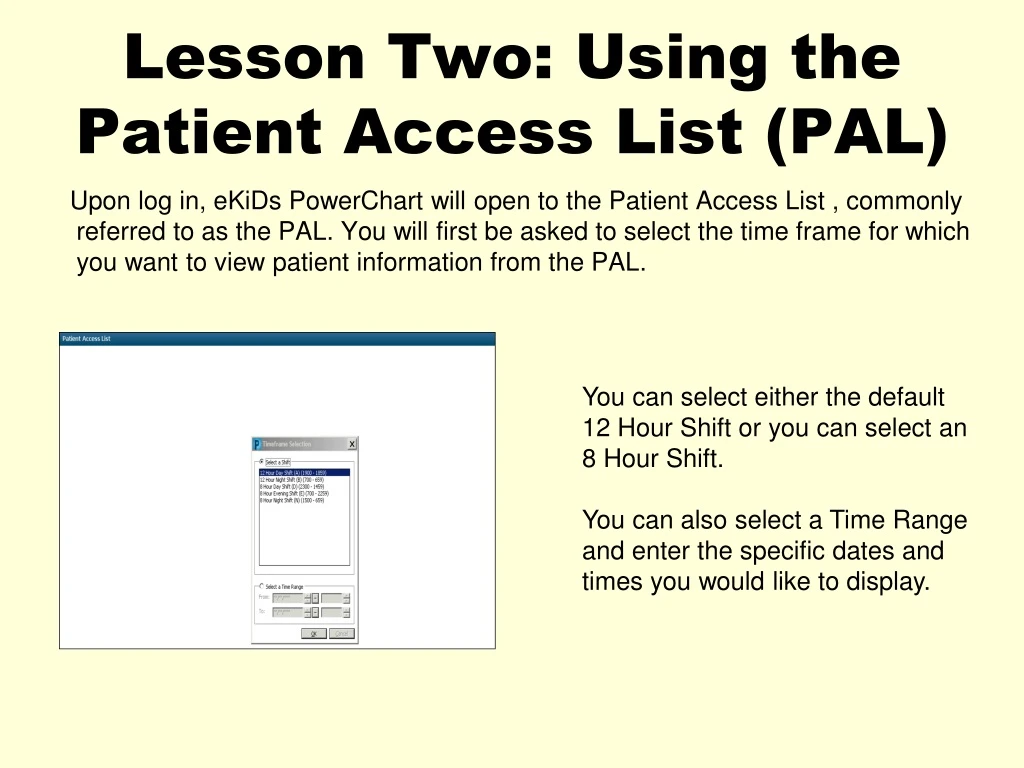
Lesson Two: Using the Patient Access List (PAL) Upon log in, eKiDs PowerChart will open to the Patient Access List , commonly referred to as the PAL. You will first be asked to select the time frame for which you want to view patient information from the PAL. You can select either the default 12 Hour Shift or you can select an 8 Hour Shift. You can also select a Time Range and enter the specific dates and times you would like to display.
Lesson Two: Using the PAL Depending on where you work and your role, you can pull in the appropriate patient location list to display on your PAL. If you do not have any patient lists built, you can build one by selecting Patient List from the toolbar and clicking on the wrench icon.
Building a Patient List There are many types of lists, however, we will focus on Location and Custom lists in this tutorial. To begin building a Patient List, select New from the Modify Patient Lists window.
Building a Patient List Select Location and click Next.
Building a Location Patient List Click the Plus Sign beside Location Groups to open the selections. In this case we have selected TCU. Notice the list automatically is named, however, you can change the name by typing over it.
Building a Location Patient List For the filter criteria, select Discharged Criteria and choose Only display patients that have not been discharged. Click Finish.
Building a Location Patient List TCU is now in your Available Lists. Click the blue arrow to move it to your Active Lists. It is now available to pull into your Patient Access List.
Building a Custom List You can also build a Custom List and select the patients that you wish to appear on the list. From the Patient List Type window, select Custom and then click on Next.
Building a Custom List From the Custom Patient List window select the filter “Only Display Patients That Have Not Been Discharged.” Enter a Name for your custom list at the bottom of the screen and then click Finish.
Building a Custom List Move your Custom List to the Active Lists column and click OK.
Building a Custom List You must decide which patients to populate your Custom List. To add patients from another active list to your Custom List , hold down the Control Key on your keyboard and click the patients to display on your Custom List. Then right click and select the option Add to Patient List/My Custom List. The selected patients will now appear on your Custom List after you Refresh your screen.
Building a Custom List You can add a patient that is not on your patient list by clicking on the yellow Person icon on the toolbar. The Patient Lookup window will display and you can look up the patient that you wish to appear on your custom list.When you select a patient they will appear on your Custom List. To remove a patient from your Custom List, highlight their name and click on the Person with the red X icon.
Using the PAL To change the Patient List to pull into your PAL, right click on the Blue Information Bar and select Change Patient List. All lists built by the user will display. Highlight the one you want to pull into your PAL and click OK.
Using the PAL The selected list will now display in your PAL. The sections of the PAL are named below. Demographics Section Orders/Results Section Name Section Task List Section
Using the PAL Students can view all tasks as indicated by a heart for Nursing tasks and lungs for Respiratory tasks but will only be able to chart on tasks designated for students. Click the icons to view or chart the associated tasks.
Charting a Task from the PAL The task form will open. By default all tasks are selected. Be sure to deselect any that you do not want to complete at that time by unchecking the box. Click the Chart button at the bottom to chart the task. Since this task requires completion of a PowerForm you will be taken directly to that PowerForm for completion. When completed by the student nurse, the task will remain in a Pending Validation status until signed off by the preceptor.
Opening a Patient’s Chart From the PAL, you can open a patient’s chart by double clicking on their name.
Benefits of Using the PAL Some benefits of using the PAL include: • Can be customized to pull in only your patients • Easy access to review and chart tasks • Notifies of new orders and/or results • Provides easy access to the patient’s chart