Download
1 / 56
560 likes | 819 Views
Implement Spanning Tree Protocols-PART-I. LAN Switching and Wireless – Chapter 5 Modified by Tony Chen. 05/01/2008. Notes:. If you see any mistake on my PowerPoint slides or if you have any questions about the materials, please feel free to email me at chento@cod.edu . Thanks! Tony Chen

E N D
Implement Spanning Tree Protocols-PART-I LAN Switching and Wireless– Chapter 5 Modified by Tony Chen 05/01/2008
Notes: • If you see any mistake on my PowerPoint slides or if you have any questions about the materials, please feel free to email me at chento@cod.edu. Thanks! Tony Chen College of DuPage Cisco Networking Academy
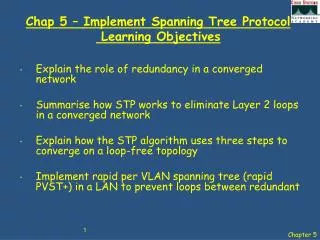
Objectives • Explain the role of redundancy in a converged network • Summarize how STP works to eliminate Layer 2 loops in a converged network • Explain how the STP algorithm uses three steps to converge on a loop-free topology • Implement rapid per VLAN spanning tree (rapid PVST+) in a LAN to prevent loops between redundant switches.
Redundancy in a hierarchical network • As businesses become increasingly dependent on the network, the availability of the network infrastructure becomes a critical business concern. • Redundancy is the solution for achieving the necessary availability. • Layer 2 redundancy improves the availability of the network by implementing alternate network paths by adding equipment and cabling. • As you can see in the graphic: • 1. PC1 is communicating with PC4 over a redundantly configured network topology. • 2. When the network link between switch S1 and switch S2 is disrupted, the path between PC1 and PC4 is automatically adjusted to compensate for the disruption. • 3. When the network connection between S1 and S2 is restored, the path is then readjusted to route traffic directly from S2 through S1 to get to PC4.
Examine a redundant design 1. 1. Starting Point Access to Distribution Layer. • In this example, there is a hierarchical network with access, distribution, and core layers. Each access layer switch is connected to two different distribution layer switches. Also, each distribution layer switch is connected to both core layer switches. • STP is enabled on all switches. STP is the topic of this chapter and will be explained at length. For now, notice that STP has placed some switch ports in forwarding state and other switch ports in blocking state. • In the example, PC1 can communicate with PC4 over the identified path. 2. Path Failure Access To Distribution Layer button. • The link between switch S1 and switch D1 has been disrupted. • Switch S1 has a second path to PC4 through switch D2. 3. Path Failure Distribution To Core Layer button. • The link between switch D1 and switch C2 has been disrupted • Switch D1 has a second path to PC4 through switch C1. 4. Switch Failure Distribution Layer button. • Switch D1 has now failed preventing the data from PC1, destined for PC4 • Switch S1 has a second path to PC4 through switch D2. 5. Switch Failure Core Layer button. • Switch C2 has now failed, preventing the data from PC1 destined for PC4 • Switch D1 has a second path to PC4 through switch C1. 2. 3. 4. 5.
Issues with Redundancy: Layer 2 Loops and TTL • There are some considerations that need to be addressed before redundancy is even possible on a network. • When multiple paths exist between two devices on the network and STP has been disabled on those switches, a Layer 2 loop can occur. If STP is enabled on these switches, which is the default, a Layer 2 loop would not occur. • Ethernet frames do not have a time to live (TTL) like IP packets traversing routers. As a result, if they are not terminated properly on a switched network, they continue to bounce from switch to switch endlessly or until a link is disrupted and breaks the loop. • Broadcast frames are forwarded out all switch ports, except the originating port. This ensures that all devices in the broadcast domain are able to receive the frame. If there is more than one path for the frame to be forwarded out, it can result in an endless loop.
Issues with Redundancy: Layer 2 Loops • 1. PC1 sends out a broadcast frame to switch S2. • 2. When S2 receives the broadcast frame it updates its MAC address table to record that PC1 is available on port F0/11. • 3. Because it is a broadcast frame, S2 forwards the frame out all switch ports, including Trunk1 and Trunk2. • 4. When the broadcast frame arrives at switches S3 and S1, they update their MAC address tables to indicate that PC1 is available out port F0/1 on S1 and port F0/2 on S3. • 5. Because it is a broadcast frame, S3 and S1 forward it out all switch ports, except the one they received the frame on. • 6. S3 then sends the frame to S1 and vice versa. Each switch updates its MAC address table with the incorrect port for PC1.
Issues with Redundancy: Layer 2 Loops • 7. Each switch again forwards the broadcast frame out all of its ports, except the one it came in on, resulting in both switches forwarding the frame to S2. • This process repeats over and over again until the loop is broken by physically disconnecting the connections causing the loop, or turning the power off the switches. • Loops result in high CPU load on all switches caught in the loop. • This slows down performance on the switch when legitimate traffic arrives. • A host caught in a loop is not accessible to other hosts on the network. • Because MAC address table is constantly changing with the updates from the broadcast frames, the switch does not know which port to forward the unicast frames out to reach the destination. • The unicast frames end up looping around the network as well. As more and more frames end up looping on the network, a broadcast storm occurs. • 8. When S2 receives the broadcast frames from S3 and S1, the MAC address table is updated once again, this time with the last entry received from the other two switches.
Issues with Redundancy: Broadcast Storms • A broadcast storm occurs when there are so many broadcast frames caught in a Layer 2 loop that all available bandwidth is consumed. • Consequently, no bandwidth is available bandwidth for legitimate traffic, and the network becomes unavailable for data communication. • A broadcast storm is inevitable on a looped network. • As more devices send broadcasts out on the network, more and more traffic gets caught in the loop, eventually creating a broadcast storm that causes the network to fail. • There are other consequences for broadcast storms. • Because broadcast traffic is forwarded out every port on a switch, all connected devices have to process all broadcast traffic that is being flooded endlessly around the looped network. This can cause the end device to malfunction because of the high processing requirements for sustaining such a high traffic load on the network interface card. VLANs logically segment the physical LAN infrastructure into different subnets (broadcast domains) Make sure you know the difference between broadcast packet and broadcast strom!!
Issues with Redundancy: Broadcast Storms • 1. PC1 sends a broadcast frame out onto the looped network. • 4. The PC4 broadcast frame also gets caught in the loop and ends up looping between all the interconnected switches, just like the PC1 broadcast frame. • 5. As more and more broadcast frames are sent out onto the network by other devices, more traffic gets caught in the loop, eventually resulting in a broadcast storm. • 6. When the network is fully saturated with broadcast traffic looping between the switches, new traffic is discarded by the switch because it is unable to process it. • 2. The broadcast frame ends up looping between all the interconnected switches on the network. • 3. PC4 also sends a broadcast frame out on to the looped network.
Issues with Redundancy: Duplicate Unicast Frames • 4. S1 does have a MAC address entry for PC4, so it forwards the frame out to PC4. • 5. S3 also has an entry in its MAC address table for PC4, so it forwards the unicast frame out Trunk3 to S1. • 6. S1 receives the duplicate frame and once again forwards the frame out to PC4. • 7. PC4 has now received the same frame twice. • 1. PC1 sends a unicast frame destined for PC4. • Unicast frames sent onto a looped network can result in duplicate frames arriving at the destination device. • 2. Switch S2 does not have an entry for PC4 in its MAC table, so it floods the unicast frame out all switch ports in an attempt to find PC4. • 3. The frame arrives at switches S1 and S3. • Most upper layer protocols are not designed to recognize or cope with duplicate transmissions. • In general, protocols that make use of a sequence-numbering mechanism assume that the transmission has failed and that the sequence number has recycled for another communication session. • Fortunately, switches are capable of detecting loops on a network. • The Spanning Tree Protocol (STP) eliminates these loop issues. You will learn about STP in the next section.
Real World Redundancy Issues: Loops in the Wiring Closet • You can prevent loops using the STP. • If STP has not been implemented in preparation for a redundant topology, loops can occur unexpectedly. • Network cables between access layer switches, located in the wiring closets, disappear into the walls, floors, and ceilings. • If the network cables are not properly labeled when they are terminated in the patch panel in the wiring closet, it is difficult to determine where the destination is for the patch panel port on the network. • Network loops that are a result of accidental duplicate connections in the wiring closets are a common occurrence. • The loop is localized to the switches that are interconnected. • The impact on the other switches may not be enough to disrupt legitimate communications, but it could noticeably affect the overall performance of the other switches. • There is an exception to this problem. An EtherChannel is a grouping of Ethernet ports on a switch that act as a single logical network connection (CCNP topics). • Because the switch treats the ports configured for the EtherChannel as a single network link, loops are not possible.
Real World Redundancy Issues: Loops in the Cubicles • Because of insufficient network data connections, some end users have a personal hub or switch located in their working environment. • Unlike the wiring closet, the administrator is not in control of how personal hubs and switches are being used or connected, so the end user can accidentally interconnect the switches or hubs. • In the example, the two user hubs are interconnected resulting in a network loop. • The loop disrupts communication between all devices connected to switch S1.
Spanning Tree Protocol (STP) Topology • Redundancyincreases the availability of the network topology by protecting the network from a single point of failure, such as a failed network cable or switch. • When redundancy is introduced into a Layer 2 design, loops and duplicate frames can occur. • Loops and duplicate frames can have severe consequences on a network. • The STP was developed to address these issues. • STP ensures that there is only one logical path between all destinations on the network by intentionally blocking redundant paths that could cause a loop (loop-free path). • A port is considered blocked when network traffic is prevented from entering or leaving that port. This does not include bridge protocol data unit (BPDU) frames that are used by STP to prevent loops. • The physical paths still exist to provide redundancy, but paths are disabled to prevent the loops from occurring. • The switches running STP are able to compensate for failures by dynamically unblocking the previously blocked ports and permitting traffic to traverse the alternate paths.
STP Topology • In the example, all switches have STP enabled: • 1. PC1 sends a broadcast out onto the network. • 2. Switch S3 is configured with STP and has set the port for Trunk2 to a blocking state. The blocking state prevents ports from being used to forward switch traffic, preventing a loop from occurring. Switch S2 forwards a broadcast frame out all switch ports, except the originating port from PC1, and the port on Trunk2, which leads to the blocked port on S3. • 3. Switch S1 receives the broadcast frame and forwards it out all of its switch ports, where it reaches PC4 and S3. S3 does not forward the frame back to S2 over Trunk2 because of the blocked port. The Layer 2 loop is prevented. • 1. PC1 sends a broadcast out onto the network. • 2. The broadcast is then forwarded around the network, just as in the previous animation. • 3. The trunk link between switch S2 and switch S1 fails, resulting in the previous path being disrupted. • 4. Switch S3 unblocks the previously blocked port for Trunk2 and allows the broadcast traffic to traverse the alternate path around the network, permitting communication to continue. If this link comes back up, STP reconverges and the port on S3 is again blocked.
STP Algorithm • STP uses the Spanning Tree Algorithm (STA) to determine which switch ports on a network need to be configured for blocking to prevent loops from occurring. • STA designates a single switch as the root bridge and uses it as the reference point for all calculations. • In the figure, S1, is chosen through an election process. • When STA has determined which paths are to be left available, it configures the ports into distinct port roles. • Root ports - Switch ports closest to the root bridge. • The root port on switch S2 is F0/1 between S2 and S1. • The root port on switch S3 is F0/1, between S3 and S1. • Designated ports - All non-root ports that are still permitted to forward traffic on the network. • ports F0/1 and F0/2 on S1 are designated ports. • S2 also has its port F0/2 configured as a designated port. • Non-designated ports - All ports configured to be in a blocking state to prevent loops. • Port F0/2 on switch S3 in the non-designated role and it is in the blocking state. • Root bridge • Root ports • Designated ports • Non-designated ports
The Root Bridge • Every spanning-tree instance has a switch designated as the root bridge. • Root bridge serves as a reference point for STP calculations. • All switches in the broadcast domain participate in the election process. • After a switch boots, it sends out BPDU frames containing the switch BID and the root ID every 2 seconds. • BID is made up of a priority value, an extended system ID, and the MAC address of the switch. • By default, the root ID matches the local BID for all switches on the network. • The root ID identifies the root bridge on the network. • Initially, each switch identifies itself as the root bridge after bootup. • As the switches forward their BPDU frames, adjacent switches read the root ID information from the BPDU frame. • If the root ID from the BPDU received is lower than the root ID on the receiving switch, the receiving switch updates its root ID identifying the adjacent switch as the root bridge. • The switch then forwards new BPDU frames with the lower root ID to the other adjacent switches. • Eventually, the switch with the lowest BID ends up being identified as the root bridge for the spanning-tree instance.
The Root Bridge http://www.cisco.com/en/US/docs/switches/lan/catalyst4500/12.1/13ew/configuration/guide/spantree.html#wpmkr1044356
Best Paths to the Root Bridge • When the root bridge has been designated for the spanning-tree instance, the STA starts the process of determining the best paths to the root bridge from all destinations in the broadcast domain. • The path information is determined by summing up the individual port costs along the path from the destination to the root bridge. • The default port costs are defined by the speed at which the port operates. • 10-Gb/s Ethernet ports have a port cost of 2, • 1-Gb/s Ethernet ports have a port cost of 4, • 100-Mb/s Fast Ethernet ports have a port cost of 19 • 10-Mb/s Ethernet ports have a port cost of 100. • Although switch ports have a default port cost associated with them, the port cost is configurable. • To configure the port cost of an interface, enter the spanning-tree cost value command in interface configuration mode. • The range value can be between 1 and 200,000,000. • In the example, switch port F0/1 has been configured with a port cost of 25 using the spanning-tree cost 25 interface configuration command on the F0/1 interface.
Best Paths to the Root Bridge (continue) • Path cost is the sum of all the port costs along the path to the root bridge. • The paths with the lowest path cost become the preferred path, and all other redundant paths are blocked. • In the example, the path cost from switch S2 to the root bridge switch S1, over path 1 is 19, while the path cost over path 2 is 38. • Because path 1 has a lower overall path cost to the root bridge, it is the preferred path. • STP then configures the redundant path to be blocked, preventing a loop from occurring. • To verify the port and path cost to the root bridge, enter the show spanning-tree privileged EXEC mode command. • The Cost field in the output is the total path cost to the root bridge. • This value changes depending on how many switch ports need to be traversed to get to the root bridge. • In the output, each interface is also identified with an individual port cost of 19. • Another command to explore is the show spanning-tree detail privileged EXEC mode command.
The BPDU Fields • The BPDU frame contains 12 distinct fields that are used to convey path and priority information that STP uses to determine the root bridge and paths to the root bridge. • The first four fields identify the protocol, version, message type, and status flags. • The next four fields are used to identify the root bridge and the cost of the path to the root bridge. • The last four fields are all timer fields that determine how frequently BPDU messages are sent, and how long the information received through the BPDU process is retained. • The example in the figure was captured using Wireshark. • The BPDU message is encapsulated in an Ethernet frame when it is transmitted across the network. • The 802.3 header indicates the source and destination addresses of the BPDU frame. • This frame has a destination MAC address of 01:80:C2:00:00:00, which is a multicast address for the spanning-tree group. • In the example, the root ID and the BID are the same in the captured BPDU frame. • This indicates that the frame was captured from a root bridge switch.
The BPDU Fields http://www.cavebear.com/archive/cavebear/Ethernet/multicast.html
The BPDU Process • Each switch in the broadcast domain initially assumes that it is the root bridge for the spanning-tree instance, so the BPDU frames sent contain the BID of the local switch as the root ID. • Each switch maintains local information about its own BID, the root ID, and the path cost to the root. • By default, BPDU frames are sent every 2 seconds. • When adjacent switches receive a BPDU frame, they compare the root ID from the BPDU frame with the local root ID. • If the root ID in the BPDU is lower than the local root ID, the switch updates the local root ID and the ID in its BPDU messages. • These messages serve to indicate the new root bridge on the network. • Also, the path cost is updated to indicate how far away the root bridge is. • For example, a Fast Ethernet switch port, the path cost would be set to 19. • If the local root ID is lower than the root ID received in the BPDU frame, the BPDU frame is discarded. • After a root ID has been updated to identify a new root bridge, all subsequent BPDU frames sent from that switch contain the new root ID and updated path cost. • That way, all other adjacent switches are able to see the lowest root ID identified at all times. • As the BPDU frames pass between other adjacent switches, the path cost is continually updated to indicate the total path cost to the root bridge. • Each switch in the spanning tree uses its path costs to identify the best possible path to the root bridge.
The BPDU Process • Step 1. Initially, each switch identifies itself as the root bridge. Switch S1 has the lowest priority of all three switches. Because the priority is the initial deciding factor when choosing a root bridge, S1 becomes the root bridge. If the priority of all the switches was the same, the MAC address would be the deciding factor. • Step 2. When switch S3 receives a BPDU from switch S2, S3 compares its root ID with the BPDU frame it received. The priorities are equal, so the switch is forced to examine the MAC address portion to determine which MAC address has a lower value. Because S2 has a lower MAC address value, S3 updates its root ID with the S2 root ID. At that point, S3 considers S2 as the root bridge. • Step 3. When S1 compares its root ID with the one in the received BPDU frame, it identifies the local root ID as the lower value and discards the BPDU from S2.
The BPDU Process • Step 4. When S3 sends out its BPDU frames, the root ID contained in the BPDU frame is that of S2. • Step 5. When S2 receives the BPDU frame, it discards it after verifying that the root ID in the BPDU matched its local root ID. • Step 6. Because S1 has a lower priority value in its root ID, it discards the BPDU frame received from S3.
The BPDU Process • Step 7. S1 sends out its BPDU frames. • Step 8. S3 identifies the root ID in the BPDU frame as having a lower value and therefore updates its root ID values to indicate that S1 is now the root bridge. • Step 9. S2 identifies the root ID in the BPDU frame as having a lower value and therefore updates its root ID values to indicate that S1 is now the root bridge.
BID Fields • The BID is used to determine the root bridge on a network. • The BID field of a BPDU frame contains 3 separate fields. • Each field is used during the root bridge election. 1. Bridge Priority • The bridge priority is a customizable value that you can use to influence which switch becomes the root bridge. • The switch with the lowest priority, which means lowest BID, becomes the root bridge (the lower the priority value, the higher the priority). • The default value for the priority of all Cisco switches is 32768. The priority range is between 1 and 65536; 1 is the highest priority. 2. Extended System ID • The early STP was designed for networks that did not use VLANs. • When VLANs started became common, the extended system ID field contains the ID of the VLAN with which the BPDU is associated. • The bridge priority values can only be multiples of 4096. • The extended system ID is added to identify the priority and VLAN of BPDU. 3. MAC Address • When two switches are configured with the same priority and have the same extended system ID (default setting), the switch with the MAC address with the lowest hexadecimal value has the lower BID. • It is recommended to configure the desired root bridge switch with a lower priority to ensure that it is elected root bridge.
BID Fields • the Priority-based decision in the figure. • In the example, S1 has a lower priority than the other switches; therefore, it is preferred as the root bridge for that spanning-tree instance. • Note: In the example, the priority of all the switches is 32769. The value is based on the 32768 default priority and the VLAN 1 assignment associated with each switch (1+32768). • the MAC Address-based decision in the figure. • When all switches are configured with the same priority, as is the case with all switches kept in the default configuration with a priority of 32768, the MAC address becomes the deciding factor for which switch becomes the root bridge. • The MAC address with the lowest hexadecimal value is considered to be the preferred root bridge. • In the example, S2 has the lowest value for its MAC address and is therefore designated as the root bridge for that spanning-tree instance.
Configure and Verify the BID • There are 2 methods used to configure bridge priority value. • Method 1 • To ensure the switch has the lowest priority value, use the spanning-tree vlan vlan-id root primary in global configuration. • The priority for the switch is set to the predefined value of 24576 or to the next 4096 increment value below the lowest bridge priority detected on the network. • If an alternate root bridge is desired, use the spanning-tree vlan vlan-id root secondary global configuration mode. • It sets the priority for the switch to the predefined value of 28672. • This ensures that this switch becomes the root bridge if the primary root bridge fails and the rest of the switches in the network have the default 32768 priority value defined. • Method 2 • Another method for configuring the bridge priority value is using the spanning-tree vlan vlan-id priority value global configuration mode command. • This command gives you more granular control over the bridge priority value. • The priority value is configured in increments of 4096 between 0 and 65536. • To verify the bridge priority of a switch, use the show spanning-tree privileged EXEC mode command. • In the example, the priority of the switch has been set to 24576. Also notice that the switch is designated as the root bridge for the spanning-tree instance. 24576 24576 20480 28672
Port Roles • There are 4 port roles that switch automatically configured for SPT process. 1. Root Port - Root port exists on non-root bridges and it is the port with the best path to the root bridge. • Only one root port is allowed per bridge. • S2 and S3 have root ports on the trunk links connecting back to S1. 2. Designated Port - The designated port exists on root and non-root bridges. • For root bridges, all switch ports are designated ports. • For non-root bridges, a designated port is the switch port that receives and forwards frames toward the root bridge as needed. • Only one designated port is allowed per segment. • S1 has both sets of ports for its 2 trunk links configured as designated ports. S2 also has a designated port configured on the trunk link going toward S3. 3. Non-designated Port - The non-designated port is a switch port that is blocked, so it is not forwarding data frames and not populating the MAC address table with source addresses. • A non-designated port is not a root port or a designated port. • For some variants of STP, the non-designated port is called an alternate port. • S3 has the only non-designated ports in the topology. • The non-designated ports prevent the loop from occurring. 4. Disabled Port - The disabled port is a switch port that is administratively shut down. • A disabled port does not function in the spanning-tree process. • There are no disabled ports in the example.
Port Roles • The STA determines which port role is assigned to each switch port. • the switch compares the path costs on all switch ports participating in the spanning tree. • The port with the lowest overall path cost to the root • is automatically assigned the root port role because it is closest to the root bridge. • When there are two switch ports that have the same path cost to the root bridge and both are the lowest path costs on the switch. • The switch uses the customizable port priority value, • if both port priority are the same it uses lowest port ID. • The port ID is the interface ID of the switch port. • For example, Port F0/1 and F0/2 on switch S2 have the same path cost value back to the root bridge. • However, port F0/1 on switch S2 is the preferred port because it has a lower port ID value. • The port ID is appended to the port priority. • For example, switch port F0/1 has a default port priority value of 128.1, where 128 is the configurable port priority value, and .1 is the port ID. Switch port F0/2 has a port priority value of 128.2, by default.
Configure Port Priority • You can configure the port priority value using the spanning-tree port-priority value interface configuration mode command. • The port priority values range from 0 - 240, in increments of 16. • The default port priority value is 128. • As with bridge priority, lower port priority values give the port higher priority. • In the example, the port priority for port F0/1 has been set to 112, which is below the default port priority of 128. • This ensures that the port is the preferred port when competing with another port for a specific port role.
Port Role Decisions • Switch S1 is the root bridge. • Switches S2 and S3 have root ports configured for the ports connecting back to S1. • After a switch has determined which of its ports is configured in the root port role, it needs to decide which ports have the designated and non-designated roles. • The root bridge automatically configures all of its switch ports in the designated role. • Other switches in the topology configure their non-root ports as designated or non-designated ports.
Port Role Decisions • Designated ports are configured for all LAN segments. • When two switches are connected to the same LAN segment, and root ports have already been defined, the two switches have to decide which port gets to be configured as a designated port and which one is left as the non-designated port. • The switches on the LAN segment in question exchange BPDU frames, which contain the switch BID.
Port Role Decisions • Generally, the switch with the lower BID has its port configured as a designated port, • while the switch with the higher BID has its port configured as a non-designated port. • However, keep in mind that the first priority is the lowest path cost to the root bridge and that only if the port costs are equal, is the BID of the sender. • As a result, each switch determines which port roles are assigned to each of its ports to create the loop-free spanning tree.
Verifying Port Roles and Port Priority • To verify the port roles and port priorities for the switch ports, use the show spanning-tree privileged EXEC mode command. • Switch port F0/1 and F0/2 are configured as designated ports. • The output also displays the port priority of each switch port. Switch port F0/1 has a port priority of 128.1.
Port States • Each switch port transitions through 5 possible port states and 3 BPDU timers. • The spanning tree is determined immediately after a switch is finished booting up. If a switch port were to transition directly from the blocking to the forwarding state, the port could temporarily create a data loop if the switch was not aware of all topology information at the time. 1. Blocking - The port is a non-designated port and does not participate in frame forwarding. • The port receives BPDU frames to determine the location and root ID of the root bridge switch and what port roles each switch port should assume in the final active STP topology. 2. Listening - STP has determined that the port can participate in frame forwarding according to the BPDU frames that the switch has received thus far. • At this point, the switch port is not only receiving BPDU frames, it is also transmitting its own BPDU frames and informing adjacent switches that the switch port is preparing to participate in the active topology. 3. Learning - The port prepares to participate in frame forwarding and begins to populate the MAC address table. 4. Forwarding - The port is considered part of the active topology and forwards frames and also sends and receives BPDU frames. 5. Disabled - The Layer 2 port does not participate in STP and does not forward frames. • The disabled state is set when the switch port is administratively disabled.
BPDU Timers • The amount of time that a port stays in the various port states depends on the BPDU timers. • Only the switch in the role of root bridge may send information through the tree to adjust the timers. • Hello time (2 seconds) • Forward delay (15 seconds) • Maximum age (20 seconds) • At power up: Every switch port goes through the blocking, listening and learning states. The ports then stabilize to the forwarding or blocking state. • [Tony] Time to take for converged is 30 seconds: • 15 sec Listening + 15 sec Learning • During a topology change: A port temporarily implements the listening and learning states for a specified period called the "forward delay interval.“ • They must also allow the frame lifetime to expire for frames that have been forwarded using the old topology • [Tony] Time to take for converged is 50 seconds: 20 sec Blocking (max age) + 15 sec Listening + 15 sec Learning
Network Diameter • Switch diameter is the number of switches a frame has to traverse to travel from the two farthest points on the broadcast domain. • The default BPDU timers allow adequate time for convergence in a network with a switch diameter ofSEVEN. • A seven-switch diameter is the largest diameter that STP permits because of convergence times. • Convergence in relation to spanning tree is the time it takes to recalculate the spanning tree if a switch or a link fails. • Typically, you do not adjust the BPDU timers nor reconfigure the network diameter. • It is recommended that the BPDU timers not be adjusted directly because the values have been optimized for the 7-switch diameter. • Adjusting the spanning-tree diameter value on the root bridge to a lower value automatically adjusts the forward delay and maximum age timers proportionally for the new diameter. • To configure a different network diameter for STP, use the spanning-tree vlan vlan id root primary diameter value global configuration command on the root bridge switch.
Cisco PortFast Technology • PortFast is a Cisco technology. When a switch port configured with PortFast • The port is configured as an access port, • The port transitions from blocking to forwarding state immediately, bypassing listening and learning states. • Using a feature called BPDU guard, if an interface configured with PortFast receives a BPDU frame, spanning tree can put the port into the blocking state. • You can use PortFast on access ports, which are connected to a single workstation or to a server, to allow those devices to connect to the network immediately rather than waiting for spanning tree to converge. • Without PortFast, a PC can send a DHCP request before the port is in forwarding state, denying the host from getting a usable IP address and other information.
Cisco PortFast Technology • To configure PortFast on a switch port, enter the spanning-tree portfast interface configuration on each interface that PortFast is to be enabled • To verify that PortFast has been enabled for a switch port, use the show running-config privileged EXEC command. • The absence of the spanning-tree portfast command in the running configuration for an interface indicates that PortFast has been disabled for that interface. • PortFast is disabled on all interfaces by default. • [Tony] It means, by default, switch will take 30 seconds to go through STA and no data will be forwarded within this 30 seconds
STP Convergence Steps • Initially, all switch ports are configured for the blocking state, which by default lasts 20 seconds. This is done to prevent a loop from occurring before STP has had time to calculate the best root paths and configure all switch ports to their specific roles. While the switch ports are in a blocking state, they are still able to send and receive BPDU frames so that the spanning-tree root election can proceed. • The previous section described the components that enable STP to create the logical loop-free network topology. In this section, you will examine the whole STP process from start to finish. • To understand the convergence process more thoroughly, it has been broken down into three distinct steps: • Step 1. Elect a root bridge • Step 2. Elect root ports • Step 3. Elect designated and non-designated ports
Step 1. Electing a Root Bridge • The first step of the spanning-tree process is to elect a root bridge. • The root bridge is the basis for all spanning-tree path cost calculations. • A root bridge election is triggered after a switch has finished booting up, or when a path failure has been detected on a network. • Immediately after the switches have finished booting up, they start sending BPDU frames in an attempt to become the root bridge. • Initially, all switches assume that they are the root bridge for the broadcast domain. • These BPDU frames are sent every 2 seconds based on the default hello timer value. • As each switch receives the BPDU frames from its neighboring switches, they compare the root ID from the received BPDU frame with the root ID configured locally. • If the root ID from the received BPDU frame is lower than the root ID it currently has, the root ID field is updated indicating the new best candidate for the root bridge role.
Step 1. Electing a Root Bridge • After the root ID field is updated on a switch, the switch then incorporates the new root ID in all future BPDU frame transmissions. • This ensures that the lowest root ID is always conveyed to all other adjacent switches in the network. • Even though the root bridge election process has completed, the switches continue to forward their BPDU every 2 seconds. • Each switch is configured with a max age timer that determines how long a switch retains the current BPDU configuration. • If a switch fails to receive 10 consecutive BPDU frames from one of its neighbors, this triggers another spanning-tree root bridge election.
Step 1. Electing a Root Bridge • As you review how STP elects a root bridge, recall that the root bridge election process occurs with all switches sending and receiving BPDU frames simultaneously. • Performing the election process simultaneously allows the switches to determine which switch is going to become the root bridge much faster. Root Bridge
Verify Root Bridge Election • When the root bridge election is completed, you can verify the identity of the root bridge using the show spanning-tree privileged EXEC mode command • switch S1 has the lowest priority value of the three switches, so we can assume it will become the root bridge. • You can see that the BID matches the root ID, confirming that S1 is the root bridge. • switch S2 shows that the root ID matches the expected root ID of switch S1, indicating that S2 considers S1 the root bridge. • switch S3 shows that the root ID matches the expected root ID of switch S1, indicating that S3 considers S1 the root bridge.
Step 2. Elect Root Ports • Every switch in a spanning-tree topology, except for the root bridge, has a single root port defined. • The root port is the switch port with the lowest path cost to the root bridge. • Normally path cost alone determines which switch port becomes the root port. • Switch ports with equivalent path costs to the root use the configurable port priority value. • They use the port ID to break a tie. • When a switch chooses one equal path cost port as a root port over another, the losing port is configured as the non-designated to avoid a loop.
Step 2. Elect Root Ports • The process of determining which port becomes a root port happens during the root bridge election BPDU exchange. • Path costs are updated immediately when BPDU frames arrive indicating a new root ID or redundant path. At the time the path cost is updated, the switch enters decision mode to determine if port configurations need to be updated. • The port role decisions do not wait until all switches settle on which switch is going to be the final root bridge. • As a result, the port role for a given switch port may change multiple times during convergence, until it finally settles on its final port role after the root ID changes for the last time.
Verify the Root Port • You can verify the configuration of the root ports using the show spanning-tree privileged EXEC mode command. • switch S1 has been identified as the root bridge. • The switch S2 F0/1 port and switch S3 F0/1 port are the two closest ports to the root bridge and, therefore, should be configured as root ports. • switch S1 reveals that it is the root bridge and consequently does not have any root ports configured. • switch S2 shows that switch port F0/1 is configured as a root port. • switch S3 shows that switch port F0/1 is configured as a root port.
Step 3. Electing Designated Ports and Non-Designated Ports • Each segment in a switched network can have only one designated port. When two non-root port switch ports are connected on the same LAN segment, a competition for port roles occurs. • Generally, when a switch port is configured as a designated port, it is based on the BID. However, keep in mind that the first priority is the lowest path cost to the root bridge and that only if the port costs are equal, is the BID of the sender. • The losing switch configures its switch port to be non-designated and, therefore, in the blocking state to prevent the loop from occurring.