Download
1 / 55
550 likes | 641 Views
Sage Demo 1 Terrain, Water, Console. SAGE Lecture Notes Ian Parberry University of North Texas. Sage Demo 1. Demo 1 has four functions Getting started writing a game Creating terrain Creating water Creating a console. Key Topics. Play Controls Changes from Demo 0 New and Changed Files

E N D
Sage Demo 1Terrain, Water, Console SAGE Lecture Notes Ian Parberry University of North Texas
Sage Demo 1 • Demo 1 has four functions • Getting started writing a game • Creating terrain • Creating water • Creating a console
Key Topics • Play Controls • Changes from Demo 0 • New and Changed Files • Water • Terrain • Console
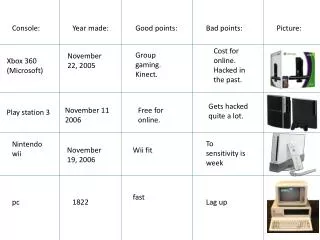
Play Controls • Input Table 1: Game Controls
Play Controls Cont. • Console Commands
Play Controls Cont. • Console Commands Cont.
Incremental Changes • Models – S3D Model Loading • Terrain – New Class • Water – New Class • Console – New Class • Derived Game Class - Rewritten
New and Changed Files • Ned3D/Source • Game.h / Game.cpp • Sage/Source/Terrain • Terain.h / Terrain.cpp • HeightMap.h / HeightMap.cpp • TerrainSubMesh.h / TerrainSubMesh.cpp • Sage/Source/Water • Water.h / Water.cpp
New and Changed Files • Sage/Source/Console • Console.h / Console.cpp • ConsoleCommands.cpp • ConsoleCommentEntry.h / ConsoleCommentEntry.cpp • ConsoleDefines.h • ConsoleFunctionEntry.h / ConsoleFunctionEntry.cpp • ParameterList.h • TextParser.h / TextParser.cpp
Water Design • Rendering the Mesh • Rendered as a plane partially above the terrain • Texture Translation • Once per frame the texture coordinates are changed to give the illusions that the water is moving • Transparency • The water will be partially transparent, so it will have an alpha value of less then 1.0, but greater than 0.0 (otherwise, you couldn’t see it)
Water Class Overview • Water() – Constructor • Initializes the water class • process() • Update the water’s texture and geometry • render() • Draws the water to the screen
Water::Water() • Allocates vertex and index buffers • Sets up the index buffer // create vertex and index buffers m_vertexBuffer = new LitVertexBuffer(numVerts, true); m_indexBuffer = new IndexBuffer(2 * numQuads); // Fill in index buffer if (m_indexBuffer->lock()) { //set triangles for (int i = 0 ; i < numVertsPerSide-1 ; i++) { for (int j = 0 ; j < numVertsPerSide-1 ; j++) { (*m_indexBuffer)[i*(numVertsPerSide-1) + j].index[0] = i*numVertsPerSide+j; (*m_indexBuffer)[i*(numVertsPerSide-1) + j].index[1] = (i+1)*numVertsPerSide + j + 1; (*m_indexBuffer)[i*(numVertsPerSide-1) + j].index[2] = (i+1)*numVertsPerSide + j; (*m_indexBuffer)[numQuads+i*(numVertsPerSide-1)+j].index[0] = i*numVertsPerSide + j; (*m_indexBuffer)[numQuads+i*(numVertsPerSide-1)+j].index[1] = i*numVertsPerSide + j + 1; (*m_indexBuffer)[numQuads+i*(numVertsPerSide-1)+j].index[2] = (i+1)*numVertsPerSide + j + 1; } } m_indexBuffer->unlock(); // unlock }
Water::process() • Maintains Drift Animation – see Water.cpp Lock VertexBuffer for z = 0 to vertsPerSide - 1 for x = 0 to vertsPerSide - 1 { Vertex.position = (x,0.0f,z) Vertex.texCoords = (x,z) Vertex.color = ARGB(128,255,255,255) VertexBuffer[x + z * vertsPerSide] = Vertex } Unlock VertexBuffer Figure 7: Filling the Vertex-Buffer
Water::render() • Alpha Blending • setBlendEnable() – Enables/Disables alpha blending (transparency) • Texturing • selectTexture() – Specifies what texture to use when drawing the water • Lighting • setLightEnable() – Enables/Disables lighting on the water
Possible Improvements • The following things are a few possible improvements you may consider adding to the water class • Reflections • Ripples • Bump Mapping • Waves • In Demo 2 we will add some of these using pixel and vertex shaders
Terrain Design Overview • The terrain design is composed of 4 parts • Terrain Class • Height Map • Level Of Detail (LOD) • Submeshes (for LOD)
Level of Detail (LOD) • LOD is a way of decreasing the number of polygons that need to be drawn for the terrain by using fewer triangles to draw items that are farther away from the camera. • Replace 8 small triangles with 2 large triangles • Repeat the texture as necessary
LOD 0: 32 Triangles LOD 1: 8 Triangles LOD 2: 2 Triangles LOD Cont. • Layout • Breakdown Figure 12: Level of Detail Grid Figure 13: Rendering at different LODs
LOD cont. • The issue with using an LOD terrain algorithm is that it creates cracks in the terrain where the level of detail drops off
LOD Cont. • Close up view of a crack in the terrain caused by the LOD
LOD Cont. • Solution • Find a crack • Move the points on the higher resolution section of the terrain to match the triangle on the lower resolution section
LOD Cont. • Finished Product
Height Maps • A height map is a simple way to represent a terrain that uses an a 2D array of height values for (int y = 0 ;y < m_nSide - 1; y++) { for (int x = 0 ;x < m_nSide - 1; x++) { m_fHeight[y][x] = ((float)(0x000000FF & bitmap.getPix(x,y)) / 256.0f) * maxHeight; } } Figure 22: Filling the height array
SubMeshes • Breaks up the terrain into smaller meshes to use with the LOD • Each section has an LOD associated with it that reduces its number of triangles based on what LOD the subMesh is at. • Constructor builds a flat layout of the subMesh with the specified LOD
SubMeshes Cont. • setMesh() – Fills the subMesh with vertex data • render() – Checks for cracks, then renders the subMesh constunsignedint LODCRACK_TOP = 0x04; constunsignedint LODCRACK_RIGHT = 0x8; constunsignedint LODCRACK_BOTTOM = 0x10; constunsignedint LODCRACK_LEFT = 0x20; constunsignedint LODCRACKPRESENT = 0x3C; Figure 23: LOD crack flags if (lodcrack & LODCRACKPRESENT) { ...... Code that fills in the crack ....... } Figure 24: Checking for a crack
Terrain Class • Brings the HeightMap and SubMesh classes together with the LOD system to build the terrain • The height map is split into several sub meshes based on their distance from the camera • The sub meshes actually do the rendering, the Terrain class just tells them to render
Terrain Class Cont. • Terrain::Terrain() – The terrain constructor performs the following tasks • Loads a height map from a file • Creates a vertex array • Calculates the terrains normal vectors • Calculates the terrains position • Calculates the terrains texture coordinates
Terrain::Terrain() Cont. • Loading the height map • The height map is created from an image file passed into the constructor by the HeightMap class • Terrain sub meshes are initialized with dimensions of the height map • Calculate the optimal level of detail float minTrianglesPerRender = 128; float triPerSubmesh = (float)m_nSubmeshSide * m_nSubmeshSide * 2; float result = log(triPerSubmesh/minTrianglesPerRender) / log(4.0f); m_nMaxLOD = (int)(result + 0.5f) + 1; Figure 26: Calculating optimal levels of resolution
Terrain::Terrain() Cont. • Calculating the normals for the terrain • The normal of the vertex in the terrain is calculated by averaging the normals of the connected triangles • SubMesh Data • Two dimensional array implemented using a triple pointer that represents the subMeshes and their respective LODs TerrainSubmesh*** m_pSubmesh;// Stores all TerrainSubmesh objects Figure 27: m_pSubmesh delaration as a TerrainSubmesh triple pointer
Terrain::Terrain() Cont. • SubMesh Data Cont. • The first dimension or the SubMesh LOD array represents the level of detail and the second dimension represents every sub-section. • In other words, we could get a pointer to the third sub-section with an LOD of 2 with the statement seen in Figure 28. m_pSubmesh[2][3];// gets third sub-section TerrainSubmesh object at LOD 2 Figure 28: Example of getting a pointer to the 3rd sub-mesh of level of detail 2
Terrain::Terrain() Cont. • SubMesh Data Cont. • The last thing is to create a two dimensional array of unsigned integers to help use with the LOD rendering process. • This array provides one unsigned integer for each sub-section holding the level of detail that the sub-section should be rendered at and information about how to render that sub-section to avoid cracks.
Level of Detail Crack Locations Terrain::setCameraPos • Calculates the LOD for all submeshes based on the given camera position • Calculates where the cracks will be located and stores them in an array for future use • Figure 29 shows how the first 2 bits represent the level of detail and the next 4 bits represent the presents of cracks along a each side. The example in Figure 29 shows a sub-section with a LOD of 2 with cracks along its right and left sides. Figure 29: How the TerrainSubmesh render information is stored
Terrain::render() • Checks flags to see if its render states need updating • These flags are modified by the console • Renders all the submeshes of the terrain // Render all the parts for (int i = 0 ; i < m_partCount ; ++i) { gRenderer.selectTexture(m_partTextureList[index]); // Render the part gRenderer.render( m_vertexBuffer, 0, m_partMeshList[index].getVertexCount(), m_indexBuffer, m_indexOffsets[index], m_partMeshList[index].getTriCount()); }
Console • A command prompt available at run time to execute specific commands. • Helps with the debugging process
Console Functions • The following are a few functions that could be implemented in a console • Turn On/Off wireframe mode • Turn On/Off FPS (frames per second) display • Turn On/Off Lighting • Add objects to the scene • Change an object’s position
Console Benefits • Programming without a console results in a large number of key bindings that can get confusing • Changing the way graphics are displayed on the fly make it easier to find problems
Console Design Overview • Display – The user must be able to see the console and text on the screen • Adding Functions – The developer must be able to easily add custom commands • Calling Functions – The user must be able to type commands into the console to execute these functions • Help Commands – The user must be able to get information about a command
Display • The console consists of the following display elements • A background image • This makes the console and text easier to see • A multi-line text display that shows previous commands and their output • A text prompt that takes user input • The tilde key (‘~’) displays/hides the console • After typing in a command, the enter key sends the command to the console to be processed
Adding functions • A console function consists has four parts to it • The command name • The parameters’ type • The parameters • A pointer to the function that it calls
Calling Functions • After a command is entered into the console, the console system must perform a few operations • A command lookup based on the name of the command • A type check on each of the parameters • This keeps the console from having negative side effects related to the user supplying the wrong data for the command
Help Command • Allows the user to see a list of available commands • This can be done in the SAGE console by typing ‘help –a’ • Also give help on a specific command • This can be done in the SAGE console by typing ‘help command_name’ • Gives a brief description of the command as well as a list of its parameters and their types • A commands help contents must be specified in the console systems xml file
Console Implementation Overview • The following utility functions needed to be created to help in the development of a console for SAGE • ParameterList – Stores parameters as they are passed to custom functions • TextParser – Controls parsing text into parameters type and values
ParameterList Structure • Stores parameter values so we can pass them into custom functions struct ParameterList { std::string Strings[MAX_PARAMETERS]; ///< holds string parameters int Ints[MAX_PARAMETERS]; ///< holds integer parameters float Floats[MAX_PARAMETERS]; ///< holds float parameters bool Bools[MAX_PARAMETERS]; ///< holds boolean parameters Vector3 Vector3s[MAX_PARAMETERS]; ///< holds Vector3 parameters int numStrings; ///< number of string parameters available int numInts; ///< number of integer parameters available int numFloats; ///< number of float parameters available int numBools; ///< number of boolean parameters available int numVector3s; ///< number of vector3 parameters available int numParameters; ///< number of parameters available };
TextParser Class • Converts strings into specific parameter types • This converted data is passed into the console functions through the ParameterList structure