Download
1 / 27
290 likes | 418 Views
ELECTRIC GUITAR WORKSHOP. 1.GEAR. A.PICKUPS

E N D
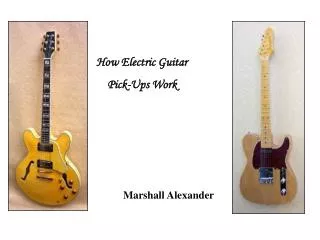
1.GEAR A.PICKUPS Humbucking - Humbuckers are essentially 2 single coil pickups that share a large magnet at their base. Each coil of a humbucker is wrapped differently, so that the signals they create cancel each other out. The only purpose in creating humbuckers was to "buck" the hum that single coils created single coil- half a humbucker…
1.GEAR NECK & BRIDGE pickups: Neck pickups - will sound warmer and deeper Bridge pickups - will be have more high end Different guitars have different pickup combinations, some have 2 some have 3 some have more…
1.GEAR Some examples…
1.GEAR B. WOOD - The type of wood your guitar is made of will affect your tone, and sustain. (Ex Mahogany: It’s constant density compresses the mids a little, and this can be considered a thick sound, because it does still produce good lows and low mids. Mahogany: It’s constant density compresses the mids a little, and this can be considered a thick sound, because it does still produce good lows and low mids.. ) Some necks are bolted on some are glued and attached. This also affects tone and sustain.
1.GEAR C. STRING GAUGE: Light, medium, heavy etc. Basically just describes how easy they are to bend. The lighter you go the easier they bend, but go too light and you sacrifice sustain and tone. D. CABLES – no need for super $, but don’t cheap out either...they do make a difference.
1.GEAR E. PEDALS/EFFECTS Types of pedals + order of typical placement (unless you have multi-effects): 1. Dynamic Range – Compression 2. EQ – Wah wah Pedal, Equalizer 3. Drive – Overdrive, Distortion, Fuzz 4. Modulation – Phaser, Flanger, Chorus 5. Time-Based – Reverb, Delay
1.GEAR F. AMPS - Types of amps: Solid State Vs. Tube Solid State amplifiers rely on transistors, and sometimes software, to provide the tone. Can sound harsh. Tube amplifiers use a series of old fashioned tubes to provide power, distortion, and tone. Generally have much better tone (warmer and more natural)
1.GEAR GEAR ISN’T EVERYTHING! HAHA, I’m one to talk:P Ok maybe it is a portion of it; but, seriously when you’re a guitarist you’re always eyeing something. Owning gear, isn’t the cool part of being a guitarist. Practicing and actually being able to play that nice piece of gear is what you’re aiming for here.
2.ELECTRIC IN WORSHIP First things first …attitude towards service. Why am I playing the electric guitar during worship? Who am I playing for? Am I helping add to the worship atmosphere, or am I taking away from it?
2.ELECTRIC IN WORSHIP After your attitude is right, next step… TUNE YOUR INSTRUMENT. Nothing sounds worse than an out of tune guitar. Next check your levels; amp, and pedals if you have them. You don’t want a volume surprise during worship time. KNOW YOUR GEAR
2.ELECTRIC IN WORSHIP The role of the electric guitar in worship. The guitar is one of the most versatile instruments, so it can be used for many different purposes within a band. - adds energy, articulation, can be used as lead/melodic or rhythm instrument -You can even play the bass line and melody at the same time, like you would on piano Generally the electric is reserved as a background/lead instrument.
2.ELECTRIC IN WORSHIP Tones you may use in contemporary worship music: -Clean -Clean with delay/reverb -overdriven -overdriven with delay FIND YOUR UNIQUE TONE! – From your gear to your finger tips.
3. TECHNICALITY Some times less is more…sometimes more is more :) Listen to the song and the rest of your band Practice at home so you are comfortable playing live
3. TECHNICALITY Basic things to help your electric playing: A. RHYTHM – with any instrument. If you don’t play in time with the music, and the rest of the band, it becomes a distraction during service. One helpful tool is to practice playing/strumming guitar and tapping your foot at the same time ( or better yet to a metronome). Practice playing leads if you are comfortable while tapping your foot. Practice different time signatures (eg. 4/4, 3/4)
3. TECHNICALITY B. DYNAMICS – Just like rhythm, Dynamics is one thing universal to all instrument playing. If you don’t change dynamics while you play your instrument can sound robotic…kinda like those midi cell phone ringtones. In dynamics I am mainly talking about volume in this case. Following are other examples which can make your playing more dynamic.
3. TECHNICALITY C. PICKING – Don’t overlook the right hand’s importance. Practice different picking exercises. Try to get comfortable with alternate picking. (changing your direction of stroke each stroke.) Practice until you are able to pick the desired string without looking at your right hand. Tip: Picking movement should all be in the wrist and fingers…not the whole forearm
3. TECHNICALITY D. PALM MUTING – exactly that, putting the strings with your palm E. HAMMER ONs and PULL OFFS – Play note, hammer on with next finger. Pull offs, Play a note then release finger to fretted note below it. F. BENDS – Try bending up to a note, or bending down to a note. It makes it more interesting. Even try sliding to a desired note.
3. TECHNICALITY G. FRETBOARD – Try and memorize all the notes on your fret board. H. SCALES – Learn different scales (major, pentatonic, minor etc) I. CHORDS - Learn your chords so you can switch between chords effortlessly, and on the fly. Learn each chord in more than one position on the neck. This will allow you to add more variety to the song. (eg, if the leader is playing acoustic guitar you can play the same chord in another voicing to accent the chord, without chord overkill) Octaves can be a good substitute for chords, on lead guitar
3. TECHNICALITY J. MICING YOUR AMP – Generally you mic the electric amp, and feed that through the PA system. Your amp therein becomes your personal monitor. FIND YOUR UNIQUE STYLE! Now you have covered the basic techniques you might come across in a worship setting. Now GO PRACTICE :)
4. TIPS PLAYING LIVE In contemporary worship music there are a lot of easy tricks you can use to help add to the worship atmosphere. A. ATMOSPHERE - Delay, and reverb effects can help a lot to add ‘atmosphere’ and fill the empty space sonically. B. REPETITION - Use repeating themes (leads) for certain sections. (Ex. Have the same riff played throughout the verses of the song. Use the same rhythm strum at chorus. Etc.)
4. TIPS PLAYING LIVE C. COMPARE & CONTRAST - Listen to what the other musicians are doing, can you do something to accent, harmonize, or contrast it (in a way that makes it more interesting, either rhythmically or with a riff)? D. INTENSITY - Look at the song as a journey. Where does the song to peak (volume, and intensity wise)? Pick your places to play. Overplaying can crowd a song. Ex..( If you play ALL OUT during the verse; then, when you want to build in the chorus you will have no room to build on)
4. TIPS PLAYING LIVE E. MAD SKILLS - Work on your weaknesses at home, and practice your strengths during worship. Playing live is one of the best chances you will get to practice/perfect your art. F. SOLOS – If it is an upbeat song it will probably be faster and more intense, or in a slower song maybe the lead in melody before it begins, or during the middle in a reflective portion of the song. Solos generally build in intensity to a climax, kind of like a story.
4. TIPS PLAYING LIVE I. IMPROVISATION – This might not be for everyone, but once you are comfortable and confident in knowing your fret board, and scales, you can try improvising on the fly along to music. Usually you may improvise leads, but you can chord on the fly too if you know your notes, and come up with your own chords. It’s important to listen to the band while you improvise, remember your goal is to add to the worship atmosphere, not take away from it.
4. TIPS PLAYING LIVE H. FOCUS – Playing live, it is really easy to get caught up in just that…PLAYING. Try and be prepared enough, that you can play, and worship God at the same time. That will require a certain amount of preparation in advance so you are not freaking out worrying about the next note, at every note.
4. TIPS PLAYING LIVE THROW THE MUSICIAN PRIDE OUT! You will most likely get feedback, whether that is positive or negative, but don’t let that become your focus; instead let it be constructive. Take it as it is and move on. fin*
Q & A Ask away :)