Download
1 / 32
320 likes | 463 Views
1. Start by opening your Internet Explorer browser, then type in the address bar: www.yahoogroups.com . www.yahoogroups.com . 2. You will arrive at the Yahoo! Groups Page, locate Find a Yahoo! Group. Then type in TitleV_NA_CA in the search bar and click search. TitleV_NA_CA .

E N D
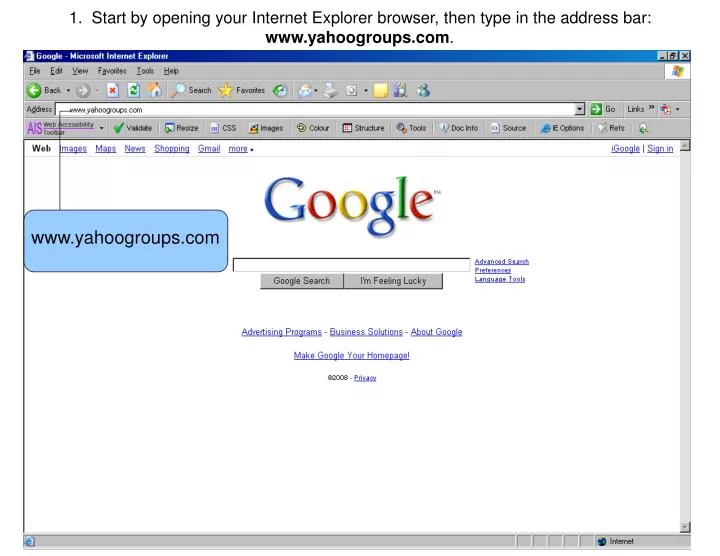
1. Start by opening your Internet Explorer browser, then type in the address bar: www.yahoogroups.com. www.yahoogroups.com
2. You will arrive at the Yahoo! Groups Page, locate Find a Yahoo! Group. Then type in TitleV_NA_CA in the search bar and click search. TitleV_NA_CA
3. At the Yahoo! Groups Search Results Page, click on the link inside the Groups box titled, “Title V_NA_CA.” Click on the link “TitleV_NA_CA”
4. This link will take you to the Yahoo! Groups Homepage for the TitleV_NA_CA Group. To join this group click on the Join This Group! button. Click on the button “Join This Group!”
5. You will arrive at the sign in page for Yahoo! Groups. If you don’t have a Yahoo! ID, you will need to sign up for one by clicking on the Sign Up link. Click on the link “Sign Up”
6. Register for your Yahoo! ID by filling out the requested information. Fill out all questions The alternative email address should be one where you want messages from this group site to be sent.
7. Once the form is completed, check the checkbox “Do you agree?” And then click on the Create My Account button. Check the box, then click “Create My Account”
8. You will arrive at a page stating congratulations, which means your account has been created. To proceed click the “Continue” button. October 20, 2008 Happy Days Click the “Continue” button
9. Notice that you are now signed in with your new Yahoo! ID. Read and verify the information. You are signed in “Welcome, mcahwebmaster”
10. There will be a section where you can send a comment to the Group Owner. The alternative email address should be one where you want messages from this group site to be sent. Leave Comment Select from one of the choices below.
11. After completing the information, click the “Join” button at the bottom of the page. Click “Join”
12. After clicking join, you will arrive at a page stating “Membership Pending”. This means that the Owner/Moderator of the TitleV_NA_CA Group must add you as member before you can post or read messages within the group. Membership Pending
13. You will not be able to access anything within the group site if you are not a member. Awaiting for approval.
14. After your membership is approved you will arrive at Group’s Home Page. Group’s “Home” Page.
15. As a member, the left menu bar becomes active. You can select from any of the options available in the left menu bar. Left menu bar becomes active.
16. If you select the link “Messages” from the left menu bar, you will be able to read messages that were posted by other members. Click on “Messages” to read posted messages.
17. To post a message click on the link “Post” from the left menu bar. Fill out the subject line and body text of the message. Click on “Post” to create a new message. Fill out the subject line and body text.
18. When you have completed your message, click preview if you would like to preview your message. If not, click send. Click “Send”.
19. Click on the “Continue” button to proceed. Click “Continue”.
20. After clicking the “Continue” button, you will be automatically taken back to the “Messages” Page where you can view your post. The newest post will appear at the bottom of the messages. Click on link to view.
21. Once you click on the post you would like to read, you will have the option to reply or forward the message. Select the “Reply” button or “Forward” link below.
22. If you choose to reply to a message you can type in your comments in the body text on top of the current posting.. Type in your comments here.
23. Once your replymessage is completed, click preview if you would like to preview your message. If not, click send. Click “Send”.
24. Click on the “Continue” button to proceed. Click “Continue”.
25. After you click “continue”, you will be brought back to the current message. Now if you look below the message box you will see an “Expand Messages” box. This is where replies to messages will be posted. Replied to message is now posted.
26. To view or uploaded files to the Group site, select the link “Files” from the left menu bar. To upload a file, click on the link “Add File”. Click on “Files” to view/upload files. Click link “Add File” to upload a document.
27. Select the link “Photos” from the left menu bar to view current photo albums. To create an album, click on the link “Create Album” or to add a photo, click the link “Add Photo”. Click on “Photos” to view/upload photos. Click on “Add Photo” or on “Create Album”.
28. Select the link “Links” from the left menu bar to view current links or add new links. Add new link or new folder. Click on “Links” to view/add new links.
29. Select the link “Database” from the left menu bar to view current tables or to create a table. Create a table. Click on “Database” to view/create tables.
30. Select the link “Polls” from the left menu bar to view Open and Closed Polls or to create a Poll. Create a poll. Click on “Polls” to view Open & Closed Polls.
31. Select the link “Members” from the left menu bar to view current members of the group. Click on “Members” to view members of the group. Moderators will have a crown next to their ID.
32. Select the link “Calendar” from the left menu bar to view current events or tasks for the group. Click on “Calendar” to view events and tasks. Click on link to add an event or to add a task.