Download

1 / 27
270 likes | 537 Views
Blood Spatter Activity. Introduction. “ In the world of serious crime, nice clean fingerprints don’t come around that often.

E N D
Blood Spatter Activity Introduction
“In the world of serious crime, nice clean fingerprints don’t come around that often. • Investigators have to work with what they have-be it a footprint or a shred of DNA, and the science of forensics is constantly evolving to help us understand the most impenetrable of crime scenes. • Meet the blood-spatter expert, the foot morphologist, and the forensic dentist, and see how their painstaking work is catching the ones who got away.”
THE CRIME SCENE • “On the night of August 16, 1991, in a house in Apohaqui, New Brunswick, in a case that shocked a small town community, blood splatter expert Pat Laturnus was called in to investigate a tragic accident that had left a woman dead. • Her husband was distraught but something about his story was not adding up and the evidence began to tell another story altogether. . . .”
Let’s take a look at the crime scene as it unfolds. . . • http://www.thehistorychannel.co.uk/site/tv_guide/full_details/Crime/programme_2728.php
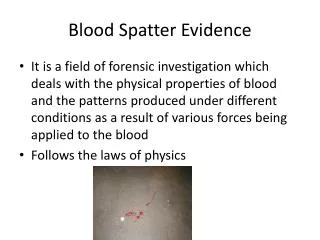
Blood Splatter Evidence Activity • Blood spatter evidence plays a key part in forensic analysis. We are going to see how reliably we can predict the height of a blood drop of known diameter, if we are able to measure diameter and precisely plot the relationship between these two variables.
Introduction continued…… • Blood drop evidence has been collected from a piece of paper laid on the floor, and blood droplets were released from perpendicular locations of various heights. • We will assume that DNA fingerprinting has already been used to determine that these drops came from our victim.
Directions for Analysis of Blood Drop Size • Data collection will be done in a small group. • Each group will receive a copy of the results of blood dropped from heights of 0.5m, 1.0m, 1.5m, 2.0m, 2.5m, and 3.0m.
Analysis continued….. • Measure the diameter (in mm) of the drop for each of the different distances dropped. • Fill in the data table on your worksheet. • Follow the directions to generate a regression model that best fits your data.
The demise of John Wayne John Wayne was wounded while trying to rescue his sister from Apache Indians. His body has not been recovered. In an attempt to recreate the tragedy, we have asked forensic/math students (you) to determine the height of the wound from blood spatter evidence left at the scene.
Blood spatter evidence recovered. • Determine the diameter of the blood spatter evidence collected from the scene and determine the height from which the blood drop fell. (This may reflect the height of the wound and help determine the site.)
Article Review: • Read “Bloodstain pattern analysis tutorial” by J. Slemko Forensic Consulting. • Complete the guided reading questions on your worksheet.
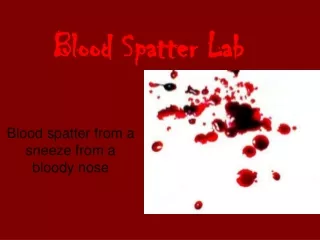
BLOOD SPATTER LABRelationship Between Blood Drop Shape and Impact Angle • Materials Needed per Group • Simulated Drip and Projected Blood • 5 X 8 notecards • 15 cm and 30 cm rulers • Impact angle apparatus • Tape
Assembling the Impact angle apparatus • Tape one end of the clipboard to a table by making a hinge out of tape. The clipboard should be right at the edge of the table. Hold the protector to the edge of the clipboard so that the protractor is perpendicular to the table top and aligned so that the center of the protractor is at the edge of the hinged-end of the clipboard. • See the figure in the next slide.
Impact Angle Apparatus Protractor Clipboard 60° 30º Table Tape
Select an Impact Angle to Study • Your data table (on your worksheet) includes angles from 10° to 90°. • Once you have selected an impact angle, indicate the angle on the card and then attach the card to the board.
Clipboard Clip Notecard Clipboard
Directions continued…. • Set the angle of the board using the protractor so that the board will have the correct impact angle. You will need to work together as a team to achieve this. • To obtain the desired impact angle, set the impact angle board to a protractor setting of 90° minus the desired impact angle. (For example, to obtain a 60° impact angle, set the board at a protractor setting of 30°).
Directions continued…. • Using the Simulated Drip and Projected Blood, place the dropper at approximately 30 cm above the impact angle board. • Allow two to three drops to fall sequentially onto the card. Move your hand so that the drops don’t overlap. Using multiple drops will allow you to see the variation that single drops may display when striking the surface. Leave the card in position for 2-3 minutes before carefully removing it.
Directions continued….. • Allow the drops to dry thoroughly on the cards and then store in a safe place. • When we return, we will record your observations including a sketch in the data table provided. We will also include the diameter and length of the circle or ellipse created.
Calculations with Blood Spatters • To find the point of hemorrhage (POH), you must first determine the two-dimensional point of convergence (POC). The POC is the intersection where lines drawn through the center of the individual drops meet (at the X-Y axis intersection). • This is determined by drawing lines or placing strings through the long axis of individual spatters.
Angle of Impact (AOI) The AOI for representative bloodstains helps to generate the 3rd dimension (z-axis) in a crime scene. This shows how high up off the ground the impact occurred.
To Determine the Angle of Impact (AOI): • Where opposite = width (W) and hypotenuse = length (L) • Angle of impact = ArcSIN of W/L ratio • First calculate ratio (W/L) • You should remember that you can use SIN-1(2nd key) to get degree of AOI.
To complete our Blood Spatter Project . . . • In a small group, look over the information gathered from the Blood Spatter Lab activity. • Complete the lab analysis worksheet provided.
Citations • www.historychannel.co.uk • www.bloodsplatter.com/BPAtutorial.htm • www.marshall.edu/cellcentral/GHA/cabinblood.htm • www.marshall.edu/cellcentral/GHA/blooddroplab.htm • The Forensic Examiner – Summer 2005: Article by Louis L. Akin, LPI • Bloodstain Pattern Analysis tutorial by J. Slemko forensic consulting
Citations, continued. • Ward’s bloodspatter analysis lab kitBloodstain • Pattern Analysis tutorial by J. Slemko forensic consulting