Download
1 / 9
90 likes | 200 Views
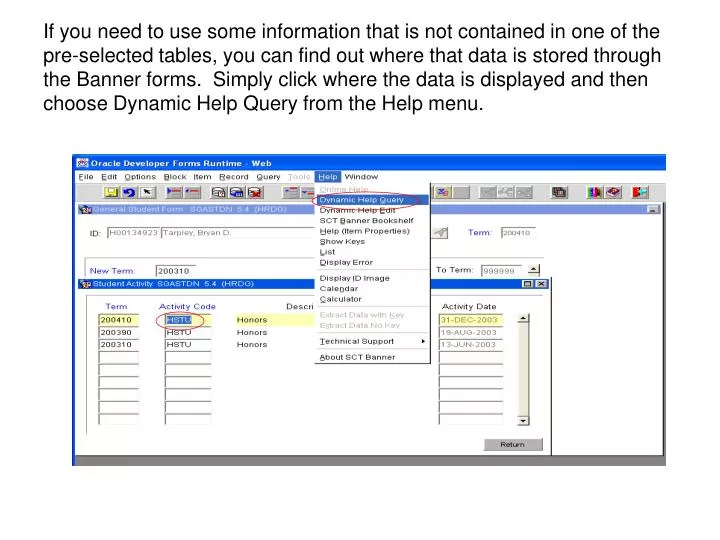
If you need to use some information that is not contained in one of the pre-selected tables, you can find out where that data is stored through the Banner forms. Simply click where the data is displayed and then choose Dynamic Help Query from the Help menu.

E N D
If you need to use some information that is not contained in one of the pre-selected tables, you can find out where that data is stored through the Banner forms. Simply click where the data is displayed and then choose Dynamic Help Query from the Help menu.
The Block and Field entries represent the table and field where the data is stored.
You can then add the table by clicking on the Tables button, the New button, and then Link Table.
Change the Files of type to ODBC Databases (the very last entry).
Double-click on the HRDG entry. If the HRDG entry is not there, call the Help Desk at extension 4440 and ask them to configure the ODBC software for you.
A list of tables for which you have been given access will appear. An easy way to get to a specific table is to type its name, including the prefix. For some reason many of the tables are prefixed by Saturn. To get to this table I typed saturn.sgrsact
When you’ve selected your table, click the OK button and you will see this screen. It is best to select the fields that in combination make each record unique. When in doubt, however, just select the PIDM (Personal ID Master key) . Finally, click the OK button.
The new table should be included in the displayed list of tables.