Download

1 / 30
300 likes | 305 Views
This is one of the application in e-commerce images, in one of those industries, where these can prove to be the difference from a person buying and skipping. Therefore, tools in Photoshop are entirely responsible for editing these images and sometimes, support the overall setup. One such significant tools in Photoshop is Pen Tool, having abilities in plenty for editing e-commerce images into a new face.

E N D
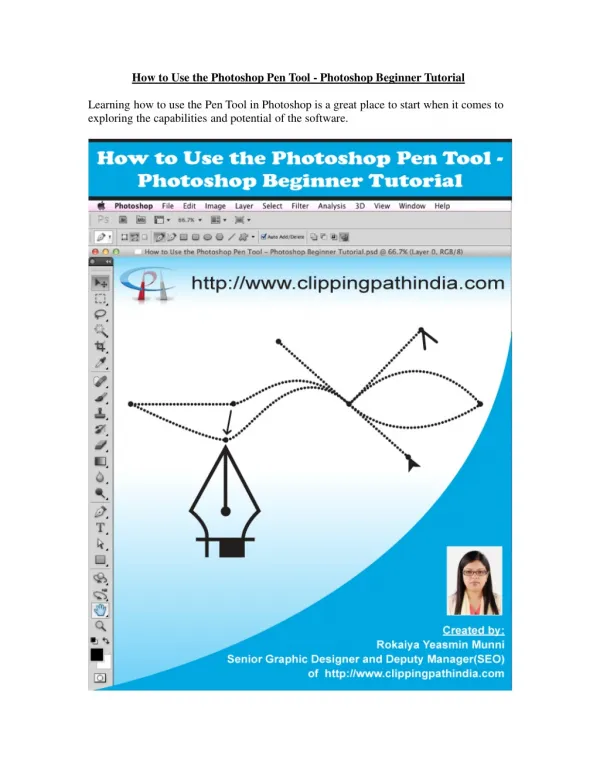
How to Use the Photoshop Pen Tool to Edit E-commerceImages In the epoch of computing software, the advancement is humungous, and by the looks of it, there is no stopping of the same. One of the advanced computing software in use for the past many years has been Adobe’sPhotoshop. This has been a landmark software in many ways. Innumerable people have found this holding some of the best and advanced tools for photo editing. In the era of digital pictures, there are over 100’s of editors in the industry but none likePhotoshop. The usage of Photoshop in industry level editing has been a talking point. With numerous brands and companies using these tools for editing, the usage in e-commerce industrieshas proved to be highly beneficial. For instance, if you are aware of seeing images of different products in alternative angles with exceptional detailing and quality, Photoshop has a significant role to play. This is one of the application in e-commerce images, in one of those industries, where these can prove to be the difference from a person buying and skipping. Therefore, tools in Photoshop are entirely responsible for editing these images and sometimes, support the overall setup. One such significant tools in Photoshop is Pen Tool, having abilities in plenty for editing e-commerce images into a new face. Importance of Photoshop Tools
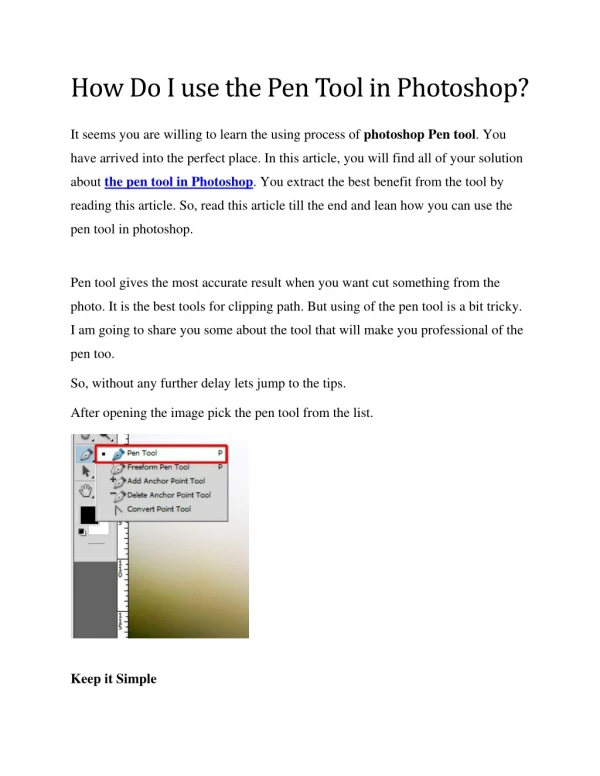
Adobe Photoshop has an immaculate application in the world of multimedia. The software is incomplete for usage, without the existence of online tools for editing. Tools are vital for making a static modification of images, and some tools add to the makeover of images. Aside from these tools, image alteration, and reduction of specific camera related issues can be altered using AdobePhotoshop. • It can be argued of the usage of the same in some other editing apps today, but none comes with as much-stacked features in comparison to Photoshop Pen and its tools. In simple words, tools are essential in Tools are the base of this critical editingsoftware. • What is Adobe Photoshop’s Pen ToolFeature? • A Photoshop Pen Tool is a critical tool, used extensively for creating shapes and path formats. The design is set for being controlled and copied for creating advanced portions and while performing masking. A pen tool is considered for its high quality and precision based outlining, making Photoshop, an essential tool of design. On how to use the pen tool in Photoshop CS6, this requires an explanation. • A Pen Tool has a better utility than the likes of brush and pencil tool. Unlike drawing pixels, a pen tool is instrumental in creating a pen tool vector-design when the path isused. • Location of Pen Tool in Photoshop and General Uses of theSoftware • Pen Tool in Photoshop is located on the bottom middle of the main toolbar. Alternatively, holding P in the keyboard will open the tool over the image project. Click the Pen Tool and hold; you can see five different options. In case of the latest model versions, one more option is added in thelist. • Here is a small list of options available with PenTool, • Regular Pen Tool • Freeform Pen Tool • Curvature PenTools • Add Anchor Point Tool • Delete Anchor PointTool • Covert Point Tools
While talking about the primary advantages of Pen Tools in Photoshop, here are the major talking points,including, In terms of modification, reusing the paths and structures designed using a Pen Tool; the feature is useful in moving a product image from thebackground. Pen Tool is used in changing the color of a specific portion of a product image, removing background or making selection. Users can avail multiple paths within a single image and create several paths alike. One of the most significant plus points of the tool is the ability to design shape paths. With this clause, users can create customized shapes over the image and even over specific locations of an image. Since Pen Tool does not dictate on specific shapes, like a rectangle or circle or even oval tool, this is the most significant advantageoffered. Methods to Design a New and Existing Path Using PenTool If the user is dealing with any version of Photoshop, here are the basic Pen Tool variants, used in creating new pathsincludes, Regular Pen Tool Curvature PenTool Freeform Pen Tool
For existing paths, the remaining options like add anchor point tool, covert point tool, and delete anchor point tool, are instrumental. While creating a new path, it is recommended to look up to the setting of Pen Tool by looking up either shape or path in the options tab over the application bar. While using the Pen Tool, this opens up a new work interface and appears in Layers and PathsPanel. In terms of setting change, users can change aspects like thickness, pixel size, fill color points, length, and width. These are customizable in every individual pathlayers. Next up, while choosing a Path, there is an option for making an initial path and creating it to be a selection, and this comes in the form of Combine Shapes. More about PathPanels Pen Tools have a major role in designing path structure, which invokes the role of Paths Panel. The Panel is always available in any working interface, and they are located on the Paths tab located over Layers Panel. Alternatively, one can click on the Windows tab and a drop down box will open up, containing variousoptions.
Using Pen Tools for Creating aPath Here comes the challenging part of the lot. Making a new path is a challenge for a newbie and there is a possibility of a blunder. With the tool, designing curved paths or straight paths are no more a hassle with practice. For starting up the proceedings, here is the systematicguide, Start from a point, which is at the border of a vertical line. For instance, the boundary of the image of a coffee cupbelow, Next, up, click on the other edge of the entity with the Pen Tool and by all probability, there will be a vertical line. On the Panel beside, a work path appears when the another point isselected.
For Curved ObjectsPaths Keeping up the Pen Tool in curved objects is no more a task. Using the Pen Tool, the next step requires choosing the sub-sequent point and dragging the Pen Tool holding the mouse. At this point, a tangential line called as Handles appear over the curved surface in the object path. Users can drag the mouse until a point they get desired shape of acurve.
Users should take note that handles are formed with curved lines appearing previous and following the tangential point. Hence, the forthcoming section of the path to be drawn after making a curved line. It will keep up with the path of the handle from the final plottedpoint. On clicking the subsequent point, make new handles by dragging the mouse and adjusts the curve appearing alongside the newpoint
Making a Straight Path after a CurvedPath While using a curved pen tool, if a user wants to halt the next point from forming a handle in the next point, then click on the next corner point with the mouse and hold ALT key. It will assure another handlevanishing.
Close Your Path using the PenTool If the plotting of paths is complete, as a user, you require in triggering to the first point of contact in the image. A tiny circle appears to the right of the Pen Tool and click over the point. This will bring in curtains to the overallpath.
Saving the ProjectPath While using Pen Tools or any of Photoshop tools, it is mandatory to save the path. For doing so, click on the Work Path in the Panel and save with an assignedname. Tips to Alter Created Path using the PenTool
If you are accustomed to creating new paths over time, the next point comes is a modification. Although optional, modification is a perennial process in any design, let alone paths. For doing so, open the Photoshop Paths Panel and choose the savedfile. Tips to Create New Paths over an On HandPath In the previous path design over a coffee cup, there was a requirement of a path design around the cup. The next task requires removing the object from itsbackground. In addition, a new path is required inside the handle of thecup. Choose the path and select Pen Tool. Go to the options bar and click the Exclude Overlapping Shapes option. Once selected, the existing path will be visible. You should draw the areas, which you do not want to get included in the design. When we select from our path, later on, the area with the latest path will be eliminated from the remaining ofselection.
Ways to Alter Existing Points andPaths Modifying an on hand point or a handle over a path, choose the path selection tools. These are located under Type Tool. Select the Direct Selection Tool and this will disclose all the points in the form of a white box, including handle points. With the tool, it is possible to move along existing points andcurves.
Adding New Points in a Path In the list of toolbars, users can click over the Add Anchor Point Tool by press holding the Pen Tool option. Users can drag the mouse with the tool opted and plot the paths point wise. Once the plotting is done, Direct Selection Tool comes in handy to modify handles and point’s location.
Way to move out Points from aPath In this case, users can remove any point from a path, irrespective of its location. This is done using the Delete Anchor Point Tool, located on the Pen Tool option of the Toolbar. With the tool activated, users require clicking an existing point, allowing the tools to vanish the points, and the adjacent segment will merge to the nearest point.
What is the Convert Point Tool? How Does itHelp? This is the last tool in the list of Pen Tools and can be accessed similarly as any other previous Pen Tool variants. With the tool, it is possible to control the handles over existing point in the same process of managing via Direct Selection Tool.
The difference, however, sees the Convert Point Tool does not facilitate moving along with on hand anchor points. This is because, unlike the Direct Selection Tool, the path segments with Convert Point converts straight lines into curves andcontrariwise. On clicking the point having a handle with the Convert Point Tool, these points vanish and the anchor point turns in to a corner. Now, if the adjacent point has more handles, these will continue affecting the curve of nearby pathsegments.
On using the tool, click over another anchor point without a handle, these will start gaining handles on any side and can be further controlled with either Convert Point or Direct Selection Tools.
Making a Selection from a Path Open up the Paths Panel and choose your desired path in this segment. Click over the icon located at the lower half of the panel, bearing a resemblance with a dottedcircle. Even by using a Pen Tool, a selection is possible. Over a selected path, users require simultaneously clicking Pen Tool, and the Selection button opted in the optionsbar.
One dialog box will pop up, permitting you to add your customization and modification ideas to the selection of a specific path. For users planning to isolate using the selection option, and keep the likes of Anti-Aliased box checked and feather radius as zero in the rendering segment. In case of a new selection, a radio button will appear beside the New SelectionOption. Once the selection is complete, users can change and customize the object color or even eliminate the object from the existingbackground.
Way to Separate an Object and itsBackground Now that you have created a selection from a path, next up, you can separate the object from its background by creating a new layer mask or barely pasting over another layer. For doing this, you should be in the layer where you are supposed towork. Removing by Copying a Selection Users can copy using regular CTRL+C and pasting by using CRTL+V command on a Windows device (COMMAND+C and COMMAND+V in case of MAC). This will paste the selection in a new layer. Also, you can remove the original layer to spot an isolatedobject.
Eliminate a Background with a fresh LayerMask For developing a fresh layer mask, you can use the Layer Mask icon available on both Paths and Layers Panel located lower end of the panel box. It appears like a black circle within the white rectangle.
Tips to Make a Shape through the PenTool The shape is the biggest challenge while defining any object and sizes. You can choose a specific path to create Shape Path from the Options bar on the PenTool. Next up, change the color of shape by double-clicking the color rectangle, located next to the Fill option. A color menu will display. It will allow you to fill with a set of solid color, gradient color, custom color, and apattern. You can change the outline color of the object by double-clicking on the color rectangle, located next to the stroke option. All other adjustments, right from the width of the stroke, changing of width the drop-down menu, next to the Stroke’s color ispossible.
On setting up the Shape Path’s, drawing an object with the Pen Tool would result in the way of drawing an ordinarypath.
While creating an object using the Pen Tool, a by default, a new layer holding that shape appears in both the Paths Panel and Shape as well. Way to Scale or Make Over a Shape Path Using the Shape Path chosen in the Paths Panel, click over the Edit-Drop down menu, locate at theupperhalfofthescreen,andopttheTransformPathtousethefunction.Also,putitsimply;
click CTRL+T in Windows device or COMMAND+T in case of Mac or even rotating path. In the end, using transform functions available, you can change a regular path also as youwish. Uses of Other Photoshop Pen Tools in theSubject Using a regular Pen Tool from Adobe Photoshop gives an ultimate operative in your hands over controlling of paths as you design the same. Based on the needs, other Pen Tools may help you with different projects. Pen Tools have the power to churn out shapes of various patterns, and all relatable types of Pen Tools follow a different model of design. Different types of PenTools Curvature Pen Tools: This useful tool is highly beneficial for determining the curve between different points. Unlike regular Pen Tools, a user does not require in clicking and dragging of the same. This means, there are no handles available, and this easily takes up the shape of the structureobject.
Curvature Pen Tool is useful for following up a uniform shape, including the likes of an arch or even a circle. Once a path is designed, the tool can be used extensively with the tool behaving like the one with Standard PenTool. How to Use Freeform PenTool This Tool has a critical property and makes a path as a user draws with a mouse freely. Using the tool, a user can draw with the Tools in the same pattern, which they would use and create an object with a pencil tool or BrushTool. Paths designed with the Freeform Pen Tools are considered among the more robust tools to control and often requires an ample amount of modification after designing. For this, practicing will help in giving out useful ideas on how paths and plotting are controlled.
How to Use Magnetic PenTool This is a unique tool, which is accessed by selecting the Freeform Pen Toolbar. You can find the magnetic checkbox in the options bar. Using this unique tool, Adobe Photoshop tries to identify the edges of an object and eventually breaks thepath.
Application of Stylus with Pen Tool andPhotoshop Pen Tool has a relatively more comfortable usage application with stylus and using the mouse with Pen Tool; you can design points with handle curves by drag and click option. Using a stylus, both forming and creating points and handle curves arepossible. Final Thoughts E-Commerce business is thriving today, with Adobe Photoshop’s picture perfect image editing options. It is a general understanding that large chunks of people are fussy about detailing and examining the images of a product. With Adobe Photoshop’s Pen Tool, editing and modification of a specific product image and change of background and utilities are pulled off easily. With the understanding of the product as a whole, a person can examine and read about the utility of the product.Clipping Path Serviceis a reputed and proficient firm offering comprehensive image editing and other alliedservices. More Information: https://www.clippingpatharts.com/how-to-use-the-photoshop-pen-tool-to-edit-e- commerce-images/