Download
1 / 47
470 likes | 584 Views
Methodology for the Second Dimension Separation.

E N D
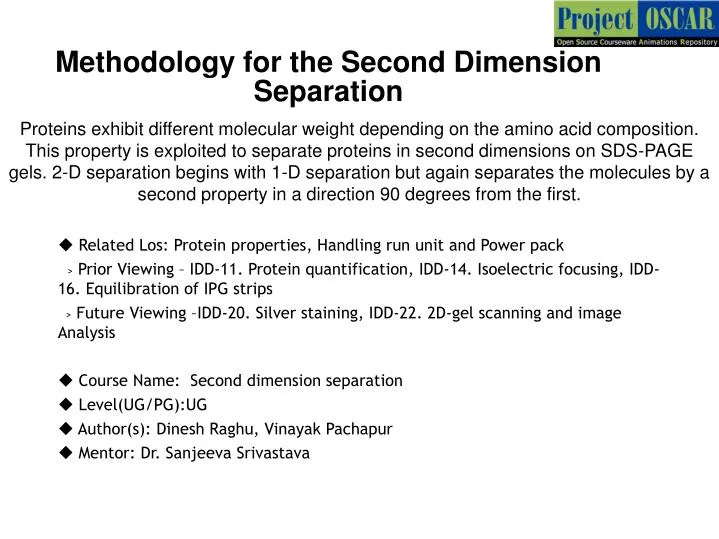
Methodology for the Second Dimension Separation Proteins exhibit different molecular weight depending on the amino acid composition. This property is exploited to separate proteins in second dimensions on SDS-PAGE gels. 2-D separation begins with 1-D separation but again separates the molecules by a second property in a direction 90 degrees from the first. • Related Los: Protein properties, Handling run unit and Power pack > Prior Viewing – IDD-11. Protein quantification, IDD-14. Isoelectric focusing, IDD-16. Equilibration of IPG strips > Future Viewing –IDD-20. Silver staining, IDD-22. 2D-gel scanning and image Analysis • Course Name: Second dimension separation • Level(UG/PG):UG • Author(s): Dinesh Raghu, Vinayak Pachapur • Mentor: Dr. Sanjeeva Srivastava
Learning objectives After interacting with this learning object, the learner will be able to: 1 • Define the steps involved in the technique. • Identify the buffers/reagents used in the technique • Operate the mechanism of protein separation in 2D SDS-PAGE. • Identify to remove the separated gel without damage from the template. • Infer the steps involved to perform the experiment. • Assess the troubleshooting steps involved in the experiments. 2 3 4 5
Master Layout 1 Gel Cassette assembly (Slide:6-8) Reagents preparation for gel casting (Slide:9-17) 2 Gel casting (Slide: 18-19) Equilibration of IPG strips (Slide:20-27) 3 Loading of IPG strips (Slide:28-30) 2Dimension run (Slide:31-41) 4 5 Animate for user click to show images or instruments used for each step from the respective slides.
Definitions and Keywords 1 1. SDS-PAGE: Sodium dodecyl sulphate –Polyacrylamide Gel Electrophoresis for the separation of proteins based on the pore size of the gel and the molecular weight of the proteins. The cocktail consists of acrylamide, bisacrylamide, TEMED, SDS, Ammonium persulphate. 2. Acrylamide and bisacrylamide: Acrylamide and bisacrylamide crosslink by polymerization reaction and forms the gel like polymer varying in pore size and number. 3. TEMED (Tetramethylethylenediamine): Tertiary amine base that catalysis free radical formation by the ammonium persulphate in the cocktail. 4. Ammonium persulphate: APS helps in the formation of the free radicals that aid in the polymerization reaction of acrylamide and bis acrylamide. 5. IPG strip: An immobilized pH gradient strip formed by covalently incorporating a gradient of acidic and basic buffering groups (immobilines) into a polyacrylamide gel. 2 3 4 5
Definitions and Keywords 1 6. Equilibration buffer-1: consists of urea as denaturing agent, SDS, provide uniform negative charge to the protein, DTT , as the reducing agent of disulphide bond, glycerol , as the stabilizing agent of polyacrylamide gel in the strips. 7. Equilibration buffer-II: consists of urea as denaturing agent, SDS, provide uniform negative charge to the protein, IAA , as the acetylating agent to prevent reformation of disulphide bond, glycerol , as the stabilizing agent of polyacrylamide gel in the strips. 8. Tank buffer: consists of tris base ,glycine, SDS, water which aid proper conductance of current from one terminal to other that helps proper separation of protein. 2 3 4 5
Step 1: T1: Gel Cassette assembly 1 template 2 3 4 clips Glass templates and plastic sheets 5
Description of the action Audio Narration Step 1: T1: Gel Cassette assembly 1 2 3 Template acts like a supporting unit, glass plates provide a space to hold the gel, plastic sheets are placed in-between two glass plates assembly. To hold all the glass plates together, glass template is used and to tighten the template clips are used. Animator should draw the materials as shown in previous slide, let user takes out the material from the rack and keeps it on the table. User click on each material should followed by its audio narration. Label as “clips” Template, Glass template, glass plates, plastic sheets. 4 5
Audio Narration Description of the action Step 1: T1: Gel Cassette assembly 1 2 plastic sheet 3 screws Zoom the glass plate to show the inbuilt glass sealing one side. Let user pick the glass plate and place it in the template followed by placing the plastic sheet. User should click on each of them. Close the glass template by apply the clips to hold the assembly together and tighten the screws at the bottom by user action as the user clicks on the hand. Re-draw the figure as shown. Prepare the gel casting template unit. Space within the glass plates helps to hold the gel or gel is formed within this space. For easy separation of glass plates, plastic sheets are used. 4 5
Step 2: T2: Reagents preparation for gel casting 1 2 3 Description of the action Audio Narration (if any) Show a measuring balance the user should click ON the Instrument, pick paper from rack, fold it across and on the edge, place it on the balance so that balance reads 0.03g and the user should press ”0” on the balance to make the reading to “0.00”. Animate the action, whenever user starts to weigh any reagents. Clean the surface of the balance, Tare the weight of the paper before weighing for each reagent. 4 5 Video file: Balancing
Step 2: T2: Reagents preparation for gel casting 1 2 pH: 4 3 pH:9 Audio Narration Description of the action To make up the pH of any solution pH meter is used. Let user start the instrument, display the instrument like shown in figure. Now take out the pH rod which is dipped in beaker containing water, clean the rod with tissue paper, let user take out bottle labeled as pH 4, let the rod be dipped in it display the reading as pH 4. now take out the rod, clean the rod with tissue, take the pH:9 bottle, uncap it and dip the rod for reading, to show pH9. Now the instrument is ready for pH adjustment of solutions. In case if the standard pH values show some variations along with temperature please note down and standardize it to normal value. 4 5
Step 2: T2: Reagents preparation for gel casting 1 Tris base SDS Glycine 2 Water Description of the action Audio Narration 3 Show the bottles labeled as TRIS-Base, Glycine and SDS. The user should click on the required reagent bottle and spatula for weighing. Instruct user to weigh Tris base, let user pick the bottle, uncap it, with help of spatula weigh the 30.3g on a paper over the balance. if the gram exceeds he should remove some quantity or if it low add to get required gram. Follow the same instruction for weighing 144.1 g of glycine and 10g SDS and transfer all the content into beaker. Show the measuring cylinder of 1000ml, animate like the user pouring 500ml of water to the cylinder and then to the beaker containing weighed TrisBase,Glycine and SDS and mix it as shown in slide 12. For SDS buffer weigh 30.3g of tris base, 144.1g of glycine and 10g SDS accurately. The beaker containing the powder need to be dissolved into the water. 4 5
Step 2: T2: Reagents preparation for gel casting 1 2 Beaker Magnetic bead 3 Audio Narration (if any) Description of the action Show magnetic stirrer instrument. Let user place the beaker on it. Display the beaker containing powder at bottom, liquid layer on top and a magnetic bead at the bottom. Instruct user to ON the instrument, let user cotrol the speed nob and regulate it accordingly to control the mixing speed in the beaker. Animate powder getting into the solution. Instruct the user to pour it in the measuring cylinder and the reading has to be 800ml. The user should click on water to pour 200ml of it in the measuring cylinder. Show a turbid solution turning colorless Prepare 10X SDS running buffer. As an when the powder starts dissolving make up the volume of solution to 1000ml by adding water. 4 Video file: Magnetic stirrer 5
Step 2: T2: Reagents preparation for gel casting 1 Tris-HCL 2 Water 3 Audio Narration Description of the action Weigh Tris-Hcl according to experimental design. Give a brief spin to dissolve powder completely. Add half the amount of total volume of water required. Animator should redraw above figure as shown. Instruct user to weigh Tris-Hcl, user must press tare in the balance with paper to show reading 0.00g, the user should click on the spatula, open the lid of the Tris Hcl bottle and weigh 2.6g. In case if the gram exceeds user should remove some quantity or if it is low add to get required amount and instruct the user to pour water till the level of water reaches 80ml in 100ml MC. Later transfer the solution into the Tris -Hcl solution bottle and show like mixing as shown in slide 10, followed by pouring in the measuring cylinder and addition of water to make the volume to 100ml in the MC. The user should click on hands for the event to happen. 4 5
Step 2: T2: Reagents preparation for gel casting 1 2 NaOH 3 HCl Audio Narration Description of the action The tris-hcl soultion prepared need to be set fo the required pH. Let user takes the bottle (labeled as “tris-hcl pH 6.8”) near pH meter and allow the user to dip pH rod in the solution. Animate like the user switching on the pH meter. The meter should show 5.5 in the display and instruct user to add NaOH. Now allow the user to click on NaOH so that drops of NaOH should be added using filler and the reading should increase like 5.8,5.9.6.1,6.3 and then 6.8 (desired pH) Prepare 6.8 pH tris –Hcl solution with initial check of pH meter reading with standards like in slide 10. 4 Video file: pH meter 5
Step 2: T2: Reagents preparation for gel casting 1 2 NaOH 3 HCl Audio Narration Description of the action Follow above steps to prepare Tris-Hcl ph 8.8. weigh the required amount, add water. to set the pH allow the user to dip pH rod in the solution. Animate like the user switching on the pH meter. The meter should show 5.5 in the display and instruct user to add NaOH. Now allow the user to click on NaOH so that drops of NaOH should be added using filler and the reading should increase like 5.8,5.9.6.1,6.3 and then 6.6.6.7,6.9,7.4,7.6,7.8,8,8.4,8.6,8.8(desired pH) Prepare 8.8 pH tris –Hcl solution with initial check of pH meter reading with standards like in slide 10. 4 5
Step 2: T2: Reagents preparation for gel casting 1 SDS APS 2 Water Description of the action Audio Narration 3 Show the bottles labeled as APS and SDS. The user should click on the required reagent bottle and spatula for weighing. Instruct user to weigh SDS, let user pick the bottle, uncap it, with help of spatula weigh 10g of SDS, transfer to SDS page bottle and later weigh 0.1g of APS over the balance and transfer to tube. if the gram exceeds he should remove some quantity or if it low add to get required amount. Instruct the user to add 100ml of water by measuring it using the MC to add into SDS page bottle. Animate like the user clicks on hand to take the pipette set 1000ul and pipette out water and add it in the tube containing APS. Mix the SDS as shown in slide:12. Prepare 10%SDS used as overlay solution and 10% APS which is used for gel casting. 4 5
Step 2: T2: Reagents preparation for gel casting 1 SDS Acrylamide 2 Tris-Hcl Description of the action Audio Narration Prepare 12.5% resolving gel cocktail consisting of 49 ml acrylamide and bisacrylamide 30ml 1.5M Tris –Hcl(pH 8.8),10% 1.2 ml SDS and 10% 1.2 ml APS,165ul TEMED and 120ml water. 3 Show the bottle labeled as Bisacrylamide and Acrylamide mixture, Tris Hcl (pH8.8) , 10% SDS and 10% Ammonium persulfate, TEMED and water. The user should click on each bottle to measure the required quantity. when the user clicks on Bisacrylamide -Acrylamide, using measuring cylinder user should pour 3ml and 1.5 ml of TrisHcl to the gel solution beaker, animate with pipette action for user adding TEMED, APS and water. (set required volumes on pipette by listening to audio narration). Now give a brief spin to mix the gel solution properly. 4 5
Description of the action Audio Narration Step 3: 1 T3: Gel casting 2 3 Show the running unit, zoom the glass plates which are fixed. The user should click on the cocktail beaker to take it and pour into the glass plates. Add APS at the last minute. Pour the solution at one go, avoid air bubbles. 4 ONce 5
Description of the action Audio Narration Step 3: T3: Gel casting 1 2 3 Spray 0.1% SDS to prevent drying off the gel and helps to produce even surface on top of the gel. When the gel is getting polymerized, start the process of equilibration for IPG strips. Spray sds solution prepared into the sprayer. Animator should draw the sprayer as shown in figure and label as “0.1%SDS and animate like the user spraying over the gel cascade as and when the user clicks on the hand. Show a clock running for 1hr for the gel to polymerize 4 5
Step 4 : T4:Equilibration of IPG strips Audio Narration (if any) Description of the action/ interactivity 1 2 3 Add equilibration buffer-1 to the strip and keep in shaker for 15min. The strip must be covered with the buffer. the strips Equilibration buffer-I Zoom equilibration buffer-I tube, display to add 3 ml, pipette with hand action and show the pipette action along the length of the strip. Display a clock animation for 15min along with movement of tray over the shaker. Please redraw the figures. For minute details refer IDD:17 equilibration of strips. 4 5
Step 4 : T4:Equilibration of IPG strips Audio Narration (if any) Description of the action/ interactivity 1 2 Protein 3 Dithiothreitol in equilibration buffer reduces the disulphide bond and helps to maintain all proteins in their fully reduced state. Equilibration buffer-I Show the reaction between the dithiothreitol and disulphide bond of protein. Animate bond breakage. Please redraw the figure. For minute details refer IDD:17 equilibration of strips. 4 5
Step 4 : T4:Equilibration of IPG strips Audio Narration (if any) Description of the action/ interactivity 1 2 3 Equilibration buffer-I After 15min. Animate to stop the shaker by a hand press, both hand motion holding tray picking from shaker and taking the forcep and transferring the strip from one well to the other new well it to remove the liquid into the discard labeled tube. Please redraw the figures. For minute details refer IDD:17 equilibration of strips. 4 Remove the strips from the well and place in the new well for second treatment of EB. 5
Step 6 : T4: Equlibration of IPG strips Audio Narration (if any) Description of the action/ interactivity 1 2 3 Add equilibration buffer-2 to the strip and keep in shaker for 15min. The strip must be covered with the buffer. the strips Equilibration buffer-I Zoom equilibration buffer (EB)-II tube, display “add 3ml”, pipette with hand action and show the pipette action along the length of the strip. Display a clock animation for 15min along with movement of tray over shaker. Please redraw the figures. For minute details refer IDD:17 equilibration of strips. 4 5
Step 4 : T4:Equilibration of IPG strips Audio Narration (if any) Description of the action/ interactivity 1 Protein 2 3 Equilibration buffer-I Animate bond breakage reaction followed by acetylation reaction. Initially animate free acetamide from IAA going and binding to reduced disulphide bond. Please redraw the mechanism. For minute details refer IDD:17 equilibration of strips. IAA acetylates the reduced disulphide bond and prevent its reformation of disulfide bonds. 4 5
Step 4 : T4:Equilibration of IPG strips Audio Narration (if any) Description of the action/ interactivity 1 2 3 strips Equilibration buffer-I After 15min. Animate to stop the shaker by a hand press, both hand motion holding tray picking from shaker and taking the forceps and transferring the strip from one well to the other new well it to remove the liquid into the discard labeled tube. Please redraw the figures. For minute details refer refer IDD:17 equilibration of strips. Remove the strips from the well and place in the new well 4 5
Step 48: 250mM Tris Base 1.92 M glycine 1% w/v SDS Audio Narration (if any) Tank buffer Description of the action/ interactivity T4: Equlibration of IPG strips 1 2 3 Water The tank buffer consists of tris base ,glycine provides proper conductance and SDS adds negative charge to protein for seperation. Zoom in Tank bufffer. Display the content with audio narration. Please redraw the figure containing buffer 4 5
Step 4 : T4:Equilibration of IPG strips Audio Narration (if any) Description of the action/ interactivity 1 2 3 Wash the strips with tank buffer after second equilibration step. Now the strip is ready for 2D run. Equilibration buffer-I Take out the strip from the tray with forceps in one hand and transfer to fresh tray. Set 1000ul in pipette when the user clicks on it and Take out 1000ul of tank buffer with help of pipette and place along the strip. Animate the process. Please redraw the figures 4 5
Step 5 : Audio Narration (if any) Description of the action/ interactivity T5:Strip loading 1 2 3 Transfer the glass plate with gel slab into glass plate holder to keep IPG strips. Equilibration buffer-I After 1 hour animate like the user clicks on each clip to remove it, remove the glass template, followed by plastic sheet and place glass plates with user action. Now take out each glass plate with gel slab and place it on glass plate holder. Please redraw the figures 4 5
Description of the action Audio Narration Step 5: T5: Strip loading 1 2 3 Animate like the user taking the strip and placing it on the glass plate as shown, acidic end (+ end of strip) must be on left side with gel surface up. Push the strip with scale till it touches the gel surface. Take molecular weight marker from freezer, set pipette to take out 5ul of molecular marker and transfer it on wick, now place the wick next to the strip end. The user should click on the scale for it to push the strip inside to get in contact with gel. Place the strip in the gel and ensure that there must be no gap or air bubbles between the gel and the strip. 4 5
Description of the action Audio Narration Step 5: 1 T5: Strip loading 2 3 Animator should draw the bottle labeled as 1% agarose and the solution has to be blue in color. Animate like the user takes the bottle(solid solution), keeps it in oven, ON the oven for set time 30s, and stops the oven to take out the bottle with solid solution turned to liquid form. Instruct user to set pipette for 1000ul to pour the agarose on the strip as shown. Agarose sealing: Agarose need to be liquid hot before use. Seal the strip and the gel using agarose sealing solution and wait till it solidifies. 4 5
Step 6: T6: Gel running 1 2 3 4 GEL GLASS TEMPALTE Cassette 5
Description of the action Audio Narration Step 6: T6: 2D Gel running 1 2 3 Animator should draw the figure as shown and animate like the user takes the glass assembly loaded with strip and transfers it to the gel running unit. In empty groves load blank plates.. The user should click on the plates so that the hand takes it and load it on the running cassette Place the glass plate containing strip and dummy plates in the gel holding unit. All the groves in the unit need to filled. In case if user is running only two gels, place each gel unit on either side of the unit. It helps for the even flow of voltage across the unit. 4 5
Description of the action Audio Narration Step 6: T6: 2D Gel running 1 2 water 3 Animator should show the bottle labeled as 10X SDS buffer . Animate like the user pouring 100ml of the buffer in to the measuring cylinder (1000ml) graduated and show a bottle labeled as distilled water and animate like the user pouring 900ml to the same into cylinder. The solution made should be transfered to the lower tank with user action. Prepare 1x SDS buffer from 10x. Pour the buffer into the chamber till the maximum level(without the gel cassette) in the lower tank is achieved. 4 5
Description of the action Audio Narration Step 6: T6: 2D Gel running 1 2 3 The gel holding cassette has a grove which fits into the accordingly into the running unit. Make sure the buffers levels are exactly at the marked levels on the running unit. Animate transferring the gel holding cassette into the running unit. Show the rise of buffer level in the lower tank. If the level is below the required level, instruct user to add SDS buffer till the level is achieved or if more instruct user to remove the excess buffer. 4 5
Description of the action Audio Narration Step 6: T6: 2D Gel running 1 Lid with groves 2 Lid must be place at this position Level marked for upper and lower tank 3 4 Animator should draw a lid as shown in figure and animate like the user placing it on the top of the gel running cassette. The groves make the opening for the glass plates. the user should click on top so that the lid moves down and close the gaps in the lid by inserting the glass plates. The lid acts as reservoir for upper buffer chamber. 5
Description of the action Audio Narration Step 6: T6: 2D Gel running 1 2 3 Animator should show the bottle labeled as 10X SDS buffer. Initially animate like the user pouring 200ml of the buffer in to the measuring cylinder (1000ml) graduated and show a bottle labeled as distilled water and animate like the user pouring 800 ml to the same cylinder. Animate like pouring the 2X buffer on the lid and show a cover with wire closing the set up when the user clicks on the hand Prepare 2x SDS buffer from 10x. Once the buffer is added till the max level. The unit is ready for 2D run. 4 5
Description of the action Audio Narration Step 6: T6: gel running 1 Power Pack 2 Water bath 3 Connect the setup, if not properly connected the power back will show error. Set the voltage 100V for 1hr and 300V for 4hr. The water bath temperature is set at 20'C, the 2D seperation is exothermic reaction. To remove the excess heat water is circulated inside the unit. Connect the setup with user interaction. Connect the electrode to power pack. Connect the pipe to tap water. The user should click on the things so that each event should appear in the animation On power pack, let the user set the 100 voltage for 1hr And press run for both the instruments and show the movement of blue line from top to bottom slowly. After 1hr (time must be displayed in power pack. Animate like the user clicking on the button to increase the voltage to 300v after 1 hr 4 5
Step 6: T6: gel running 1 2 3 4 5
Description of the action Audio Narration Step 6: T6: 2D Gel running 1 Disulfide bond breaking 2 3 4 SDS denatures the proteins and give negative charge to the proteins which allows the proteins to move from negative to positive terminal based on the pore size of the gel the proteins are separated on the basis of their molecular weight Animator should redraw the figure as shown and animate like as per the figures with arrows 5
Description of the action/ interactivity Audio Narration (if any) Step 6: T6: gel running 1 2 3 4 The higher molecular weight proteins have slow speed of separation get focused on the top with d1 distance of movement as compared to low molecular weight proteins which have d3. Overview of the mechanism to have clear outlook for the user must be animated accordingly as per the figure. 5
Audio Narration Description of the action Step 6: T6: 2D Gel running 1 2 3 After 5 hours of time, animate blue band reaching the bottom of the gel. Instruct user to stop the instrument. Let user open the lid, take out the upper lid, take out the gel cassette and remove the glass plates one by one. Now user must take the glass plate and immerse in tray containing distilled water. With the help of spacer user must open the glass plates and animate like user shaking the plate and gel goes into the solution. The gel can be taken on to plastic plate or carried directly by user for the Scanning or staining purpose. Place the gel in the distilled water to remove excess SDS that may interfere in staining. now gel is ready for staining process. Follow the future viewing IDD for more information and continiuity. 4 5
Button 01 Button 02 Button 03 Slide 20-27 Slide 6-8 Slide 9-17 Slide 18-19 Slide 28-30 Slide 31-41 Tab 01 Tab 02 Tab 03 Tab 04 Tab 05 Tab 06 Tab 07 Name of the section/stage Animation area • In Slide-17: let user calculate the gel composition depending upon the nature of sample and proceeds with the setup. • Instruction: if sample has high molecular proteins provide option for lower percentage gel composition, in case of low molecular weight proteins provide option for higher percentage gel composition. If user likes to see the complete proteome profile provide option for 12.5% gel composition. • In Slide-32: let user place the gel plates on one side and dummy plates on the other in the gel holding chamber and user proceeds with the setup. • Instruction: animate to show a very slow diaphragm run and display variation in the voltage and running on low voltage in the power supply. Instruct user to check the setup, balance the gel plates and dummy plates on either side of the gel holding unit. Once the setup is modified animate a increasing voltage to a set point and a movement of diaphragm at even rate. Interactivity area Instructions/ Working area Credits
Questionnaire: APPENDIX 1 Question 1 Which one of the following is true in case of strip placing in the gel? a)The strip should be on the gel with agarose I in between them b) The strip should be on the gel making close contact with the gel c) Gel should on the top of the strip d) Should not place the strip on the gel Answer: The strip should be on the gel making close contact with the gel Question 2 Charge of the SDS is • Negative • Positive • No charge • Neutral Answer: Negative
Questionnaire: APPENDIX 1 Charge given by the SDS to the protein is a) Negative • Positive • No charge • Neutral Answer: Negative Question 4 Protein moves from • Negative terminal to positive • Positive to negative terminal • Moves based on the charge of the protein • Doesn’t move Answer: Negative terminal to positive
Questionnaire: APPENDIX 1 Question 5 Proteins are separated in SDS-PAGE based on a)pH b)pI c)Molecular weight d)Protein quantity Answer: Molecular weight
APPENDIX 2 Links for further reading Reference websites: 2DE Tutorials by Angelika Görg : http://www.wzw.tum.de/blm/deg/ Books: Biochemistry by Stryer et al., 5th edition Biochemistry by A.L.Lehninger et al., 3rd edition Biochemistry by Voet & Voet, 3rd edition GE Healthcare 2D-Electrophoresis principles and methods by Angelika Görg, 3rd edition. Research papers: Chen JH, Chang YW, Yao CW et al. Plasma proteome of severe acute respiratory syndrome analyzed by two-dimensional gel electrophoresis and mass spectrometry.Proc Natl Acad Sci U S A2004, 7;101(49):17039-44. Eymann C, Dreisbach A, Albrecht D. A comprehensive proteome map of growing Bacillus subtilis cells. Maldonado AM, Echevarría-Zomeño S, Jean-Baptiste S. et al. Evaluation of three different protocols of protein extraction for Arabidopsis thaliana leaf proteome analysis by two-dimensional electrophoresis. Proteomics 2008, 71(4):461-72.
APPENDIX 3 Summary The experiment involves gel casting, equilibration, gel running and reagent preparation. The gel composition plays a very important role in polymerization. Gel with proper ingredients in required amount will not get damaged when removing from the cassette after separation. well polymerized gels help for better protein separation. The set voltage will be reached when the buffer quantity and constitution is in required level.