Download
1 / 23
230 likes | 422 Views
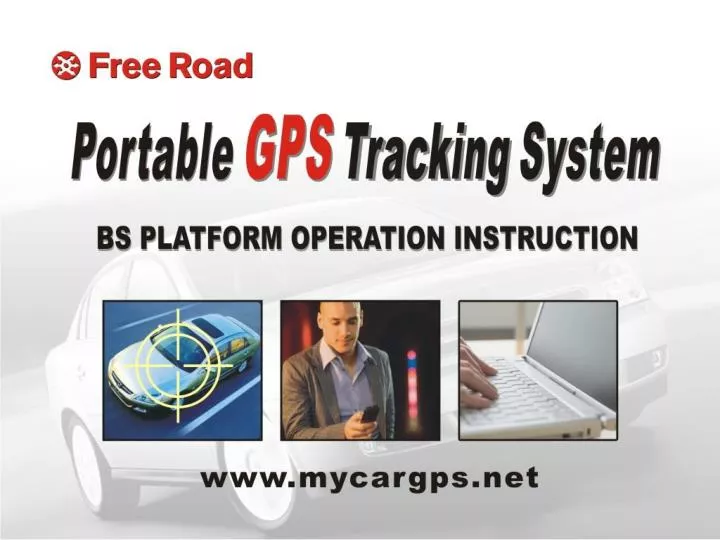
1. Login the Car-checking Platform Step One. Step One: Enter the correct URL in the address bar:http://www.mycargps.net. Step Two. 第三步:输入用户名、密码和验证码,点”登录“. Step Two: Enter the user name, password (default is the ID number) and the verification code, and click “Login”.

E N D
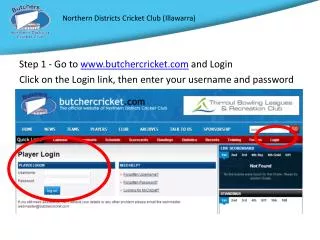
1. Login the Car-checking Platform Step One Step One: Enter the correct URL in the address bar:http://www.mycargps.net
Step Two 第三步:输入用户名、密码和验证码,点”登录“ Step Two: Enter the user name, password (default is the ID number) and the verification code, and click “Login” . 第三步:输入用户名、密码(默认是ID号)和验证码,点”登录“
Step Three 登录后会看到你名下所有的车辆,要查哪台就用鼠标选中哪台就可了。 After you login, you will see all the vehicles in your name and select whichever you want by the mouse.
Details Select the vehicle, open the “Details" , and then you can see the specific localization of the vehicle ( If you open a blank, click the license plate again.)
Set Status: “Nothing” is the factory settings by default. ( If you open a blank, click the license plate again.)
Operation: Auto Center/Normal Show On “Auto Center”, the license plate will be in red. When traveling, the vehicle is locked in sight. On “Normal Show”, the license plate will turn back to its original color, and the target is relieved.
“Show Trace”as figure, when the vehicle is moving,it will show BLUE trace.”Hide trace”will not show the trace on map,but can be found out in history. Operation: Show Trace/Hide Trace
Operation: Tracking (Setting the Uploading Positioning Distance) Click “Tracking”, the track set window will pop up. Enter the distance you want to set, and click “Send the set”. Click “Cancel Track” to end current setting, and come back to the factory default setting 200 meters.
Operation: Speed Limit/ Cancel Limit Click “Speed Limited”, the speed set window will pop up. Choose the speed want to set, and click “send the set”. Click “Cancel Limited” to end current setting,
Operation: Region Defend/Cancel Defend (Take Setting “Outoff” for Example) Step One of Region Defend : Click “Region Defend”, and then select “Outoff” or “Into” on the pop-up window.
Operation: Region Defend/Cancel Defend (Step Two and Three) Step Two: Click the button “Area”. Step Three: Click some point in the area that you want to set on the map, and then a small bulb will appear.
Operation: Region Defend/Cancel Defend (Step Four and Five) Step Five: The setting window demonstrates latitude and longitude, and then click “Send the set”. Click “Cancel Defend” directly can cancel the region defend. Step Four: Drag the small bulb to the point that you want to set, release it, and then the rectangular safe area will appear.
Engine Flameout/Cancel Engine Flameout Click “Engine Flameout”, a password setting window will pop up. Device and confirm the password, then the vehicle will automatically shut down the engine. Users should use it cautiously. (The password is the security code, and the factory default one is 999999. One can revise it by sending the order from the first management number, which is different from the password that is used in checking cars on line.)
History Trace: Query/ Play/ Export/ Clear Select date and time, click “Query”, and then history trace can be checked; Play”, the green arrowhead, is used to play the trace; “Export” is used to export and save the data of history trace; “Clear” is used to clear current trace and data.
Alarm Query Select query date to check out current and previous alarm records. Click corresponding alarm record, and then the alarm position will appear on the map and become red.
Report: Distance Report Distance Report: Select date and export format, click “Submit”, and then day mileage can be checked.
Report: Driving Report Driving Report: Select date and export format, click “Submit”, and then driving record can be checked as the picture shows.
Management System: Vehicles Information Click “Vehicles Information” to demonstrate the setting information in your name, and select one ID number.
Management System: Vehicles Information (Edit) After selecting the ID number, you can edit the user information here. Edit it as detailed as you can, and then save it (modifiable).
Management System: Change Pass Click “Change Pass” to modify the password that is used to login the car-checking platform.
Click “Measure”, and click the map interface. Then one green point will appear somewhere on the map. Next click the target point and the straight-line distance will show up. Double click it to end. Distance Measure: Straight-line Distance You can print the web page directly.