Download
1 / 13
460 likes | 1.17k Views
Constructing Triangles. Unit 4C-Triangle Geometry LT5: I can construct triangles from given angles. LT6: I can construct triangles from given sides. Drawing Triangles. There are 4 different ways you can draw triangles…. 1.) SAS (Side-Angle-Side). 2.) ASA (Angle-Side-Angle).

E N D
Constructing Triangles Unit 4C-Triangle Geometry • LT5: I can construct triangles from given angles. • LT6: I can construct triangles from given sides.
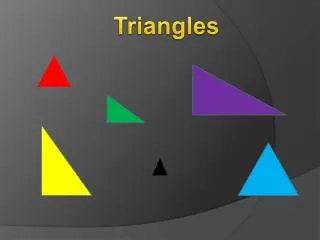
Drawing Triangles There are 4 different ways you can draw triangles… 1.) SAS (Side-Angle-Side) 2.) ASA (Angle-Side-Angle) 3.) AAA (Angle-Angle-Angle) 4.) SSS (Side-Side-Side)
SAS (Side-Angle-Side) A triangle can be constructed if we are given 2 sides and an angle. If the two sides include (join) the angle, the angle is called an “included angle” For these triangles, both a protractor AND a ruler are essential. The following video clip will offer an introduction on how to draw SAS triangles. PAY ATTENTION!!!!!!!!!!
SAS (Side-Angle-Side) http://www.youtube.com/watch?v=gwKaluvCLrU Now we will practice with a few examples. Clear your area of everything EXCEPT a pencil, blank paper, ruler, protractor, and scissors. Create the following triangles on your blank paper based on SAS given.
Examples **For BOTH examples you are creating Triangle ABC** 1.) AB=4 cm, Angle A =30˚, AC=5 cm 2.) BC=3 cm, Angle B=80˚, BA=6 cm Now cut your triangles out and place them on your neighbor’s to see if they are the same fit!
ASA (Angle-Side-Angle) A triangle can be constructed if we are given 2 angles and a side. If the two angles include (share) the side, the side is called an “included side” For these triangles, both a protractor AND a ruler are essential. The following video clip will offer an introduction on how to draw ASA triangles. PAY ATTENTION!!!!!!!!!!
ASA (Angle-Side-Angle) http://www.youtube.com/watch?v=Hawuf6Sh070 Now we will practice with a few examples. Make sure you have cleared your area of everything EXCEPT a pencil, blank paper, ruler, protractor, and scissors. Create the following triangles on your blank paper based on ASA given.
Examples **For BOTH examples you are creating Triangle ABC** 1.) Angle A=40˚, AC=5 cm, Angle C=30˚ 2.) Angle A=20˚, AC=6.5 cm, Angle C=90˚ Now cut your triangles out and place them on your neighbor’s to see if they are the same fit!
AAA (Angle-Angle-Angle) A triangle can be constructed if we are given 3 angle measures. Step 1: Sketch a triangle as a model for what to create. Step 2: Fill in the given information (angle measures) where you would like for them to go when you draw your “real” model Step 3: Now start with one line segment (base of the triangle) and create 2 of the required angles from the base (one on left and one on right) Step 4: Check the third angle once all line segments are connected to ensure it meets the requirements given for the third angle. **Remember to make sure a triangle can be formed before you start**
Examples 1.) Angle A=40˚, Angle B=60˚, Angle C=80˚ 2.) Angle A=25˚, Angle B=120˚, Angle C=35˚ Now cut your triangles out and place them on your neighbor’s to see if they are the same fit!
SSS (Side-Side-Side) A triangle can be constructed if we are given 3 side measures. Step 1: Sketch a triangle as a model for what to create. Step 2: Fill in the given information (side measures) where you would like for them to go when you draw your “real” model Step 3: Now start with one line segment (base of the triangle) and draw it the length of the measure given Step 4: You will have to build up the other 2 sides of the triangle using your ruler and meeting the measures given. You will most likely have to use trial and error to get the triangle formed correctly. **Remember to make sure a triangle can be made before you start**
Examples 1.) AB=4 cm, AC=6 cm, BC=7 cm 2.) AB=3 cm, AC=5 cm, BC=4 cm Now cut your triangles out and place them on your neighbor’s to see if they are the same fit!
Homework • You are to complete (draw) the following 4 triangles on your own piece of paper to turn in tomorrow when you enter the classroom. **You are creating Triangle ABC in all 4 problems • 1.) AB=3cm, Angle A=90°, AC=4cm • 2.) Angle A=65°, AB=12cm, Angle B=65° • 3.) Angle A=35°, Angle B=120°, Angle C=25° • 4.) AB=3.5cm, BC=5.5cm, AC=7cm