Download
1 / 14
180 likes | 253 Views
Introduction to Data Analysis. Downloading CasaXPS Online tutorials, resources, manuals, videos Low resolution analysis, calculating atomic % File Handling, report generation (slide 7) High resolution analysis Peak fits (Gaussian-Lorentzian, Voigt, Doniach-Sunjic) Atomic % (tags)

E N D
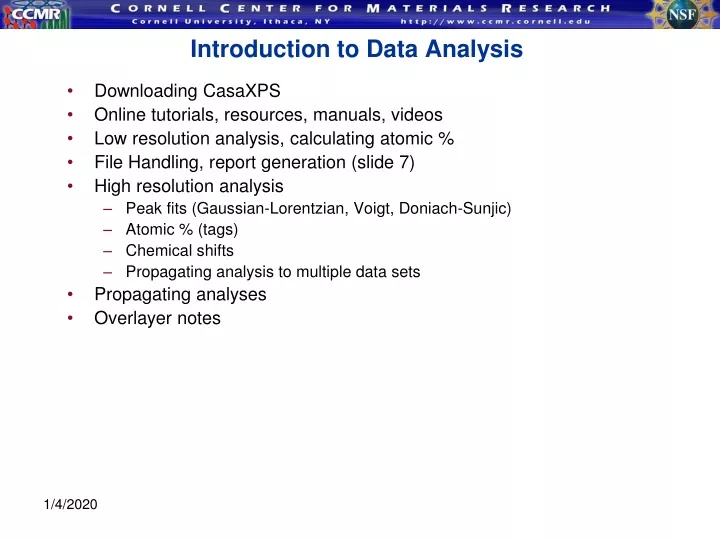
Introduction to Data Analysis • Downloading CasaXPS • Online tutorials, resources, manuals, videos • Low resolution analysis, calculating atomic % • File Handling, report generation (slide 7) • High resolution analysis • Peak fits (Gaussian-Lorentzian, Voigt, Doniach-Sunjic) • Atomic % (tags) • Chemical shifts • Propagating analysis to multiple data sets • Propagating analyses • Overlayer notes
Introduction to CasaXPS • Cornell site license: Free to any Cornell user, get registration code from manager • Sorry, not available for Macs. • Current download v.2.3.15 at http://www.casaxps.com/casaxps2315.htm version 2.3.16 http://www.casaxps.com/berlin http://www.casaxps.com/help_manual/ (help files and videos) development http://www.casaxps.com/2317dev/download.htm If you have an old version of Casa, simply replace your current • Casa.exe executable file • .hlp folder • This will ensure that you keep your current library and settings • The Casa folder should stay intact and not split up, the folder can be moved around on disk or flash drive and run from any computer. You can create a shortcut to CasaXPS.exe but don’t move CasaXPS.exe from the folder • Can be used to analyze XPS, Auger, SIMS data and more • Actively upgraded by author, Neal Fairley • Can import almost any data file and save as ISO 14976 (VAMAS) format for easy exchange between laboratories • Web Manual • Casa Cookbook (~$60) available from RBD or Acolyte Science • Incorporated into data processing short courses by John Grant and others
Other • XPS information http://www.casaxps.com/help_manual/XPSInformation/ • CasaXPS eManuals (Yellow Book) http://www.casaxps.com/ebooks/ebooks.htm • Quantifying survey and high resolution data • (video) http://www.casaxps.com/cam4/quant-survey/quant-survey.html • http://www.casaxps.com/help_manual/manual_updates/Basics_Quantification_of_XPS_Spectra.pdf • Peak fitting of high resolution data • http://www.casaxps.com/help_manual/manual_updates/peak_fitting_in_xps.pdf • Curve Fitting of Polymers • http://www.casaxps.com/help_manual/curve_fitting_polymers.htm • Estimating errors http://www.casaxps.com/cam4/Quant-With-Tags/Calculate-error-bars/Calculate-error-bars.html • Error analysis http://www.casaxps.com/help_manual/error_analysis.htm • Force quantification • File format conversion http://www.casaxps.com/help_manual/file_converters/file_conversion_filters.htm
Analysis Using one Wide Scan (see http://www.casaxps.com/cam4/quant-survey/quant-survey.html) • Open the scan by double-clicking on the data block • Click on the Library icon , or press F10. Click on the Periodic Table tab. • Select elements, verify transitions that appear with data • Can also go to the Element Table tab, click on the spectrum, and highlight transition in the Element Table. • When all peaks are identified, click Create Regions • Verify that regions are correct. If a doublet region (Cr 2p, e.g.) only encloses a singlet, click F7 or the Quantify icon. When the Regions tab is clicked, adjust the gray bars around the regions. • To zoom in, draw a box around a peak, and click inside the box. Use these icons to shift the data. • Important: verify that regions are correct. If a doublet region (Cr 2p, e.g.) only encloses a singlet, click F7 or the Quantify icon. When the Regions tab is selected, adjust the gray bars around the regions to obtain a proper background that intersects the noise at a reasonable point. • Backgrounds are typically Shirley for metals and Linear for polymers. • Some regions may need to be added manually. • Zoom in on a peak • F7, in Regions tab, click Create. • Make sure region name is correct, type in ‘# Na 1s’ to change a region and the RSF value. The ‘#’ command utilizes information in the library. By default, CasaXPS will look for the peak with the greatest RSF value In the case of a doublet, CasaXPS may assign a doublet region to a single peak To change the default peak, open the CasaXPS_quant.lib file and add/replace the peak transition you prefer, from CasaXPS.lib
Analysis Using two Survey Scans (taken at same pass energy) • Trace elements near the sensitivity level of XPS (~0.1-0.5%) may not show up well in a few survey scans. In this example, 10 survey scans of a chrome film do not indicate a bismuth peak, while 40 survey scans around 160eV show a small Bi 4f doublet. To utilize two (or more) survey scans: • Open the scan where the Atomic% table should go. • Add regions to all survey scans (follow instructions on previous slide). In this example, the Bi 4f region should not be in both spectra, just one. • Click F9, or the Annotation icon . • Remove any previously made annotation in Annotation History. Highlight and delete. • Click on the Quantification tab. Click Apply and a table will appear on the spectrum. • Highlight the blocks of data that you want added to the table and the smaller survey scan information should appear.
File Handling • Click “EDIT MODE” to see any original file names • FG means Flood Gun was used for charge compensation • FGG means the Flood Gun and Grid were used for charge compensation • _0, _30, _55, e.g. refer to the emission angle for ARXPS. _0 is the sample normal (deepest analysis). If no angle is given 55-degrees is assumed. • You may edit the blockID or sampleID by clicking on the “?” icon to the left of EditMode • Can rename species and transitions as well • If rows are not already arranged, select all blocks in a row and click ‘edit by row’ • Choose a variable label (e.g. sample, time, depth, etc.) • Choose a variable value higher than the # of blocks you have. • Repeat to sort each block into its label# • Blocks should be sorted into columns by peak transition • Using the ‘species/transition’ icon, label the element and transition (survey, Au 4f, C 1s, e.g.) • Or, open the element Library(F10) • Click on your peak to narrow the element table down • Select your peak/transition (C1s, Au4f, Au 4f 7/2, etc. ) • Click ‘edit Block Species/Trans’ • Click OK and your data block will go under its own column (C1s, Au4f, etc. ) • Clicking the trash-can ‘delete Vamas blocks’ will delete all highlighted blocks (cannot undo) • Clicking the clipboard for ‘copy/paste Vamas blocks’ will add all highlighted blocks into the current data set. Even blocks from other Vamas files can be copied if highlighted. • Spectra can be copied to the clipboard or saved as an EMF • Data is saved in Vamas format
Exporting Data Shifting Data • Processing (F8) can be used to shift data • Click on the ‘Calibration’ tab • Click on your peak and a Measured energy will appear • Type in the true intensity and click ‘Apply’ • Can be applied to Regions and Components by checking boxes • Note: • SSI system is calibrated to Au4f at 84/88eV • CasaXPS defaults to 83/87eV • Can go into the CasaXPS.lib file and change the Au4f7/2 to 84eV and Au4f5/2 to 88eV • Can reverse data shifts by clicking on the ‘Processing History’ tab and removing any commands Exporting data to text Highlight the blocks to be exported and click: • Click the ‘Save Tab ASCII’ icon • Choose file name • Export as rows of tables Exporting Atomic %’s as a report Highlight the blocks to be exported and click: • F7, Quantify • Click the Report Spec. tab • Click on the regions/transitions, or just click ‘All’ • Click Area Report • Save file to save as text file
Peaks/Components: Fitting Data • Note: It will help if your block Species/Transition is named correctly, or the default lineshape will be GL(30) instead of what you have in the library • Create a region around your peak(s) • Click the ‘Components’ tab • Click ‘Create Component’ • If the peak is selected in the Element table, the component will have the peak name (Au4f7/2 e.g.) • Can also type in “# Au 4f 7/2” in the ‘Name’ field to bring up the library RSF value • When you click on a peak, you can: • See the residual at the top, in black, which you would like to be flat when fit well. The next created peak will be inserted where the largest negative residual lies. • Drag the top of the peak to change Area and Position • Drag the side of the peak to change FWHM • Repeat for # of components you need • Click ‘Fit Components’ to obtain a fit to the data • Components can be removed by selecting and clicking ‘Cut’
Spin-Orbit Splitting • Very subjective • Can use two separate regions to define both peaks • Can use a Shirley/linear background (v.2.3.13 only) • Type ‘OS’ into region background field • Can use a linear background • Can constrain peak areas to theoretical values
Constraints (components) Can create Component Constraints: • In the component fields, make sure you press enter, don’t click after entering a value • Position (eV) • Known chemical shifts • Can set X,Y in the constraints field where X is lower limit and Y is upper limit • A+1.2 means 1.2 eV higher than position of peak A • FWHM • May vary with transition or chemical shift • Area • 4f 7/2 peak area should be 4f5/2 area*1.3333 (4:3 ratio) • 3p 5/2 = 3d 3/2 *1.5 (3:2 ratio) • 2p 3/2 = 2p 1/2 *2 (2:1 ratio) • A*1.333 would constrain the peak to 1.333 times the area of peak A
Displaying Component Table • Each component can have a unique Name • Open the ‘Tile Annotation’(F9) box • Click the Quantification tab • Can click the Components tab if only comparing components • Can click the Regions tab for comparing regions • Click table type for components, regions, or both • Click ‘Apply’ • Annotation History • Can move the table by click and dragging the red box that appears • Can remove the table by deleting the annotation history line
Advanced: Propagating Analyses • You can propagate the following analyses: • Regions • Components • Processing and more • Careful propagating too much • Bring up the spectrum you would like to propagate • Highlight the blocks you would like to propagate to • Either right-click the spectrum, OR click the ‘Propagate to Selection’ icon • Your selected blocks should appear and allow you to choose what you would like to propagate (regions, components, processing, annotation, etc.) • Selected spectra will have parameters applied
Overlayer Effects • Copper thin film on gold • Heterogeneous structure • Buried thick copper layer between gold • Copper substrate beneath gold
Overlayer Effects • A pure gold sample would show equal atomic% for all peaks • An overlayer will cause the lower KE (higher BE) peaks to be reduced in area • The data here indicate a Carbon overlayer (C peak at 284 eV) that is attenuating the Au peaks at higher BE’s