Download

1 / 26
260 likes | 515 Views
Cascading Style Sheet. Intoduction. Cascading Style Sheets, fondly referred to as CSS, is a simple design language intended to simplify the process of making web pages presentable.

E N D
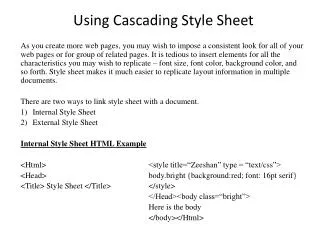
Intoduction • Cascading Style Sheets, fondly referred to as CSS, is a simple design language intended to simplify the process of making web pages presentable. • CSS handles the look and feel part of a web page. Using CSS, you can control the color of the text, the style of fonts, the spacing between paragraphs, how columns are sized and laid out, what background images or colors are used, as well as a variety of other effects. • CSS is easy to learn and understand but it provides powerful control over the presentation of an HTML document
Advantages of CSS: • CSS saves time - You can write CSS once and then reuse same sheet in multiple HTML pages. You can define a style for each HTML element and apply it to as many Web pages as you want. • Pages load faster - If you are using CSS, you do not need to write HTML tag attributes every time. Just write one CSS rule of a tag and apply to all the occurrences of that tag. So less code means faster download times. • Easy maintenance - To make a global change, simply change the style, and all elements in all the web pages will be updated automatically. • Superior styles to HTML - CSS has a much wider array of attributes than HTML so you can give far better look to your HTML page in comparison of HTML attributes. • Multiple Device Compatibility - Style sheets allow content to be optimized for more than one type of device. By using the same HTML document, different versions of a website can be presented for handheld devices such as PDAs and cell phones or for printing. • Global web standards - Now HTML attributes are being deprecated and it is being recommended to use CSS. So its a good idea to start using CSS in all the HTML pages to make them compatible to future browser
Parts of CSS CSS instruction or rules has two parts. • Selector • Declarations
Selector HTML elements are known as selectors in CSS. Selector tells a browser which elements in a page are governed by the particular rule. It is the link between the HTML document and the style, and all HTML tags are possible selectors. These are two kinds of selectors: • Type • Attribute (class or id)
Declarations The deceleration has two parts: • Property and • Value
Associating CSS with HTML • Embedded Style Sheet • External Style Sheet • Inline Style Sheet • Using Classes
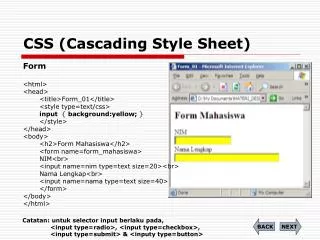
Using Embedded Style Sheet Embedded style sheet are placed within the HTML document by defining it between the opening and closing <head> tag and <body> tag. To embed a style sheet you need to use the opening and closing <style> tags. <head> <title>------------------</title> <Style> </style> </head>
Using Embedded Style Sheet Syntax Tag name { Style sheet Property : value} For example BODY{ Color: Blue} Embedded style sheet are most effective when you have a single HTML document to format.
Using Embedded Style Sheet • Advantages • Can control style for a document in one place. • No additional download time for style information. • Disadvantages • Need to reapply style information for other document.
Using External Style Sheet Suppose you are working with multiple documents and they share similar formatting. In this case, if you use embedded style sheets in each of the document, when in order to update the documents you need to adjust each and every style sheet. The best way is to have a separate style sheet file, which includes all the style definitions and associate it with the HTML document. The separate style sheet file must have the CSS extension. In this file the style definitions are placed within the opening and closing <STYLE> TAGS. The same syntax is used as in embedded style sheets.
Using External Style Sheet • To associate the separate CSS file with the HTML file, you have two options: • Importing • Linking
Importing In importing you need to add @ import URL (“…”); within the style block of the HTML document. The URL gives the address of the style sheet file. You can import any number of style sheet by including as many import statements. This method is useful if you are using multiple style sheet page that each has a particular function. Instead of having a large style sheet page you can work with multiple smaller ones.
Linking • This method gives visitors a choice of style sheet to use for a specific page. You need to use a single <Link> tag within the opening and closing <head> tags. Syntax <LINK rel=stylesheethref=“CSS1.CSS” type=“text/CSS”>
Using External Style Sheet Advantages • It can set style for many document with one style sheet. Disadvantages • Requires extra download time for style sheet, which may delay page rendering
Using Inline Style Sheet Applying inline style definitions throughout an HTML document is similar to adding formatting extensions. For example <P style=“color:red;font-size:5px”>
Using Inline Style Sheet Advantages • It can control style to a single character instance • Overrides any external or document styles Disadvantages • Need to reapply style information throughout the document and outside documents. • Bound too closely to HTML-difficult to update
Selector • Definition: identifies the HTML elements that the rule will be applied to, identified by the actual element name, e.g. <body>, or by other means such as class attribute values. • Example
Property & Value • Definition: The property is the style attribute you want to change. Each property has a value
Declaration • Definition: Each CSS line that includes property and value
Declaration Block • Definition: multiple declaration lines including the curly braces
Curly Braces • Definition: the curly braces contain the properties of the element you want to manipulate, and the values that you want to change them to. The curly braces plus their content is called a declaration block.
Let’s Create Our First CSS Page <html> <head> <style type="text/css"> p {color:red; text-align:center;} </style> </head> <body> <p>Hello World!</p> <p>This paragraph is styled with CSS.</p> </body> </html>
Class and id Selectors • In addition to setting a style for a HTML element, CSS allows you to specify your own selectors called "id" and "class". id - The id selector is used to specify a style for a single, unique element. • The id selector uses the id attribute of the HTML element, and is defined with a "#". • The style rule below will be applied to the element with id="para1": • #para1 {text-align:center;color:red;}
Let’s Create A CSS Page that uses “id” <html> <head> <style type="text/css"> #para1 { text-align:center; color:red; } </style> </head> <body> <p id="para1">Hello World!</p> <p>This paragraph is not affected by the style.</p> </body> </html>
Let’s Create A CSS Page that uses “class” <html> <head> <style type="text/css"> .center { text-align:center; } </style> </head> <body> <h1 class="center">Center-aligned heading</h1> <p class="center">Center-aligned paragraph.</p> </body> </html>