Download
1 / 22
230 likes | 367 Views
Google Earth. How to create a Google Earth Tour and place it in your Wiki. 1) Have a Plan. Know what places you are going to use for your tour If you want to include pictures or additional information along with your placemarks, have them set out in advance. 1) b. Create your Folder.

E N D
Google Earth How to create a Google Earth Tour and place it in your Wiki
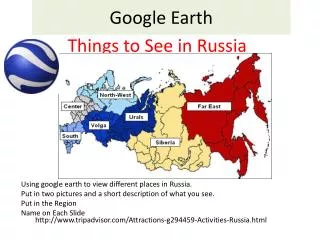
1) Have a Plan • Know what places you are going to use for your tour • If you want to include pictures or additional information along with your placemarks, have them set out in advance
1) b. Create your Folder • Create a folder on your “H” drive. Label it whatever you like, but for this example it is labeled “Google Earth Tour” • This folder is where you need to save the images you would like to use
3) Go to your first location Using the search bar in the upper left menu, type in the first location you would like to include on your tour. The hit the magnifying Glass icon to the immediate right of the box
4) Create a placemark Once GE has ‘flown’ to this location (zoom in if necessary to find the place you want to mark), click on the Yellow Pushpin Icon to create a placemark.
5) Name your Placemark • When you place the point • marker on the map the • ‘information window’ for • this specific point will • open up. At this stage you • want to add the name • of the place (e.g. Colorado) • or element (e.g. Pikes Peak) to the title. • You can also add more information here. This • Works like your wiki, you can add pictures using code, or just put text.
6) Customize your placemark You can change the icon that appears for your placemark. Clicking on this button will show different icons that you can choose from to change this image here
You can use code to place pictures in the description of your placemark Here is an example of a placemark description with an image
Adding a Photo • To upload a picture first copy the url code from google • In the google earth placemark properties tab click add picture • Paste the url code where it says to and click ok • Save the placemark
7) b. Check your placemarks • Look at your list of points in the box at the left-hand side of the screen and confirm that are in the correct order for your tour (It will run top to bottom, if something is out of place just drag and drop to move it to the correct spot in the order) • Also, make sure your placemarks are labeled and look the way you want
7) c. Adjust view settings for each point • You are about to make your tour, but before then, you should ‘fly’ to each of your placemarks and adjust the view settings to make the tour easier to create and look better in the long run • Go to TOOLS on the top of toolbar and scroll down to OPTIONS, then click TOURING TAB • Set the TIME BETWEEN FEATURES to the amount of time you want Google Earth to spend flying from place to place • Set the WAIT BETWEEN FEATURES to the amount of time you want Google Earth to stay on your place and/or the amount of time you want test and pictures to stay up • Make sure that the box that says SHOW BALLON WHEN WAITING FOR FEATURE is checked.
7) c. Continued • Once you have arrived at a placemarker, zoom in or out and pan around in the digital globe using the navigation tools located in the upper right hand corner of Google Earth. Once you find a view of your point marker and the map imagery that you like, right click on right click on the place marker on the left hand side and select “properties.” Click on the “view” tab then then click on the “snapshot view” at the lower right. GE will save that position for you.
8) Record a Tour 1. Hit the tour button 2. This should appear. Hit the “record” button to start recording (red circle)
Double-Click on your Placemarks in the column on the left side to “fly” to each point. Go in whatever order you would like, but it is simpler to go from top to bottom in this box. Google Earth will record what appears on the “world screen” automatically. However, it will not record your mouse cursor if you move it over the map
9) Finishing your Tour • When you are done with your tour hit the record button again to stop • After you stop, a widow pops up allowing you to play your recorded tour and save • Keep recording and re-recording tours until you are satisfied and be sure when your tour is all finished to save by clicking the disk icon • The tour will appear in the menu on the left as a camera icon
10) Saving your Tour 2. Click “File, Save, Save Place As…” • Drag your Tour under the “My Places” panel. If you click the “-” icon next to My Places, the Tour and your Placemarks should collapse under the “My Places” header
Save your file as a “.kml” Save your tour in the same folder that you saved your pictures. This will make sure you can view the pictures if you open Google Earth from another computer.
Uploading to the Wiki • Once you have saved the tour, upload the file onto your wiki. • Type in your page then link the text the same way you would for a new page link. • Find your .kmz or .kml file then press insert link. • Save your changes and check to make sure the file opens when clicked on.
11) Placing your Tour on a Wiki 1) Go to this url: http://www.gmodules.com/ig/creator?synd=open&url=http://code.google.com/apis/kml/embed/tourgadget.xml 2) Upload you Google Earth ".kmz" or ".kml" file to PBWorks 3) Scroll Down the url page until you reach the following. Make sure you check or uncheck the boxes until it looks as follows:
4) In the ".kml" url field, copy and paste the url to your Google Earth Tour 5) Click "Preview Changes" then hit "Get the Code“ 6) Use the code as you would any other code and put it into your wiki