Download
1 / 48
500 likes | 680 Views
Software Configuration Management Using the RTC Eclipse Client. Bruce Besch (Version 1.0 ). Table of Contents. Associate a new Work Item Accepting an Incoming Change Set Suspending and Resuming a Change set Discarding and Completing a Change Set Reversing a Change Set

E N D
Software Configuration Management Using the RTC Eclipse Client Bruce Besch (Version 1.0)
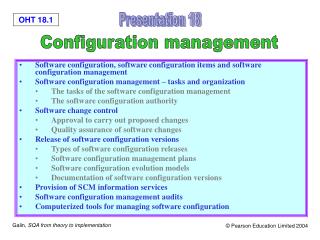
Table of Contents • Associate a new Work Item • Accepting an Incoming Change Set • Suspending and Resuming a Change set • Discarding and Completing a Change Set • Reversing a Change Set • Conflicts and Merging • Compare Editor • Completing the Merge • Creating a Baseline • Viewing History of a File or Folder • Comparing versions of Files or Folders • Sharing an Eclipse project • Opening RTC the first time • The Eclipse Workspace • Team Invitation • Accepting a Team Invitation • Understanding Eclipse Perspectives • Configure Instant Messaging • RTC Source Control Concepts Refresher • Developer Workflow • Create an RTC Workspace • The RTC Workspace • RTC in the Development Perspective • Check-In Changes • Editing Change Set Comments • Deliver Changes • Team Advisor • Associate an existing Work Item
Opening RTC the first time Introductory Information Links to Join a project Online Help Link to Jazz.net 3
Opening RTC the first time Information on this release of RTC Links to Tutorials 4
Opening RTC the first time Main Buttons on the Welcome Page Navigation Buttons on top of page 5
Opening RTC the first time – Opening the Workbench To open the workbench either double click the “Welcome tab” or click the “go to workbench” icon 6
The Eclipse Workspace Team Artifacts View Tip: Click on the “X” to close a view • Tip: In RTC “workspace” is an overloaded term. There are two completely different types of workspace: • An Eclipse Workspace, which we are discussing on this page. • An RTC Workspace which we discuss later. Work Items View 7
The Eclipse Workspace - Views RTC SCM Views Select “Window / Show View” to display the available Eclipse views. Tip: Click on the “+” to expand each folder Views support editors and provide alternative presentations as well as ways to navigate the information in Eclipse. For example, the Team Artifacts and other navigation views display projects and other resources that you are working with. Views also have their own menus. To open the menu for a view, click the icon at the left end of the view's title bar. Some views also have their own toolbars. The actions represented by buttons on view toolbars only affect the items within that view. 8
The Eclipse Workspace – Online Help The “Help View” displays the available Help topics Use “F2” to display the description of selected views 9
The Eclipse Workspace – Online Help RTC detailed usage information is available in “Contents” 1. Select “Contents” to display all available help topics 10
Team Invitation You will receive a Team Invitation email that looks similar to the example below. It contains the URL for the RTC web client and the repository information for the Eclipse client. URL for the Web Client This is the Repository information to copy onto your clipboard ready for setup of the Eclipse client. (instructions on following slides) 11
Accepting a Team Invitation You can accept a team invitation in the Eclipse client by either: Option 2. 1. Select “Accept Team Invitation…” in the “File” menu Option 1. 1. Click on “Accept Team Invitation” in the initial “Team Artifacts” view. Note: The “Team Artifacts” view will only look like this the first time you access it. 12
Accepting a Team Invitation (continued) The “Accept Team Invitation” window will now be displayed Repository connection information from the Team invitation Email 2. “Copy” and “Paste” the Repository Connection information from the team invitation Email into this area Tip: Many windows that pop up have this icon on them. Click this Icon for Help on the window 3. After you have pasted the connection information into the window, click on “Finish” 13
Accepting a Team Invitation (continued) The “Log in Required” window will now be displayed 5. Press “OK” The “Repository Connection Certificate Problem” window may be displayed once or a number of times. 6. Select the “Accept this certificate temporarily for the remainder of this session” radio button and press “OK” This is because the RTC server is using self signed certificate and can be safely ignored. 4. Enter your password and check the “Save Password” and “Automatically Log in” check boxes. Then press the “OK” button. 14
Accepting a Team Invitation (continued) The Workbench “Work Items” Perspective will now be displayed showing you the new team connection. A Perspective is a collection of views to enable the user to perform tasks in Eclipse. For example, the Work Item Perspective is the main perspective for performing RTC tasks. The Java Perspective is used for Java development. One or many Repository Connections Your Team Project Information. Tip, click on the “+” icon to expand the folders Project Area View. This contains configuration details of your project area. 15
Understanding Eclipse Perspectives The “Open Perspective” windows displays all available perspectives. The number of Perspectives displayed depends on the Eclipse based product you are using. For example, RSA has many more perspectives than this example which is the basic RTC client. You will find that as you work the Eclipse perspective can become untidy and difficult to find the views you want to use. In this case the “Reset Perspective” function will restore the perspective you are working in to its default layout. Each Eclipse window contains one or more perspectives. A perspective defines the initial set and layout of views in the Eclipse window. Within the window, each perspective shares the same set of editors. Each perspective provides a set of functionality aimed at accomplishing a specific type of task or works with specific types of resources. For example, the Java perspective combines views that you would commonly use while editing Java source files. As you work in Eclipse, you will probably switch perspectives frequently. 16
Configure Instant Messaging You need to ensure that the Instant Messaging client is configured for RTC 3. Press the “Add” button to add your Sametime account details 2. Select “Instant Messaging” Tab 1. Open the Eclipse “Preferences” window 4. Select “Sametime/Notes 8” as the provider Note: This assumes that RTC is installed on the IBM network 5. Enter your IBM Intranet ID 6. Press “OK” Note the Help 17
Configure Instant Messaging (continued) 7. Press “Connect” 8. Finally press “OK” to save 18
Sandbox Sandbox RTC Source Control Concepts Refresher • The project area is the top level of project organisation • The project area contains one or many team areas • Team areas have one or many streams of development activity contained in them • Workspaces are the users sandbox used to perform work. They are replicated between the Server (Repository Workspace) and Workstations Sandbox. • Changes are checked into a change set. The change set records the before and after states of each file. Content is stored separately and is delta-compressed • You Check-in changes from the Sandbox to the Repository Workspace. This also places the changes in a change set • You deliver change sets from Repository Workspace to Team Stream • You accept change sets from the team stream into your workspace and hence your Sandbox Jazz Server Project Area Team Area 1 Team Area 2 Team Members Team Processes Team Stream 1 Team Stream 2 Deliver Change Sets Deliver Change Sets Workspace Repository WorkspaceRepository Accept Change Sets Workstation Workstation 19
Developer Workflow - Overview Accepting changes from the shared ‘stream’ into your workspace and Sandbox Accept Changes Join a Project Make Changes Deliver Changes Accept Team Invitation Create Workspace Check In Changes Changes are delivered into the team shared ‘stream’ Changes are checked-in to your repository workspace and assigned to a ‘change set’ 20
Create an RTC Workspace 3. The “New Repository Workspace” windows will be displayed 4. Select the “Flow with a stream” radio button 1. Right click on “Source Control” 5. Select the stream you have been instructed to join 2. Select “New” then “Repository Workspace” 6. Press “Next” to continue to the next step Click the “help” icon to access on line help for the windows 21
Create an RTC Workspace (continued) 7. Enter a Unique repository name. It is recommended that you prefix the repository name with your name so the owner is easily identifiable 10. Select the “Use Current Repository” radio button 8. Enter a Description of the repository 11. Press “Next” 9. Press “Next” 12. Select the “Scoped” radio button 13. Select the Project you are joining 14. Press “Next” 22
Create an RTC Workspace (continued) 15. Select the components in the Stream that you wish to load. There may be one or many components available to select. 18. The “Load Repository Workspace” Window will then be displayed 16. Press “Finish” to continue to the next step 19. Select “Find and load Eclipse projects” to load existing projects into your workspace 20. Press “Next” to continue to the next step 17. Ensure the load repository check box is selected so that the repository is loaded For information on the other load options use the online help 23
Create an RTC Workspace (continued) 21. Select the Eclipse projects that you wish to load. There may be one or many projects available to select. Note: From a performance point for view we recommend only loading only the minimum set of Eclipse projects into the workspace. If possible when working on multiple Eclipse projects create independent workspaces for each project. The “Loading Repository Items” windows will be displayed as your local repository is loaded. Depending on the size of the workspace you are loading and the speed of the network connection, this may take a while. Note the Help Icon 22. Press “Finish” to start the loading of the workspace. 24
The RTC Workspace – Sample Project Other RTC functions are available here. They are beyond the scope of this training module When a component looks like this it means it is not loaded in a workspace When a component looks like this it means it is loaded in a workspace Your available workspaces are now shown in the Team Artifacts view 25
RTC in the Development Perspective If you change to a development perspective, Java in this example, you will see the Eclipse project you have loaded If you “right click” on a file or folder in a development perspective you can access RTC functions under the “Team” menu. Note that this icon on a file or directory means that it is stored in Jazz 26
Check-In Changes 2. The “No Changes to Show” window may be displayed. Just press “OK” to continue To Check-In and Deliver changes you need to open the “Pending Changes” view in your development perspective (Java in this example) 1. Right click on any file or directory in your development perspective. Then select “Show Pending Changes” in the Team menu. 3. The Pending Changes view will now be displayed. Tip: Expand the folders in the view by clicking on the “+” icon to drill down to the files or Folders being delivered 27
Check-In Changes (continued) You can also check-in individual files If this is the first time you check-in you will need a new change set 1. Right Click on “Unresolved” to check in all change sets 1. Right Click on the file to be checked in 2. Select a new or existing change set 2. Select “Check-in” then “New Change Set” If you have checked in previous files you can select existing change sets Unresolved changes have not been checked into a change set 1. Right click on “Unresolved” to check in all change sets 2. Select an existing change set 28
Editing Change Set Comments It is important to give change sets a useful comment so that they can be easily identified. 1. Right click on the Change Set 2. Select “Edit Comment” 29
Deliver Changes You can deliver all changes in the workspace You can deliver individual change sets 1. Right click on the workspace to deliver from 1. Right click on the change set to deliver 2. Select ”Deliver” 2. Select ”Deliver” You can deliver all changes in a selected component 1. Right click on the component to deliver from 2. Select ”Deliver” Tip: Note the keyboard shortcuts 30
Team Advisor Rational Team Concert has the facility to enforce team process. A commonly enforced team process is that delivered change sets must be associated with a Rational Team Concert work item. If you try and perform a deliver of a change set that is not associated with a work item, then Rational Team Concert will open up the Team Advisor to assist you in resolving the problem. Suggested solutions for the problem RTC has identified There are also shortcut buttons on the toolbar of the view 31
Associate an existing Work Item You can also associate a work item to a change set in the “Pending Changes” view If you select “Associate Existing Work Items” from the “Team Advisor” view 1. Right Click on the Change Set you wish to associate to a work item The “Select Work Items” search Windows will be displayed enabling you to search for and assign existing work items 2. Select ”Associate Work Item” to open the “Select Work Items” windows 3. When you have finished associating a work item to the change set press the “Try Again” button on the Team Advisor” view 32
Associate a new Work Item You can create a new work item from the “Create Work Items” windows 2. Populate the fields as required then select “OK” The “Create Work Item” windows will be displayed 1.Select “Create work item…” Remember the online help 3. When you have finished associating a work item to the change set press the “Try Again” button on the Team Advisor” view 33
Accepting an Incoming Change Set Incoming change sets are the changes delivered by your team members to the current flow target of your repository workspace. This is usually your team stream. The incoming change sets are displayed in the Incoming folder of the Pending Changes tool window. 1. Open the “Pending Changes” view to see any incoming change sets Accepting individual incoming change sets 1. Right click on a change set to accept individual incoming change sets Incoming change sets Accepting all incoming change sets 2. Select ”Accept” 1. Right click on “Incoming” to accept all incoming change sets The incoming change set should now be loaded in your workspace 2. Select ”Accept” 34
Suspending and Resuming a Change Set Suspending a change set enables you to suspend work on the current change set and resume the work later. Typically this could happen when a high priority task is assigned to you such as fixing a urgent defect. Suspending removes the change set from the repository workspace and unloads it from the local work space but preserves it in the stream Suspend Resume 1. Right click on the Change Set you wish to Suspend 1. To resume a suspended change set, Right Click on the Change Set you wish to resume 2. Select Suspend” 3. The change set will now appear in your list of suspended change sets 2. Select “Resume” 35
Discarding and Completing a Change Set If you think that the change set is invalid or could cause problem to the project code, you can discard it. You can discard either a outgoing change set or an accepted change set. After you make all the changes to the change set, you can mark it complete. A change set marked complete is no longer active. You can not add new changes or remove any changes from it. 1. Right click on the Change Set you wish to Discard 1. Right click on the Change Set you wish to Complete 2. Select ”Discard” 3. The Discarding Change Set Window will be displayed 2. Select ”Complete” 4. Select ”OK” to discard the change set 36
Reversing a Change Set Reversing a change set removes the changes captured in a change set. The reverse operation on a change set creates a patch. When you merge the patch into your workspace, the changes made to the selected change set are removed and a new change set is created. You can now deliver this change set to reverse the changes in the workspace flow target. 1. Right click on the Component containing the change set you wish to reverse 2. Select ”History” 3. The “History” View will be displayed 6. The “Patch Added to Pending Changes” window will be displayed. Press “OK” 4. Right click on the change set you wish to reverse 5. Select ”Reverse” 37
Reversing a Change Set (continued) Note: You should complete or suspend any open change sets before merging 6. Right click the Patch to Merge 7. Select ”Merge into Workspace” Warning: You may get merge errors indicating conflicts that you will need to manually resolve. Please see the next few slides on how to do this 8. Select ”OK” to confirm the merge 9. Finally you will need to Check-in and deliver the change set the merge has created 38
Conflicts and Merging Conflicts arise when two or more team members modify the same file or folder. Conflicts can also arise when you suspend a change set, modify a file it contains, and then resume the change set. In this example you have accepted a change set that has caused a conflict. The conflict is displayed in the “Pending Changes” view The first step is to open one of the conflicting files: 1. Right click on one of the conflicting files. Conflicts 2. Select ”Open in Compare Editor” In Rational Team Concert this icon indicates a conflict Tip: You can also use an external compare tool 39
Compare Editor The Compare Editor will then open. The compare editor is based on the Eclipse compare editor Editor Navigation Buttons Incoming Changes Local Workspace 40
Compare Editor (continued) 1. Attempt an Auto-merge 2. If the “Conflicts detected” Window is displayed, you will need to manually resolved all conflicting merges 3. When you have completed the merge click the “Resolve as Merged” button to complete the merge 4. The “ Resolve with Mine” window will be displayed. Click “Resolve with mine” to confirm the merge is complete 41
Completing the Merge Completing the merge will result in a merged change set being generated. It is shown in the Pending Changes view. You will need to deliver this change set to complete the merge 42
Creating a Baseline A baseline records the current configuration of a component in a repository workspace or stream. They enable you to revert to a previous component configuration or compare two configurations Tip: It is important for projects to have good naming standards in place for baselines 1. Right click on the Component in your workspace that you wish to make a baseline on The baseline will now appear as a outgoing change in the pending changes view. You will need to deliver this change to the stream 2. Click on “Baseline” 3. Enter a baseline name 4. Press “OK” to create the baseline Tip: It is good practice to create baselines frequently so you can easily go back to earlier configurations 43
Viewing History of a File or Folder 1. Right click on the file or folder that you wish to display the history 2. Select “Team-> Show History” to open the History View The History view is now displayed for the selected file or folder 44
Comparing versions of Files or Folders 1. Right click on the version of the file or folder you wish to compare The Compare Editor will then be opened displaying the difference between the version of files. Note how having good change set comments makes identifying points in the history of the file or folder much easier! 2. Select “Compare with Previous 45
Sharing an Eclipse Project Sharing an Eclipse project in an Eclipse based tool is how to save the project in the SCM tool and make it available to other people. Tip: Always have only one person create a project and share it for others to use Example: A new unshared java project. Note the different folder Icon compared to the Search project which has been shared 3. The “Share Project” windows will now be displayed. 1. Right click on the project that you wish to share Tip: Eclipse Project and RTC Projects are not related 4. Select “Jazz Source Control” Remember the online help 5. Press “Next” to continue 2. Select “Team” then “Share Project” 46
Sharing an Eclipse Project (continued) You can now select the component you wish to save the project in. You can also create new components or new folders in existing components or folders to save the new project in. In this example we are going to save the project in the “HelloGalaxy” folder in the search component. “to add” means it is a new folder we have just created You can use the “New Component” button to create a new component You can use the “New Folder” button to create a new folder 6. Select the component or folder you wish to save the project in. Tip: You should never save an Eclipse project directly under the component. You should always create a folder and save the project inside it. This is because you cannot save Eclipse projects inside existing Eclipse projects, so creating the folder prevents problems if you wish to add more projects later. 7. Press “Next” to continue 47
Sharing an Eclipse Project (continued) 9. The “Sharing Projects” window will be displayed as the project is shared You now have the option to exclude particular files from being saved in the repository. For example this could include build artifacts. 10. When “Sharing Projects” has completed, a “Share project” change set will be created that you need to deliver to complete the sharing of the project 8. Press “Finish ” to share the project 48