Download
1 / 34
340 likes | 456 Views
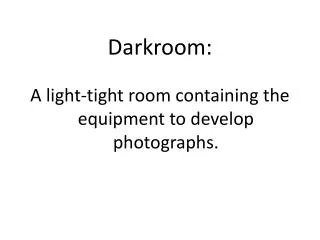
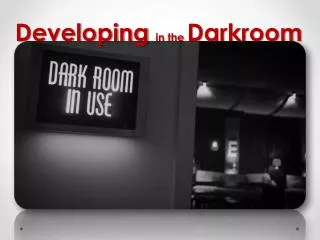
HOW TO MAKE TEST STRIPS AND ENLARGEMENTS IN THE MGJH COMMUNICATION TECHNOLOGIES DARKROOM. THIS IS AN ENLARGER. It is used to make photographic prints (enlargements) from negatives. THESE ARE NEGATIVE CARRIERS. They are used to hold negatives in the enlarger.

E N D
HOW TO MAKE TEST STRIPS AND ENLARGEMENTS IN THE MGJH COMMUNICATION TECHNOLOGIES DARKROOM
THIS IS AN ENLARGER It is used to make photographic prints (enlargements) from negatives
THESE ARE NEGATIVE CARRIERS They are used to hold negatives in the enlarger
THE NEGATIVE IS PLACED IN THE CARRIER WITH THE EMULSION (dull side) DOWN It is also best to place the negative upside down in the carrier so the image is oriented correctly to the person using the enlarger
OPEN THE APERATURE ON THE ENLARGER LENS SO THE MAXIMUM AMOUNT OF LIGHT CAN PASS THROUGH IT
TURN THE APERATURE ON THE ENLARGER LENS DOWN TWO TO THREE STOPS This reduces the amount of light passing through the negative and lens so your image will have proper contrast
THIS IS A TEST STRIP A test strip is a narrow piece of photographic paper which is used to help you determine the correct exposure time for your photographic enlargement.
It is used with a test strip to help you determine the correct exposure time for your photographic enlargement. TEST STRIP CARD This is a
THE TIMER IS USED TO CONTROL THE AMOUNT OF LIGHT USED WHEN MAKING TEST STRIPS AND ENLARGEMENTS
PLACE THE TEST STRIP IN THE EASEL (EMULSION UP) AND COVER ALL EXCEPT THE FIRST FIFTH OF IT WITH THE TEST STRIP CARD Remember, the EMULSION OF THE PAPER is shiny!
The timer is started by pushing this button It is used to time units of light that are projected toward the photographic paper.
THE NEXT FIVE SLIDES SIMULATE WHAT IS DONE TO MAKE A TEST STRIP
PUSH TIMER BUTTON ONCE TEST STRIP CARD
PUSH TIMER BUTTON ONCE TEST STRIP CARD
PUSH TIMER BUTTON ONCE TEST STRIP CARD
PUSH TIMER BUTTON ONCE TEST STRIP CARD
PUSH TIMER BUTTON ONCE TEST STRIP CARD COMPLETELY REMOVED
4 3 2 1 5 How many units of light have hit this section of the test strip?
DEVELOP THE TEST STRIP AGITATION (moving photo paper in solutions) NEEDS TO TAKE PLACE IN ALL TRAYS WATER WASH (5 MINUTES IF YOU WANT TO KEEP IT). If not, a quick rinse is all that is needed. DEVELOPER (2 MINUTES) STOP BATH (30 SECONDS) FIXER(2 MINUTES) MINUMUM
MAKE SURE THE ENLARGER SETTINGS DO NOT CHANGE OR EASEL BE MOVED BETWEEN THE DEVELOPMENT OF YOUR TEST STRIP AND THE EXPOSURE OF YOUR ENLARGMENT
PLACE A PIECE OF PHOTO PAPER IN THE EASEL (EMULSION UP) AND…….. Remember, the EMULSION OF THE PAPER is shiny!
………..PUSH THE TIMER BUTTON THE REQUIRED NUMBER OF UNITSOF LIGHT REQUIRED
DEVELOP THE ENLARGEMENT AGITATION (moving photo paper in solutions) NEEDS TO TAKE PLACE IN ALL 4 TRAYS DEVELOPER (2 MINUTES) STOP BATH (30 SECONDS) FIXER(2 MINUTES) WATER WASH (5 MINUTES) MINUMUM
EACH NEGATIVE THAT YOU ARE MAKING AN ENLARGEMENT FOR NEEDS TO HAVE THIS PROCEDURE DONE EVERY TIME. Allow 15 minutes to make one test strip and enlargement from a single negative. Only one test strip is needed (providing conditions do not change) if you plan to make more than one enlargement from the same negative.