Download
1 / 25
250 likes | 397 Views
User Interfaces, Debugging, MediaPlayer , Speech. User Interfaces. How Not to Do It. Better User Interface. Instant Response. For calculators and games, the user interface becomes more intuitive if your code responds immediately (without waiting for a button click).

E N D
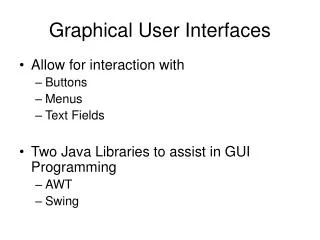
User Interfaces • How Not to Do It
Instant Response • For calculators and games, the user interface becomes more intuitive if your code responds immediately (without waiting for a button click). • That is, the bottom example is better than the top one.
Caution • This is great for calculators and games—the state of the controls and displays are always in agreement. • However, for data entry forms, you generally do not want instant action. • The user should be able to set the values of every control carefully, and even change his mind if needed. • When the user is ready to submit the data, he clicks a button. • If it is a major step (like spending a lot of money), displaying a confirmation (“Are you sure?”) message box can be useful. • Just remember that this would be highly annoying in a calculator or game.
Don’t waste space! • Many computer users multi-task; they don’t want your program taking up all of the monitor space. • Make your forms big enough to be easy to read and to use, but no bigger. • Don’t let the huge monitors in G610 fool you; your programs should function well on much smaller monitors.
Additional Guidelines • Don’t make fields required if they’re not! • Use VB’s alignment tools to make your form look organized and attractive. • Set your form’s Text property to something relevant. Not only does the Text property appear at the top of the form, it also appears in the Windows taskbar. Make sure that it doesn’t still say “Form1.”
ToolTips • ToolTips are small popup messages that appear when you hover the mouse over a control. • They can provide quick help to the user without taking up additional window space, and without annoying the power user. • To add ToolTips to your program: • Find the ToolTip control in the Toolbox. • Add one to your form. • Now, look at the properties for your other controls—there should be a new property called “ToolTip on ToolTip1”. • Enter the ToolTip text that you want displayed into this property. • You can also set or change a ToolTip at runtime by calling the SetToolTip procedure, like this: ToolTip1.SetToolTip(Button1, “This is Button1!”) • You can adjust the delay before ToolTips are shown as a property of the ToolTip control.
Tab Order and Shortcut Keys • Data-entry typists hate to take their fingers off of the keyboard to use a mouse. • If you think that your program may be used to enter a lot of typed data, have mercy on the typists and assign an appropriate tab order and use shortcut keys. • Tab order indicates how focus (the cursor) moves between the controls on a form. • Shortcut keys are used to immediately jump to a particular control by typing a special key combination.
Tab Order • If you order something online, you will likely have to enter your name, address, credit card number, and maybe some other information. • If the form has been well designed, you will be able to jump from one control (textbox, combobox, numericupdown) to the next using the Tab key on the keyboard. • It will be most useful if the jumping is logical; typically, this means left-to-right and top-to-bottom. • By default, the tab order in a VB form will be the order in which the controls were added to the form. • However, this isn’t usually the best order, logically. • Fortunately, VB allows you to assign the tab order; it’s fast and easy!
Assigning the Tab Order • Once you have the form nicely laid out, you can assign the tab order. • To do this, go to the View menu, and select Tab Order. • Small white-on-blue numbers will appear on the controls on the form, as shown in the picture at right. • Click on the controls in the desired order (left-to-right, top-to-bottom). • Include the labels, even though they never receive focus (the cursor). This facilitates making keyboard shortcuts. • Hit Escape to exit Tab Order view. Your new tab order will be saved. • You can always go back and change it if you made a mistake or if you add new controls.
Keyboard Shortcuts • A keyboard shortcut is assigned by adding an ampersand (&) to the text of a control. • For controls like CheckBoxes and RadioButtons which have fixed Text properties, you can put the ampersand right in the text. At runtime, you won’t see the “&”, but the letter following it will be underlined. • In the properties window: “&State” • On the form at runtime: “State” • When the form has focus, typing Alt+S will cause focus to jump to the State combo box.
Keyboard Shortcuts (continued) • For controls that do not have fixed Text properties, like TextBoxes and ComboBoxes, put the & in the label which immediately precedes the control in the tab order. • For example, if you have a First Name label (Label1) with tab order 0 next to a TextBox for the user to enter her First Name (with tab order 1), set the text property of the LABEL as follows: • Label1.Text = “&First Name” (this can be done at design time or run time. • When the user types Alt+F, Windows will try to send focus to the label, but since labels can’t receive focus, it will move onto the next control in the tab order, the TextBox.
Docking • Aside from forms and the SplitPanel control, VB generally does not allow users to adjust the size of the controls on a form. • However, there are some controls that users sometimes need or want to resize. Examples: • DataGridView: Make it bigger to see more fields or records. • PictureBox: Make it bigger to see more of a picture (in Normal or Centered SizeMode) or to zoom in on it (in Zoom SizeMode). • TextBox: For writing a longer essay. • WebBrowser: For seeing more of a web page on the screen. • You can give the user this option by “docking” the control to the entire form • In designing a VB form, you can “Dock” controls to the form. • VB allows for docking to any of the four sides of the form, but docking to the entire form works best. • To dock a control to the form, go to the Dock property of the form, click the down arrow, and select the big square in the middle.
Docking • Once the control is docked to the form, it will always be the same size as the form. • Since the user can resize the form, this means she can resize the control as well. • If you do this with PictureBoxes, you will probably want to set the SizeMode property to Zoom.
Anchor • An alternative to docking is to “anchor” a control to one or more sides of a form. • Anchor is a property of a control; try the different settings and see how they affect the control’s behavior when the form is resized. • Anchor is a good way to keep controls visible and of a useful size when resizing a form, both at design and run time.
Text-to-Speech • See the sample program.
The MediaPlayer Control • Adding to the Toolbox: • Right-click on a section of the Toolbox and select “Choose Items…” • When the “Choose Toolbox Items” dialog appears, switch to the “COM Components” tab. • Scroll down to find “Windows Media Player.” • Check the box next to it and click “OK” at the bottom. • The Media Player should now be in your toolbox.
Using the Media Player • Add a MediaPlayer control to a form. • By default, VB gives it the name “AxWindowsMediaPlayer1”. Change it! • You select the file to play, either locally or from the web, using the URL property. • To access the functions of the media player (play, pause, stop, etc.), use the CtlControls property. • Example code on the next slide.