Download
1 / 18
180 likes | 203 Views
This set of slides shows the step-by-step process of generating 3D renderings in Avisio from tomographic reconstructions using Inspect 3D or ETomo. Learn how to adjust thresholding, generate surface data, and perform manual skeletonization.

E N D
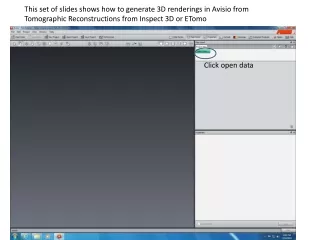
This set of slides shows how to generate 3D renderings in Avisio from Tomographic Reconstructions from Inspect 3D or ETomo Click open data
Step 3 A Left click on Loaded Data in project view to display favorite options B Right Click to display all available options Favorite options are displayed after left click 1.Click here
Step 4. A Click Interactive Thresholding B. The following screen now comes up:
4C Now adjust thresholding so you can see your nanofibers, blue color indicates the selected area Change slice number here Slide threshold so you Can see fibers
Step 4, Thresholding final step C: Hit Apply to generate thresholded data: 4C: Hit Apply!
The steps in project view have been dragged to show the workflow that we just did on the data! Thresholded data is now generated hiding in new green colorbar Drag colorbars So you can see all objects of the project
Step 5: To see the thresholded volume in 3D: A) Get rid of slicing plane by deactivating Interactive Thresholding B) Select new green box with thresholded data A) Press Red button to stop displaying threshold plane B) Left click, then right click
Step 5 C) Select Volume Rendering, a new yellow double box comes up (it is already connected with an arrow to the thresholded data) D) Use Hand Tool to rotate data freely around in the viewer window C) New colorbar for Volume rendering D) Hand Tool
Generate Surface • Select Thresholded data • Select Generate Surface Module • Hit Apply • Wait (1-3 minutes) • Left Click B) New module Still displaying thresholded data D) New surface data
Surface Simplification is required because the generated surface is too big • Select surface data (lowest green colorbar) • Open simplification editor • Set number of faces to 1,800,000 (add two zeros) • Hit Simplify Now • Wait some minutes • Left Click Simplification Editor (second from left) Initial number of faces Change number of faces Hit Simplify now
View Surface A) Deselect Volume Rendering B) Right click on the surface module and select Surface View B) Deselect (color changes from orange to grey) B) New module surface View
Auto Skeleton After step 4 (creation of the thresholded data), skeletonizing can be done. The Auto Skeleton function however, usually does not work the way we want it. Left click, right click, type “skeleton” in the search field and select when it shows up
A red colorbar “Auto Skeleton” will appear, left click to select it Hit Apply on the green button
Manual Skeleton Several Individual steps need to be performed depending on the dataset: resampling, closing, dilating, eroding. But there is no standard way and some trial and error. After applying those steps/filters/functions, the thinning function must be used and only if it yields a graph/line – like skeleton the Auto Skeleton function will result in the desired skeleton and statistical data can be generated
Fill in Steps on Surface rendering. Every time I run a surface rendering in Avizio it crashes. Reduce data set first? Best way to do that? Then how to edit surface plot properties ….
Data acquisition Tilt series Reconstruction Surface reconstruction Skeletonizing Measurements Reconstruction file Numbers Surface Spatial Graph Simplification Inspection Surface Volume Rendering Animation Segmentation Video Label Field