Download

1 / 20
220 likes | 536 Views
ARDUINO FRAMEWORK. ARDUINO - REVIEW. Open http://arduino.cc/ to download the latest version of Arduino IDE. Verify Checks your code for errors. Upload Compiles your code and uploads it to the Arduino I/O board. See uploading below for details.

E N D
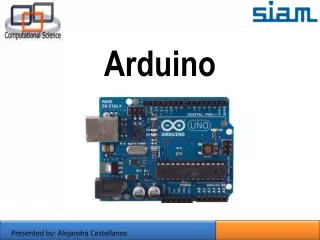
ARDUINO FRAMEWORK
ARDUINO - REVIEW Open http://arduino.cc/ to download the latest version of Arduino IDE
Verify Checks your code for errors. Upload Compiles your code and uploads it to the Arduino I/O board. See uploading below for details. Note: If you are using an external programmer, you can hold down the "shift" key on your computer when using this icon. The text will change to "Upload using Programmer" New Creates a new sketch. Open Presents a menu of all the sketches in your sketchbook. Clicking one will open it within the current window. Note: due to a bug in Java, this menu doesn't scroll; if you need to open a sketch late in the list, use the File | Sketchbook menu instead. Save Saves your sketch. Serial Monitor Opens the serial monitor.
BARE MINIMUM CODE void setup() { // put your setup code here, to run once: } void loop() { // put your main code here, to run repeatedly: }
The code for Digital Read • intpushButton = 2;void setup() {Serial.begin(9600);pinMode(pushButton, INPUT);}void loop() { // read the input pin:intbuttonState = digitalRead(pushButton); // print out the state of the button:Serial.println(buttonState);}
Code for Analog Read • void setup() {Serial.begin(9600);}void loop() { // read the input on analog pin 0:intsensorValue = analogRead(A0); // print out the value you read:Serial.println(sensorValue);}
Code for Fading • intledPin = 9; // LED connected to digital pin 9void setup() { } void loop() { for(intfadeValue = 0 ; fadeValue <= 255; fadeValue +=5) { analogWrite(ledPin, fadeValue); delay(30); } for(intfadeValue = 255 ; fadeValue >= 0; fadeValue -=5) { analogWrite(ledPin, fadeValue); delay(30); } }
Code #include <LiquidCrystal.h>// initialize the library with the numbers of the interface pinsLiquidCrystallcd(12, 11, 5, 4, 3, 2);void setup() { // set up the LCD's number of columns and rows: lcd.begin(16, 2); // Print a message to the LCD.lcd.print("hello, world!");}void loop() { // set the cursor to column 0, line 1 // (note: line 1 is the second row, since counting begins with 0):lcd.setCursor(0, 1); // print the number of seconds since reset:lcd.print(millis()/1000);}
Code constintgroundpin = 18; // analog input pin 4 -- groundconstintpowerpin = 19; // analog input pin 5 -- voltageconstintxpin = A3; // x-axis of the accelerometerconstintypin = A2; // y-axisconstintzpin = A1; // z-axis (only on 3-axis models)void setup(){Serial.begin(9600);pinMode(groundpin, OUTPUT);pinMode(powerpin, OUTPUT);digitalWrite(groundpin, LOW); digitalWrite(powerpin, HIGH);}void loop(){Serial.print(analogRead(xpin));Serial.print("\t");Serial.print(analogRead(ypin));Serial.print("\t");Serial.print(analogRead(zpin));Serial.println(); delay(100);}
Code • constintxPin = 2; // X output of the accelerometerconstintyPin = 3; // Y output of the accelerometervoid setup() {Serial.begin(9600);pinMode(xPin, INPUT);pinMode(yPin, INPUT);}void loop() { // variables to read the pulse widths:intpulseX, pulseY; // variables to contain the resulting accelerationsintaccelerationX, accelerationY; // read pulse from x- and y-axes:pulseX = pulseIn(xPin,HIGH); pulseY = pulseIn(yPin,HIGH); // convert the pulse width into acceleration // accelerationX and accelerationY are in milli-g's: // earth's gravity is 1000 milli-g's, or 1g.accelerationX = ((pulseX / 10) - 500) * 8;accelerationY = ((pulseY / 10) - 500) * 8; // print the accelerationSerial.print(accelerationX); // print a tab character:Serial.print("\t");Serial.print(accelerationY);Serial.println(); delay(100);}
WEB CLIENT #include <SPI.h>#include <Ethernet.h>// Enter a MAC address and IP address for your controller below.// The IP address will be dependent on your local network:byte mac[] = { 0xDE, 0xAD, 0xBE, 0xEF, 0xFE, 0xED };IPAddressip(192,168,1, 177);// Initialize the Ethernet server library// with the IP address and port you want to use // (port 80 is default for HTTP):EthernetServer server(80);void setup() {Serial.begin(9600); // start the Ethernet connection and the server:Ethernet.begin(mac, ip);server.begin();Serial.print("server is at ");Serial.println(Ethernet.localIP());}
void loop() { // listen for incoming clientsEthernetClient client = server.available(); if (client) {Serial.println("new client"); // an http request ends with a blank linebooleancurrentLineIsBlank = true; while (client.connected()) { if (client.available()) { char c = client.read();Serial.write(c); // if you've gotten to the end of the line (received a newline // character) and the line is blank, the http request has ended, // so you can send a reply if (c == '\n' && currentLineIsBlank) { // send a standard http response headerclient.println("HTTP/1.1 200 OK");client.println("Content-Type: text/html");client.println("Connnection: close");client.println();client.println("<!DOCTYPE HTML>");client.println("<html>"); // add a meta refresh tag, so the browser pulls again every 5 seconds:client.println("<meta http-equiv=\"refresh\" content=\"5\">");
// output the value of each analog input pin for (intanalogChannel = 0; analogChannel < 6; analogChannel++) {intsensorReading = analogRead(analogChannel);client.print("analog input ");client.print(analogChannel);client.print(" is ");client.print(sensorReading);client.println("<br />"); }client.println("</html>"); break; } if (c == '\n') { // you're starting a new linecurrentLineIsBlank = true; } else if (c != '\r') { // you've gotten a character on the current linecurrentLineIsBlank = false; } } } // give the web browser time to receive the data delay(1); // close the connection:client.stop();Serial.println("client disonnected"); }}