Download
1 / 99
1.01k likes | 1.27k Views
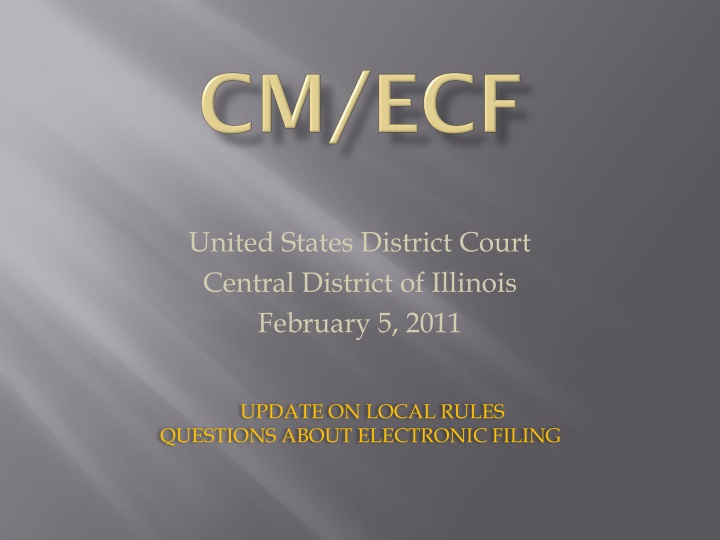
Cm/ecf. United States District Court Central District of Illinois February 5, 2011. UPDATE ON LOCAL RULES QUESTIONS ABOUT ELECTRONIC FILING. Central District of Illinois public website www.ilcd.uscourts.gov.

E N D
Cm/ecf United States District Court Central District of Illinois February 5, 2011 UPDATE ON LOCAL RULES QUESTIONS ABOUT ELECTRONIC FILING
Central District of Illinois public websitewww.ilcd.uscourts.gov
Central District of Illinois website is an interactive tool providing information specific to the Court, information on additions to the system and answers to frequently asked questions Link especially “for Attorneys” Link to Electronic Case Filing Link to Local Rules Link to AO forms Directory of Judges Directory of Clerk’s Office locations and email addresses Link to training modules for CM/ECF
Provides link to CM/ECF Wireless access information Frequently asked questions about CM/ECF CJA attorney forms Informational updates on concerns of the court Attorney registration forms for the Central District of Illinois electronic filing system Court fee schedule
Tutorials on new functionality • Civil case opening instructions • Sealed documents • Maintenance of user accounts
ELECTRONIC CIVIL CASE OPENINGS • New functionality has been added to CM/ECF which will allow an attorney to file a complaint electronically with a credit card • Complaints can be filed 24 hours a day • System is set up to randomly assign the judges after the transaction is complete • Step-by-step instructions to filing can be found on the website
CIVIL CASE OPENING Log on to the CM/ECF system using your login and password, making sure to check the box regarding redaction issues.
Click on Civil in the blue tool bar located at the top of the page. Click on Attorney Opening of Civil Cases.
Choose correct office for filing from drop down box. Verify that the Case type is cv. (Note: If you are not sure which office is applicable, please refer to the Local Rules to determine correct location). DO NOTHING ELSE ON THIS SCREEN. Click next.
You will now see a screen which asks for specific statistical information regarding your case. This information is the same information that you provide on your civil cover sheet. Please refer to your completed civil cover sheet for information. Fill in the appropriate boxes by clicking on the down arrow located at the end of each informational box. Please note that it is mandatory to fill in the Jurisdiction, Cause of Action, Nature of Suit and Origin boxes. If you are paying by credit card, the fee status selection should be paid.
You will now see a screen in which you may add parties. You will note that this screen is a split screen. Please pay special attention to which side of the screen you are working. To add parties, type in plaintiffs first and last names in the appropriate box on the right side of your screen. Click Search. A Search Results box is displayed and below the box there are two buttons, one which says Select Party, and one which says Create New Party.
The Party Information Screen now appears on the right side of your screen. Your plaintiff’s name will be in the appropriate boxes in this screen. You will need to change the role of the party by clicking on the drop down box arrow, and selecting the correct role (in this case, plaintiff). Enter no other information on this screen. On the bottom of the screen is a button that says add party (you may have to use your scroll bar located on the far right hand side of your screen to be able to see the add party button).
Click on the add party button (located on the bottom right hand side of your screen), NOT the “add new party” button (located on the top left hand of your screen). You will note that if done correctly, your party has been added to the party tree on the left side of your screen. If you should click on the “add new party” button in error, your party will not be added to the party tree and you will need to re-enter the information on the right side of your screen. It is imperative to always check the party tree located on the left side of your screen to verify that your parties are being added.
DO NOT HIT YOUR BROWSER BACK BUTTON IN AN ATTEMPT TO CORRECT ERRORS. You will note that your plaintiff’s name has now been added to the left side.
You are now ready to enter another party. To do this you once again go to the right side of your screen, adding names as you did above making note to change your role types as appropriate. As you continue to add parties the names will appear on the left side of the screen also. Once all parties have been entered, you will notice on the left side of your screen, above the party names a button that says “Create Case”. Click on this button.
A screen appears that says “Case will be created. Proceed?”. If you have entered your parties correctly, have your credit card ready, and have your complaint ready to attach (in pdf format), click ‘Yes’ to proceed. Your case has now been created and a case number is assigned. NOTE: Once you have clicked the “create case” button , DO NOT HIT YOUR BROWSER BACK BUTTON in hopes of correcting any errors to your case. Please contact the clerk’s office with any questions.
You will notice that this screen displays your case number and asks if you would like to docket lead event. Click on the link “Docket Lead Event”.
From this screen choose “Attorney Complaint” or “Attorney Notice of Removal” (whichever is appropriate) from the list of ‘Available Events’ and click next. An informational screen appears with the case number that has been assigned to your case. Click Next.
On this screen you will see that you once again have a split screen. On the left side of your screen you will see the plaintiff(s) and defendant(s) that you have entered. On the right hand of the screen all parties appear in a box. At the top of the split screen on the right hand side you will see that you are being asked to ‘select the filer’ . YOU ARE THE FILER. Click next.
A screen appears that tells you that an attorney/ party association does not exist for this party and yourself, and would you like to make this association. The box is already checked by default. You will also notice that there is a box that can be marked if you are the lead attorney. Local Rule 11.2 - Designation of Lead Counsel on Initial Pleading states: “When a party’s initial pleading is filed, counsel must designate as lead counsel the attorney who will be responsible for receipt of telephone conference calls. Only one may be designated.” If you are the lead counsel, mark this box. If not, leave it blank. Click next.
A split screen once again appears. On the right side of this screen it is asking - “Please select the party that this filing is against”. Pick the appropriate party from the box by clicking on the name (it will turn blue), and then clicking on next.
A screen appears in which you are to attach your complaint or notice of removal (required) and any attachments(i.e. summons, exhibits).To do this, next to the main document box there is a browse button(the main document will always be either the complaint or notice of removal) . Browse for your complaint or notice of removal (that you have in pdf format). Once you have selected this document, the link will appear in the box under “main document”. Follow the same steps for the attachment boxes by browsing for your remaining documents (i.e., civil cover sheet, summons), making sure to fill in either the category or description of these documents.
IMPORTANT : If you are seeking ifp status, DO NOT attach your motion for ifp to this transaction. Once your case has been opened, and complaint filed, you may proceed in filing your motion for ifp by logging into the CM/ECF system; click civil on the blue tool bar; select motions/petitions, pick proceed in forma pauperis from the drop down box, hit next; follow the interactive screens to complete filing ). Once finished, hit next.
This screen asks you if you are requesting ifp status or filing on behalf of the USA. Fill in the appropriate response. If you are filing on behalf of the USA or are requesting IFP status, you would enter “y” in this box and hit next; if not, and are ready to pay by credit card, you would put a “n” in the box, and then click next. The next screen is a reminder that the filing fee is $350. Click next.
A screen now appears that asks for your credit card information. Fill in the appropriate boxes, verify, and then click on “continue with plastic card payment”.
An Authorize Payment screen now appears. Verify the information on this page. If you would like confirmation of this payment sent to you, enter your email address in the appropriate boxes. Once you have filled in all appropriate boxes, mark the authorization box at the bottom of the page by clicking in the box, click next.
WARNING: Once you have clicked on the “submit payment” button, your credit card has been charged the $350 filing fee, regardless of whether you finish the transaction. DO NOT HIT YOUR BROWSER BACK BUTTON in an attempt to make corrections to your case. Doing so may result in double charges to your credit card.
If your payment is accepted, you will get a screen that shows you: Complaint against “your defendant” (Filing fee $350, receipt number *******), filed by “your plaintiff”. If all appears correct, click next:
A final docket text screen appears. Click on next to commit this transaction
A Notice of Electronic filing now appears. Please note that the Notice of Electronic filing informs you of the judges which have been assigned to your case.
Attachments and Exhibits(Local Rule 5.8) • Documents with attachments and exhibits greater than 30 pages must have a courtesy paper copy delivered to the presiding judge’s chambers. • Non-trial exhibits that are not readily available in electronic form can be conventionally filed. • Trial exhibits will not be scanned into the electronic record unless specifically ordered by the Judge.
TECHNICAL ISSUES – HELPFUL HINTS • Documents are to be filed in pdf format. For proper archival preservation, the National Archives and Records Administration (NARA) recommends that documents be scanned at a setting of 300 dots per inch (dpi). (Local Rule 5.8). • When attaching a document, if you get a message that your document is too big, even though it is only a few pages, it may be the result of your document being scanned. • Check your scanner settings to be sure that they are 300 dpi. • Convert your document to pdf using adobe program instead of relying on your scanner to convert
SEALED DOCUMENTS(Local Rule 5.10) • The Court does not approve of sealing parts of the record as a general matter. • In the rare event that amotion itself must be filed under seal, the motion should be filed using the event “Sealed Motion”. • A party who has a legal basis for filing a document under seal must file a motion for leave to file under seal unless prior court approval has been granted.
The motion must include an explanation of how the document in question meets legal standards for filing sealed documents. The document in question is filed contemporaneously using separate docket event “Sealed Document”. A publically viewable notice of electronic filing is generated, but the document is not viewable electronically, by the public or by parties. Service of the sealed document must be made in accordance with the Federal Rules of Civil Procedure and the Local Rules of this Court.
If the motion to file under seal is denied, the sealed document tendered will remain under seal and will not be considered by the presiding judge. • If the filer wishes to have the denied document considered by the Court, it must be re-filed in the normal fashion. • The Court may, in its discretion, order a sealed document to be made public if: • The document is filed in disregard of legal standards. • The document is so intricately connected with a pending matter that the interest of justice are best served by doing so.
Rules applicable to sealed documents also apply to documents submitted for in camera review. • A party who has a legal basis to file a submission without notice to other parties should file the submission electronically as an “ex parte document” or “ex parte motion” .
SEALED DOCUMENTS Log on to the CM/ECF system using your login and password, making sure to check the box regarding redaction issues.
First we will file your motion for leave to file under seal. • This motion WILL NOT BE sealed, will be sent via NEF to counsel of record, and will be available on PACER; therefore, special care should be taken to ensure that the motion does not include any sensitive information. • Click on Civil in the blue tool bar located at the top of the page. • Click on Motions/Petitions.
From the drop down box, click on “Leave to File Document Under Seal”. Click Next.
Enter appropriate case number. Click next.
A split screen now appears. The left side of the screen displays all parties to the case. The right hand side asks that you select the party who is filing the motion. YOU ARE THE FILER. Choose your client by clicking on the appropriate name in the box on the right side of the screen. To make multiple selections, hold down your control button while clicking on the names. Once selection(s) are made. Click next
A screen now appears with an instructional message for attorneys regarding an upcoming screen. Please pay special attention to this message. Once read, click next.
This screen is where you will attach your motion for leave under seal which you have saved in .pdf format. Remember this event is your motion asking for leave to file your sealed document and therefore this filing is NOT SEALED. DO NOT ATTACH YOUR SEALED DOCUMENT to this event. Once you have browsed for your motion. Click next.