Download
1 / 29
290 likes | 437 Views
Skater World: Part Four. By Deborah Nelson Duke University Under the direction of Professor Susan Rodger June 2009. Overview. Make Billboards by bringing 2D images into your Alice world. Learn how to animate them like any other object . Learn how to use 3D text and sound

E N D
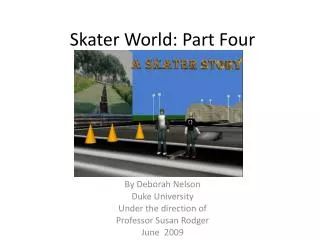
Skater World: Part Four By Deborah Nelson Duke University Under the direction of Professor Susan Rodger June 2009
Overview • Make Billboards by bringing 2D images into your Alice world. • Learn how to animate them like any other object . • Learn how to use 3D text and sound • The story continues: Using two billboards, we will simulate a plane taking off.
Make Billboard takeOff.jpg • Pictures can be saved and imported into your world, this is known as “Make Billboard” • Right Click on camera in the object tree. Set • point of view to Dummy Objects, watchTakeOff. • In the menu bar, select File, then Make Billboard. Select takeOff.jpg. Click Import. • This image should have been downloaded with the tutorial. Or download it now.
Position • Billboards always appear in one default position in the world. Right click on takeoff in the object tree. Select methods, move to, doNotEnterSign, the entire doNotEnterSign. • Drag takeOff into the middle of the scene. • Click on • Add Objects • to see it better
Make Billboard: Plane.jpg • Select File, Make Billboard. Import Plane.jpg. • Right click on Plane in the object tree. Select methods, move to, takeOff. • Use the position buttons to turn the images like this. Use quad view if needed
The Story • takeOff is an image of a plane sitting on green grass. Plane is an image of a plane in the air • Even though Billboards are images, they can be animated like any other object. • In this scene we will use these images to simulate an airplane taking off. • takeOff will move across the screen. As it moves, it will gradually become invisible while Plane gradually becomes visible. Then Plane will lift up into the air and continue moving.
Set Plane Vehicle • Click on Plane in the object tree. Set vehicle to takeoff • Keep in mind, the camera position and the size of the billboards may be slightly different from mine. That’s ok for this animation
Position takeoff • With the position button, move takeOff to the right hand corner. Plane will follow since it’s vehicle is set to takeOff.
Position Plane • Drag the Plane so that it is covering takeOff. Then drag it up slightly so you can see the bottom of takeOff. • Click on Plane in the object tree. In • the details • area, set • opacity to 0.0%
Plane orient To takeoff • To make sure they are facing the same direction, right click onPlane in the object tree. Select methods, orient to, takeOff.
Brighten the images • The images are too dark. In the local gallery, open the Lights folder. Drag stageSpotLight into the world. • Drag the spotlight over to takeoff. Use the resize button to make it bigger • Right click on spotlight in the object tree. Select methods, turn to face, takeoff • Use the move and up buttons until your picture brightens
Make spotlight invisible and set vehicle • Click on stageSpotLight in the object tree. • Set isShowing to False. • Set the vehicle to takeOff • The light still shines, even • though the black box is • invisible.
In the scene, move takeoff over to the right so just the edge is showing. • Click Done to exit the gallery • Click on world in the object tree • In the methods tab, Click edit • Next to airplaneTakeOff in order • to open it’s method tab
Write airplaneTakeOff • Drag the following code into the method,underneath the code we added in Part Three. Remember, use skaterGuy2: • Set the first event, when the world starts, to call world.airplaneTakeOff • Play your world
Click on Plane in the object tree. From properties, drag opacity into the Do together. Set to 100.0%. • . Set duration to 4.5 seconds
Play your world. • Your flight and speed may vary because of slight differences in our camera/billboard positioning. Make sure the plane flies all the way across the screen. • Now we want to add 3D text to our world. • Click on Add Objects. In local gallery, scroll over to Create3D text. This is at the end of the gallery
Adding 3D text • In the pop up window, type “Up, UP and Away”. Click OK.
Position 3D Text • Right click on 3D text in the object tree and select move to doNotEnterSign • Use the position buttons to put your text in the middle of your scene. • Click Done to exit • the Gallery
Properties of 3D text • Click on 3D Text in the object tree. Click on properties. • Change isShowing to false • If you want, change the color, the fillingStyle, or the font. • 3D text can be animated just like any other object. • Let’s add some instructions into our airplaneTakeOff method
Drag the following instructions into the bottom of your airplaneTakeOff method, underneath the Do Together. • Play your world
How to use sound in your world • Finally, let’s add a bit of sound to our world. • Click on skaterGuy in the object tree. • In his properties, expand the + beside Sounds. • Click record sound
Record your sound • Click record sound, say “Wow, Awesome!” • Click Stop • Name it yell. • Click OK.
Drag sound into your method • From properties, drag yell into airplaneTakeOff • (into the do together, right underneath takeoff move right.) • Play your world, make sure your volume is turned up
Import Sound • Click on world in the object tree. • Expand Sound in properties and click • Find the sound of the jet that you downloaded with this tutorial. Drag it into the first do together of airplaneTakeOff
Commenting your code • Change the event when the world starts to my first method. When you play your world now, click on skaterGuy in order to watch the airplane takeOff • Finally, it is always a good idea to comment. • In world.my first method, drag comment above your first instruction
Type inside your comment • Type in “Created by” and your name • A comment is not code that will be animated. It is for a person to read when they look at your code, to help them understand it • For practice, go back and look at each method you wrote. Add a comment at the beginning to explain what it does. • In the future, you can comment as you code.
Right click on camera in the object tree. Select methods. Set point of view to,Dummy objects, originalPosition • To Do on your own: Create 3D text as a title. Animate it at the beginning of my first method. • Online, find an image of a scene. Make Billboard and drag it into your original scene.
The final World.myfirst method • Congratulations on completing your Alice world