Download

1 / 28
290 likes | 404 Views
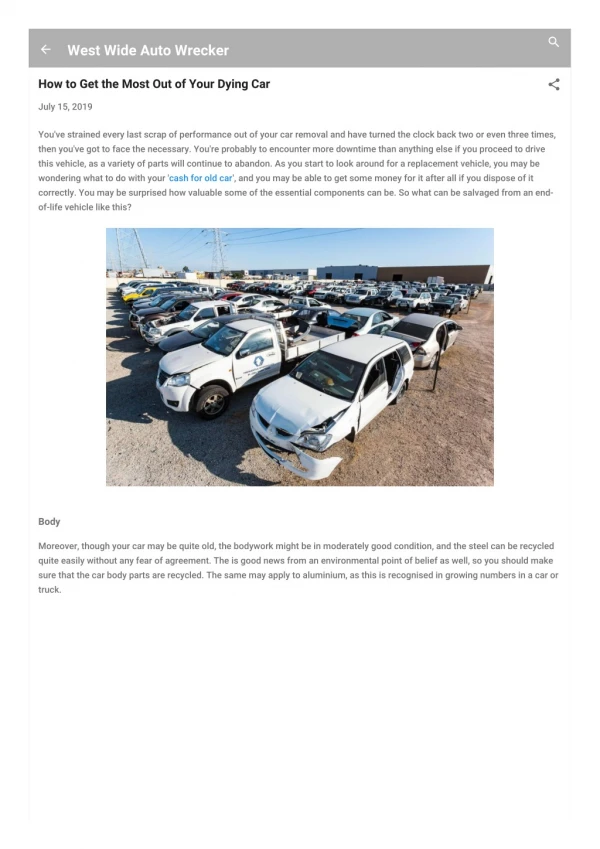
Get the most out of your digital camera. The Basics. ALWAYS wrap the strap around your wrist or around your neck. Do you have an extra $800? Use the photographer stance: elbows in and down, feet spread shoulder-width apart.

E N D
The Basics • ALWAYS wrap the strap around your wrist or around your neck. • Do you have an extra $800? • Use the photographer stance: elbows in and down, feet spread shoulder-width apart.
Take 5-6 shots for EVERY ONE that you need. You should have at least 50 photos to sort through after an event. • Pictures are easy to delete after the fact, but they are nearly impossible to get after the event is over.
Person-portrait setting- This setting blurs background so the person stands out. • This works well for personality or “just us” photos.
Mountains- landscape setting- Use this setting when you want the foreground and background in focus. • It’s also good for overview shots.
Flower- close up setting- use to photograph small objects. • Good for object shots- balls, books, pencils, phones, etc.
Runner- sports setting- for continual photography. • Good for subjects in motion- refocuses quickly.
Star- night portrait setting- for dark backgrounds. It creates a longer exposure, so camera needs to be VERY still. • Good for reaction shots at football games, assemblies, etc.
PROGRAM MODE P mode is Program Mode. It puts you in control of the flash, the ISO value, and white balance.
The Flash You and the camera don’t always agree about when the flash is needed.
The ISO Value This is what used to be film speed: 100, 200, 400, 800, 1600, etc. Raising the ISO makes the camera more sensitive to light. For an indoor flashless shot, try raising the ISO to 800. Press and hold the ISO button; turn the dial and watch the numbers change. BEWARE: The higher the ISO, the more “noise.”
The White Balance Sometimes lighting has a colored cast to it. Indoors this is often a yellow cast because of tungsten or incandescent lighting. Press and hold the white balance button (WB) while turning the command dial. Choose among the light bulb, sun, cloud, fluorescent bulb. You can also read your manual to adjust white balance manually using a white card.
MANUAL MODE After you’ve mastered program mode, manual mode puts you in control of shutter speed and aperture. The shutter controls how long the hole in your camera stays open to allow light in. Having a fast shutter means that you can freeze fast action. The aperture controls the size of the hole in your camera. A smaller number means a larger opening for light to enter.
Shutter Speed • The shutter speed is the other number that isn’t the aperture on your digital display. • It’s actually a fraction, so a shutter speed of 4000 is actually 1/4000th of a second. • If you move from 1/2000 to 1/4000, you’re reducing the light in half. • You can freeze motion with faster shutter speeds and capture movement like flowing water with slower shutter speeds.
Shutter Speed Summary: Fast shutter speed = freeze action. Slow shutter speed w/tripod = silky flowing water.
The Yin and Yang
The Yin and Yang Summary: Larger aperture = faster shutter speed Smaller aperture = slower shutter speed Equivalent exposure = Increase aperture by one stop and decrease shutter speed by one stop (and vice versa).
PRIORITY MODE If you’re not quite ready for manual mode, but you’ve mastered program mode, try the two priority settings. The first is A or Av mode. The second is S or Tv mode.
PRIORITY MODE: Av The first is A or Av mode. This puts the priority on the aperture to get a shallow depth of field on a sunny day. A or Av tells the camera, “I have chosen f4, so you figure out the shutter speed.” In this mode, you just rotate the dial, and the numbers will change. You still need to choose a sensible ISO.
PRIORITY MODE: S or Tv The second priority setting is S or Tv. This puts priority on the shutter speed (the Tv is for time value). You are telling the camera, “I’m choosing the shutter speed since I want to take action photos, and you choose the correct aperture.” In this mode, you just rotate the dial, and the numbers will change. You still need to choose a sensible ISO.
More help Remember to go to my web site for more materials. If you search for Hillsboro R-3, click on the high school, and click on teacher web sites, I’m under English and Gillespie. Facethelight.com, as well as camera manufacturers, have many resources on their web sites. READ THE MANUAL. :-)