Download
1 / 12
130 likes | 349 Views
PLASMID ISOLATION AND ANALYSIS Part IV DNA Analysis Using Agarose Gel Electrophoresis. DNA Analysis Using Agarose Gel Electrophoresis Day 1. Prepare the agarose gel one day before Part IV.

E N D
PLASMID ISOLATION AND ANALYSISPart IVDNA Analysis Using Agarose Gel Electrophoresis
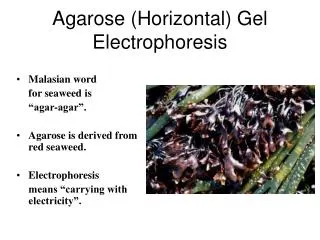
DNA Analysis Using Agarose Gel ElectrophoresisDay 1 Prepare the agarose gel one day before Part IV. Review this procedure at the beginning of the printed protocol or go to the Agarose Gel Prep in the DNA Fingerprinting protocol on the ISU biotech web site at: www.biotech.iastate.edu PLASMID ISOLATION AND ANALYSIS: Part IV
DNA Analysis Using Agarose Gel ElectrophoresisDay 1Step 1 Mark four 1.5 ml microcentrifuge tubes as follows: pUC-, pUC+, Mini+, and Mini- PLASMID ISOLATION AND ANALYSIS: Part IV
DNA Analysis Using Agarose Gel ElectrophoresisDay 1Step 2 Use the matrix below to mix the reagents. Add all reagents directly into the solution. Change tips after each reagent addition. PLASMID ISOLATION AND ANALYSIS: Part IV
DNA Analysis Using Agarose Gel ElectrophoresisDay 1Step 3 Incubate the mixtures in a 37oC water bath for 20 minutes to 1 hour. One hour of incubation yields the best results. PLASMID ISOLATION AND ANALYSIS: Part IV
DNA Analysis Using Agarose Gel ElectrophoresisDay 1Step 4 Store the reaction in the freezer at -20oC until you are ready for electrophoresis. PLASMID ISOLATION AND ANALYSIS: Part IV
DNA Analysis Using Agarose Gel ElectrophoresisDay 2Step 1 Thaw the solutions at room temperature and add 4 ul of migration dye in each of the four reaction tubes. PLASMID ISOLATION AND ANALYSIS: Part IV
DNA Analysis Using Agarose Gel ElectrophoresisDay 2Step 2 Set the micropipettor to 20 ul and draw the sample from tube pUC-. PLASMID ISOLATION AND ANALYSIS: Part IV
DNA Analysis Using Agarose Gel ElectrophoresisDay 2Step 3 Load the 20 ul of the DNA sample by placing the pipette tip into the top of the well and slowly releasing the solution into the well. PLASMID ISOLATION AND ANALYSIS: Part IV
DNA Analysis Using Agarose Gel ElectrophoresisDay 2Step 4 Repeat steps 1 and 2 for the tubes marked pUC+, Mini+ and Mini-. Add the 1X TBE buffer (70 ml 10X TBE diluted with 630 ml distilled water) to the electrophoresis chamber making sure to cover the gel. Run the gels at 150 volts for 1 hour. PLASMID ISOLATION AND ANALYSIS: Part IV
DNA Analysis Using Agarose Gel ElectrophoresisDay 2Step 5 Your instructor will run and stain the gel so you can view it later. PLASMID ISOLATION AND ANALYSIS: Part IV
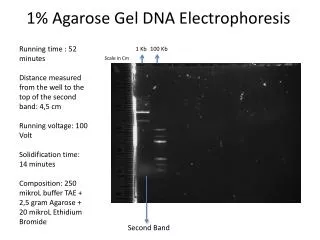
DNA Analysis Using Agarose Gel ElectrophoresisDay 3Results pUC - + MiniPrep + - pUC - + MiniPrep + - PLASMID ISOLATION AND ANALYSIS: Part IV