Download
1 / 9
90 likes | 157 Views
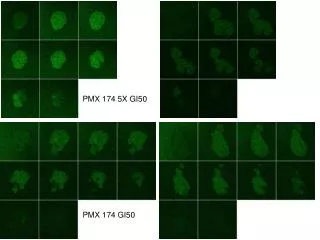
5x mixed with 25x Reduction. Draw mask, keeping 25x features within a 3mm square, within the traditional 14-15mm 5x die When printing masks scale 25x layers by 25 times. 5x. 25x. 25x Reduction: alignment marks.

E N D
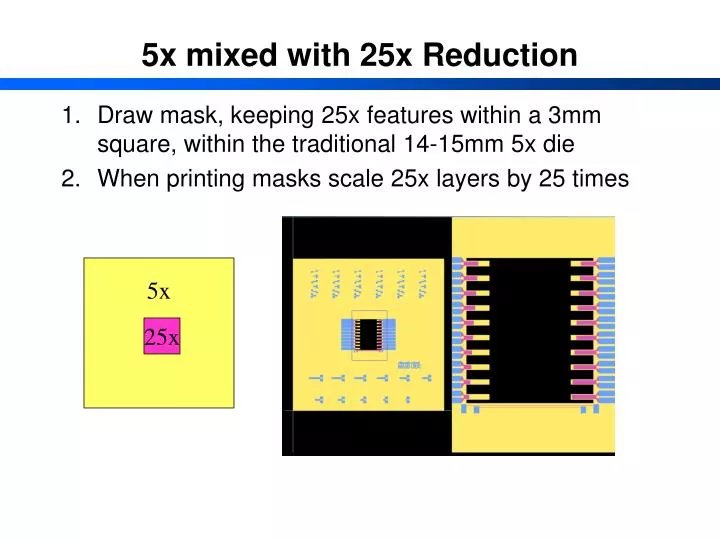
5x mixed with 25x Reduction • Draw mask, keeping 25x features within a 3mm square, within the traditional 14-15mm 5x die • When printing masks scale 25x layers by 25 times 5x 25x
25x Reduction: alignment marks • Create 5” mask with stepper marks on edges, and two alignment marks at fixed spacing (i.e. 50mm). This will be used for contact lithography, at 1x scale 5x
25x Reduction: alignment marks • Create 5” mask with central alignment mark as used in previous step (step 3) but scaled 5x larger. 5x
25x Reduction: first reduction • Project 25x features onto 3” thin mask once in roughly center of mask • Leaving 3” mask in place in stepper, project alignment transparency from step 4 onto 3” mask at known spacing set by step 3 (i.e. 50mm) 5x 5x 3” Mask
25x Reduction: first reduction • Develop and etch 3” mask • Using flood exposure tool and 1x alignment mask from Step 3, expose a 5” mask plate 5” Mask 5x
25x Reduction: spot develop 5” mask • Using dropper, spot develop and spot etch the alignment marks on 5” mask. DO NOT STRIP PR
25x Reduction: flood 5” mask • Using flood exposure tool, manually align the developed 3” mask to the features on the 5” mask and expose the 5” mask through the 3” mask. Be sure to place the chrome sides together • Develop and etch the 5” mask 3” Mask
25x Reduction: second reduction • Place 5” mask in stepper and expose final 3” thin mask using same program as normal 5x masks • To avoid getting alignment marks on 3” mask be sure to close down the x-y shutters to around 25-35% 3” Mask
25x Reduction: Conclusions • Using this process, can use a mixture of 5x and 25x masks • Additional processing time of about 1 hour per 25x mask • One 3” and one 5” mask are wasted as a result • Excellent feature definition from printed transparencies • No e-beam mask conversion