Download
1 / 45
450 likes | 657 Views
Thomas Krichel http://openlib.org/home/krichel. hardware. introduction. This is a basic introduction to computer hardware. I wrote it from memory. It contains the things I know about without having to look them up. That's about how much you need to know. basic components.

E N D
Thomas Krichel http://openlib.org/home/krichel hardware
introduction • This is a basic introduction to computer hardware. • I wrote it from memory. • It contains the things I know about without having to look them up. • That's about how much you need to know.
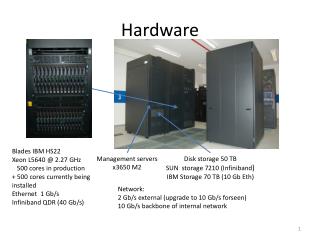
basic components • basic components are • processor • memory • motherboard • input/output devices • disks • network interfaces • The first three, plus the bus speed, are essential to the understanding of the performance of the computer.
processors • The processor does all the calculations on a computer. • The performance indicator of the processor is the frequency of operations. • There are various types of processors, by different manufactures. • Intel • AMD
architecture • The Debian operating system offers a complete range of software that can be run with a range of processors by a certain manifactures. Such a range of software packages is called an architecture. • We use the i386 architecture for Intel processors. • AMD processors may be more open source friendly
memory • The memory is where all data that the computer works with is stored. • If the memory is small the computer has to perform more operations to read and write data to the disk. • As a consequence, it will appear to be slower.
motherboard • This is a green sheet of plastic that all components inside the computer attach to. • We don't need to know more about it, just the plane concept will do.
devices • These are things that the computer uses for input and output of data. • Examples include • keyboard • screen • network card • disks • We only need to study disks and network cards.
disks • There are three architectures of disks • IDE, aka PATA, an old system • SCSI, a bit more modern • SATA, used in most modern systems • We need to be aware of them because the way that Linux refers to them.
IDE • When a computer can use IDE, you see two forty-pin connectors on the motherboard. • These are the primary and the secondary IDE channnels. They are usually labelled. • To each channel, you can attach two disks. • One is called the master. • The other is called the slave.
master and slave • One method to select master and slave is to set jumpers on the disk. The position of the jumpers is often written on the disk. Otherwise • The other method is called “cable select”. There you place the master at the end of the 40 pin IDE cable.
device names • Linux needs to give the devices names in other to talk to them. • The device names for IDE are • /dev/hda for the primary master • /dev/hdb for the primary slave • /dev/hdc for the secondary master • /dev/hdd for the secondary slave
SCSI and SATA • SCSI and SATA drives are named • /dev/sda • /dev/sdb • etc. • Usually it is a bit of guesswork to know which drive is give what name. There may be a better way than guesswork, but I don't know about it.
file systems • A file system is a way to set up files on a disk. • Common file systems are • Microsoft FAT • ext2 or ext3, used in Linux • Reiserfs, used on Linux • Linux kernels support various file systems natively, including Microsoft file systems.
several file systems • If you have several file systems on a disk, each system needs to occupy a separate physical area on the disk. • Such an aera is called a partition. • An empty disk will have no partitions. • You will have to set up partitions before working with a disk. • Chaning the partitions at a later stage will, generally, make the data on the disk inaccssible.
partition table • Any disk has a special place for the partition table. • The partition tables says • what partitions are on the disk, • where each partition starts and end • Changing the partition table makes all data on the disk unusable.
default partitions • On a Linux system, if you only have one disk on a computer, it is customary to have two partitions on it. • the main data partition • the swap partition • Deciding on the size of both is a bit of black magic. There is no hard rule. • We let the Debian installer do it for us.
device names with partitions • If you have a device that linux calls foo, the first partion will be foo1, the second partition will be foo2 etc. • Thus you can have /dev/hda1, /dev/sdb3 etc. • The command “df” will list all devies and all partition.
the main data partition • This is where you have all the data on the hard disk. • This is usually formatted with the ext3 file system. • There other file systems one could use, but this is the default, one and we will use that one.
the swap partition • The swap partition is used to reserve space for swapping. • Swapping is a way for a computer to work with large memory requirements by writing parts of the memory on the disk. • When this happens the computer appears to be very slow.
initial setup • When the debian installer sets up your machine, by default it will take the first disk. • Then it will calculate a partition table • swap partition • data partition • it will present you with the suggestions. • When you accept them, it will write the partition table. All data on the disk will be lost. • This is the only time you should not accept the default option.
booting • When you switch on a computer, you see some messages. • They usually refer to particular pieces of hardware that just tell you “hi, I am here in this computer. • Then the operating system starts. • But before it starts, there is one interesting stage.
more on initial setup • When we start the computer, it reads an internal, essentially read only piece of data known as the BIOS. • The BIOS has a number of settings. You can make changes to them. • How to do that depends on the BIOS manufacturer but there are some generic features.
getting into the BIOS • When the machine starts, you see, maybe for a second a message “press foo to enter setup”. • foo is usually the name of a key. • When you see this message, press the key very quickly several times. • (yes, this presumes you have a working keyboard attached). • You arrive in a menu-driven system.
the BIOS menu system • The menu system is usually in English. • It usually relies on keyboard strokes. • What keys do what depends on the BIOS manufacturer. • What entries there are depends on the manufacuturer. • We only need to know one BIOS setting, and it is useful to know about another.
BIOS setting: boot sequence • When the machine boots, it looks for an operating system on a sequence of devices. • That sequence is called the boot sequence. • When we install Debian, we need to make sure that the medium that contains Debian is in the boot sequences. • We also need to make sure that this medium appears before any other medium that contains an operating system.
BIOS setting: boot on power • When you are running a server machine, you want the machine to be on all the time. • After a power cut, you want the machine to boot as soon as power is restored. • There usually is a BIOS setting for that.
making a Debian medium • Go to the debian installer http://www.debian.org /devel/debian-installer/ • I made a copy of the current CD for you at http://wotan.liu.edu/opt • Get software to burn the CD • http://isorecorder.alexfeinman.com/isorecorder.htm • http://www.cdburnerxp.se/downloadsetup.php • Use it to burn.
working with the installer • The only rule is: don't panic. • Any decision you are making when working with the installer can be reversed quite easily later. • The only exeption is the disk partitioning, reversing that would be cumbersome.
overall steps • boot • set up user interface of installer • setting up network (the crucial part) • setting up a disk • setting the time • setting up users • downloading basic software from the network • making system bootable
obvious sequence • At the start, select the normal (not the graphical installer) and press enter. • Select the language of installation (English) • Select your country (United States) • Select your keyboard layout (US)
the hostname • This is a short name for the machine. • Here any name can be used. The name can't contains a space. You need to let me know about the name. • Don't use the name debian because I want everybody to have a different machine name for ease of administration of the course.
network configuration • The installer will configure the network with the help of a protocol called dhcp. • This should work in the class situation. • I will discuss networks later, so I skip over details for now. • If the dhcp we have a serious problem.
the domain name • Here you should enter a domain that you own and control. • If you don't have one, or don't know what this is please enter the domain of a friend who will run the domain for you. • Since Thomas is your friend, enter his domain here: “openlib.org”.
disk partitioning • Here chose of guided partitioning, using the built-in partitioner. • Select the disk to partition, usually there is only one. • Choose the default of all files in one partition. • Accept the partition that is proposed. • Then you get the screen where you are warned you will loose all data, here don't accept the default to tell the partitioner to go ahead.
setting up time • The time can be set in the BIOS. They BIOS calls a battery that keeps running. But that is not reliable. • Modern linux machines get the time from the network from time servers. The time servers know what time it is. • Then all you have to do is to set the time zone you are in. Since you have said you are in the US, you will be shown a list of US time zones.
setting up the root user • There is one superuser who has the right to do anything on the machine. • The name of this user is “root”. • There is a sequence screen that invites you to set the password for that user. • Since it is not echoed, you need to type it twice to try to make sure that it was entered properly.
ordinary user • Although this is not strictly necessary, the installer also requires the setup of an ordinary user. • Here you first enter your full name, then your user name (login name, no spaces, no uppercase) and then your password.
network download • On the network, there are mirrors of Debian that contain newer versions of the Debian packages. It is a good idea to use the closest mirror available. Say yes to use a network mirror. • The mirrors are organized by country. Select country and then select a mirror that appears to be close. For class select any because we may have a problem if all select the same.
http proxy • To download packages from mirrors, the installer uses the http protocol. • This is a well-know protocol used to transfer files on the web. • In certain, rare settings, a network administrator may require you to use the http proxy. We don't have such a requirement, so we can leave this screen blank.
popularity contents • This is a bit of an oddity. • There is a contents on which packages are most popular. • Machines participating in the contest report what packages are installed on them. • You may elect to take part or not.
the bootloader • To make the system bootable without the CD, Linux installs a special command sequence on the hard disk you are installing linux to. • This special command sequence calls a software known as a boot loader. The boot loader shows you a menu to ask you what operating system you want to load.
removing media • You need to remove the media you booted from, or change the BIOS not to boot from it again. • If you use a CD to install from the installer will eject the CD for you. • Then the machine reboots. • You are done.
linux boot loaders • In olden days, people use lilo, the linux loader. • Nowadays people use the grub, the grand unified bootloader. • Here you just have to follow the default to install the bootloader.
collection of software • This is important. There are collections of software predefined by the installer for certain tasks a machine should do. • Here you should ONLY select the “standard system”. • Selecting others, you will waste your time dowloading a ton of software we don't need. • Do not select “desktop environment”. This is particularly wasteful for what we are trying to do.