Download
1 / 11
110 likes | 197 Views
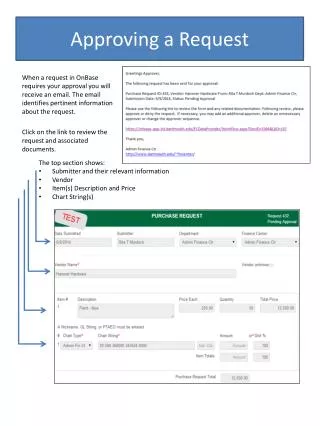
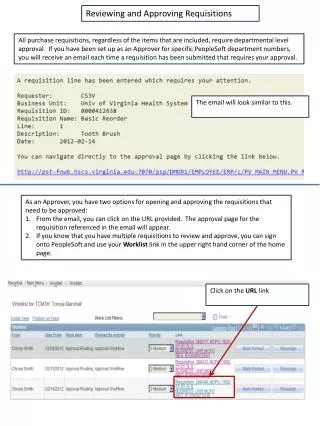
Approving an Order. Click Administrator to login to approve orders. Login on this screen using your ADO user id and password. Your password is defaulted to the word “password” the first time you log on. Click the orders button to view all orders awaiting approval.

E N D
Login on this screen using your ADO user id and password. Your password is defaulted to the word “password” the first time you log on.
Click the orders button to view all orders awaiting approval.
This displays the total amount of current OCIE orders per DODAAC and the available OCIE balance for each DODAAC. This displays the total for current MPA orders and the available MPA balance left to spend, per DODAAC. Allows you to change the way you view orders. You can choose to sort by Document Number, Last Name, First Name, Order Date, and Unit.
Click the document number link to view the details of an order.
This screen can be used to verify that an order is correct. • You can make changes to the order here by making desired changes and then clicking the Update Order button. • You can delete orders from this screen by clicking Delete Order. • Once you verify that the order is correct click the Back button to return to the orders screen for approval.
Once you are ready to approve an order, place a check in the box next to the order you are going to approve and click Submit Order.
Once an order has been approved, it moves to the bottom of the screen. Its status is listed as Submitted, and its color on the screen is blue.
To delete an order using this screen, place a check next to the order you want to delete, then click Delete Orders.
To change the ship to information from the default “c/o Supply Sergeant” place a check in the box next to the order whose information you want to change and click Send c/o Individual. Remember this action will also submit the order at that time.