Download
1 / 59
620 likes | 804 Views
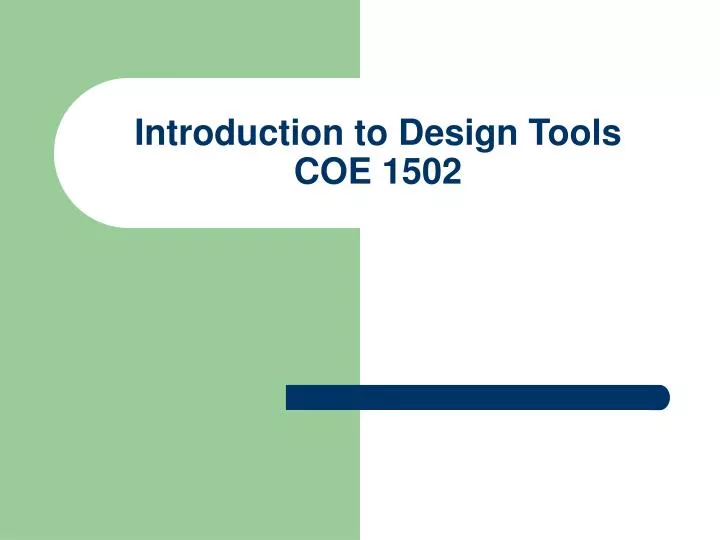
Introduction to Design Tools COE 1502. Lecture Outline. Review: Tools, functions, design flow Libraries in FPGA Advantage Setting permissions for group directories Example design: ALU ALU specifications Block diagram editor and embedded blocks Simulation Flow chart editor

E N D
Lecture Outline • Review: Tools, functions, design flow • Libraries in FPGA Advantage • Setting permissions for group directories • Example design: ALU • ALU specifications • Block diagram editor and embedded blocks • Simulation • Flow chart editor • Component instantiation • Truth table editor
Review: Tools, functions, design flow • Four tools we will use in this course • HDL Designer Suite • FPGA Advantage (aka Renoir) • IDE to create hierarchical designs and generate HDL • ModelSim • Robust logic simulator • Leonardo Spectrum • Synthesizes HDL into gate-level netlists using device cell libraries • Xilinx command-line tools • Place-and-route netlists onto FPGAs
Generate Compile FPGA Advantage Create symbolic designs Proprietary text format VHDL code Proprietary binary format Simulate using ModelSim Synthesize using Leonardo EDIF “gate-level” netlist using Xilinx CLBs Place-and-route Xilinx .BIN binary Load onto FPGA and test using LA Review: Tools, functions, design flow
Libraries in FPGA Advantage • A library is a collection of components • Components have one or more views (implementations) • Block diagram, truth table, flow chart, state machine, VHDL architecture • Each view has representations: • Graphics, VHDL, simulator netlist, synthesis netlist library CPU_lib component ALU CPU control_unit view block diagram 1 block diagram 2 VHDL arch state diagram representation graphics gen. VHDL sim. binary synth. netlist
Components • Library components can be instantiated in other designs • Shown as green blocks • For bottom-up design • Libraries also contain “blocks” • Attached to the design they were created in • Shown as blue blocks • For top-down design • Embedded blocks – embedded into block diagram • Shown as yellow blocks • Embeds behavior into structure
Libraries in FPGA Advantage • Libraries are stored in four subdirectories in your group directory (e.g. I:\alpha) • For each library you use or create, library mappings to these directories must be specified • The mappings for your set of libraries are stored in your project file • Lives in your group directory \hds source directory \ALU_lib \hdl HDL directory I:\alpha \work simulation directory \CPU_lib \ls synthesis directory
Setting Permissions on Group Dir. • Right-click your group folder and select “Properties” • Add “Full Control” permissions for yourself and your partner
Projects • A project in FPGA Advantage is a set of library mappings • One partner will create a new project for the group • “tutorial” • The second partner will open this project • Both partners will work within a single project for design of ALU
tutorial ALU_Lib ALU Src (hds) (graphical view) HDL (generated) Downstream (compiled for sim) Downstream (compiled for synth) Projects, Libraries, Components, Views Project Library Component
Shared Project ALU CPU ALU_Lib COELib CPU_Lib ieee src files hdl files sim files synth files Projects, Libraries, Components, Views
Example Design: ALU • First partner: Open FPGA Advantage and create your project
Example Design: ALU • Library and project views in Design Manager…
Example Design: ALU • Second group member, open project
Example design: ALU • Specifications for ALU • GOAL: implement all logical, arithmetic, shift, and comparison operations in MIPS instruction set • Operations • Bit-wise AND, OR, XOR, and NOR • Signed and unsigned addition, subtraction • Overflow detection, zero-result detection • Signed and unsigned set-on-less-than comparison • Logical shift left and right, arithmetic shift right • Must accept 2 x 32-bit operands and produce a 32-bit result
Example design: ALU • Inputs • A, B (32 bits) • SHAMT (how many bits?) • ALUOP (how many bits?) • 13 total operations • Outputs • C (32 bits) • Overflow • Zero
Example design: ALU • We will work top-down to design the ALU • First step is to create top-level design • Need to choose a view which will implement a VHDL architecture • View type: block diagram • Implements structural VHDL • From design browser… • File | New | Graphical View | Block Diagram
Example design: ALU • First, let’s discuss the block diagram toolbars…
Example design: ALU • First, add interface signals with ports (using the toolbar tool, “wire with port”)… • Note signal widths (in wire properties)
Example design: ALU • Save the block diagram into the ALU library • The component name will be “ALU” • Let’s look at the ALU symbol… • Click “up” in BD, or • Use the design browser Source file Symbol file
Example design: ALU • The symbol looks something like this… • We can change the shape and pin locations here • Right click, then “Autoshapes” • Make the symbol look like an ALU symbol
Example design: ALU • Go back to the block diagram window and let’s generate VHDL for our design… • Next, let’s take a look at the VHDL that we generated…
Example design: ALU -- hds header_start -- -- VHDL Entity ALU.ALU.symbol -- -- Created: -- by - jbakos.UNKNOWN (TWEETY) -- at - 11:19:31 01/07/03 -- -- Generated by Mentor Graphics' HDL Designer(TM) 2002.1a (Build 22) -- -- hds header_end LIBRARY ieee; USE ieee.std_logic_1164.all; USE ieee.std_logic_arith.all; ENTITY ALU IS PORT( A : IN std_logic_vector (31 DOWNTO 0); ALUOP : IN std_logic_vector (3 DOWNTO 0); B : IN std_logic_vector (31 DOWNTO 0); SHAMT : IN std_logic_vector (4 DOWNTO 0); C : OUT std_logic_vector (31 DOWNTO 0); Overflow : OUT std_logic; Zero : OUT std_logic ); -- Declarations END ALU ; -- hds interface_end -- VHDL Architecture ALU.ALU.struct -- -- Created: -- by - jbakos.UNKNOWN (TWEETY) -- at - 11:19:31 01/07/03 -- -- Generated by Mentor Graphics' HDL Designer(TM) 2002.1a (Build 22) -- LIBRARY ieee; USE ieee.std_logic_1164.all; USE ieee.std_logic_arith.all; ARCHITECTURE struct OF ALU IS -- Architecture declarations -- Internal signal declarations BEGIN -- Instance port mappings. END struct;
Example design: ALU • Recall that the ALUOp is 4 bits • High-order two bits used to determine operation class (ALUOp(3:2)) • Low-order two bits used to determine which operation is performed within each class (ALUOp(1:0)) • Next, let’s define “operation classes” and have subblocks compute intermediate results in parallel… • Logical operations (ALUOp(3:2) == “00”) • AND, OR, NOR, XOR • Arithmetic operations (ALUOp(3:2) == “01”) • ADD, ADDU, SUB, SUBU • Comparison (ALUOp(3:2) == “10”) • SLT, SLTU • Shift (ALUOp(3:2) == “11”) • SLL, SRL, SRA • Idea: perform each operation type in parallel and select the appropriate output using the two high-order bits of ALUOp
Example design: ALU • Add subblocks, name them, and wire them up… • Note that ALUOp needs a bus ripper… Use wire tool here
Example design: ALU • Let’s take a look at the generated VHDL for the top-level design… • Things to note • Same entity statement as before • Internal signal declarations • Subblocks declared as components (with interfaces) • FOR ALL statements • Embedded block code • Instance port mappings
Example design: ALU COMPONENT Logical PORT ( A : IN std_logic_vector (31 DOWNTO 0); ALUOp : IN std_logic_vector (1 DOWNTO 0); B : IN std_logic_vector (31 DOWNTO 0); LogicalR : OUT std_logic_vector (31 DOWNTO 0) ); END COMPONENT; COMPONENT Mux4Bus32 PORT ( ALUOp : IN std_logic_vector (3 DOWNTO 2); ArithmeticR : IN std_logic_vector (31 DOWNTO 0); ComparisonR : IN std_logic_vector (31 DOWNTO 0); LogicalR : IN std_logic_vector (31 DOWNTO 0); ShifterR : IN std_logic_vector (31 DOWNTO 0); R : OUT std_logic_vector (31 DOWNTO 0) ); END COMPONENT; COMPONENT Shifter PORT ( A : IN std_logic_vector (31 DOWNTO 0); ALUOp : IN std_logic_vector (1 DOWNTO 0); SHAMT : IN std_logic_vector (4 DOWNTO 0); ShifterR : OUT std_logic_vector (31 DOWNTO 0) ); END COMPONENT; -- Optional embedded configurations -- pragma synthesis_off FOR ALL : Arithmetic USE ENTITY ALU.Arithmetic; FOR ALL : Comparison USE ENTITY ALU.Comparison; FOR ALL : Logical USE ENTITY ALU.Logical; FOR ALL : Mux4Bus32 USE ENTITY ALU.Mux4Bus32; FOR ALL : Shifter USE ENTITY ALU.Shifter; -- pragma synthesis_on LIBRARY ALU; ARCHITECTURE struct OF ALU IS -- Architecture declarations -- Internal signal declarations SIGNAL ArithmeticR : std_logic_vector(31 DOWNTO 0); SIGNAL Asign : std_logic; SIGNAL Bsign : std_logic; SIGNAL CarryOut : std_logic; SIGNAL ComparisonR : std_logic_vector(31 DOWNTO 0); SIGNAL LogicalR : std_logic_vector(31 DOWNTO 0); SIGNAL Rsign : std_logic; SIGNAL ShifterR : std_logic_vector(31 DOWNTO 0); -- Component Declarations COMPONENT Arithmetic PORT ( A : IN std_logic_vector (31 DOWNTO 0); ALUOp : IN std_logic_vector (1 DOWNTO 0); B : IN std_logic_vector (31 DOWNTO 0); ArithmeticR : OUT std_logic_vector (31 DOWNTO 0); CarryOut : OUT std_logic ; Overflow : OUT std_logic ; Zero : OUT std_logic ); END COMPONENT; COMPONENT Comparison PORT ( ALUOp : IN std_logic_vector (1 DOWNTO 0); Asign : IN std_logic ; Bsign : IN std_logic ; CarryOut : IN std_logic ; Rsign : IN std_logic ; ComparisonR : OUT std_logic_vector (31 DOWNTO 0) ); END COMPONENT;
Example design: ALU BEGIN -- Architecture concurrent statements -- HDL Embedded Text Block 1 eb1 Asign <= A(31); Bsign <= B(31); Rsign <= ArithmeticR(31); -- Instance port mappings. I1 : Arithmetic PORT MAP ( A => A, ALUOp => ALUOp(1 DOWNTO 0), B => B, ArithmeticR => ArithmeticR, CarryOut => CarryOut, Overflow => Overflow, Zero => Zero ); I2 : Comparison PORT MAP ( ALUOp => ALUOp(1 DOWNTO 0), Asign => Asign, Bsign => Bsign, CarryOut => CarryOut, Rsign => Rsign, ComparisonR => ComparisonR ); I0 : Logical PORT MAP ( A => A, ALUOp => ALUOp(1 DOWNTO 0), B => B, LogicalR => LogicalR ); I4 : Mux4Bus32 PORT MAP ( ALUOp => ALUOp(3 DOWNTO 2), ArithmeticR => ArithmeticR, ComparisonR => ComparisonR, LogicalR => LogicalR, ShifterR => ShifterR, R => R ); I3 : Shifter PORT MAP ( A => A, ALUOp => ALUOp(1 DOWNTO 0), SHAMT => SHAMT, ShifterR => ShifterR ); END struct;
Example design: ALU • Next, let’s create the logical sub-block… • Double-click the logical subblock • This design will perform all four logical operations in parallel and select the desired result using the low-order two bits of ALUOp • AND => 00 • OR => 01 • XOR => 10 • NOR => 11
Example design: ALU • Notice the new block diagram already has the interface ports and signals… • Add four embedded blocks (yellow blocks) to implement the operations • Next, wire up the blocks to the inputs (A,B), create an output mux, wire it to the output bus and ALUOp • We can change the symbols for the yellow blocks • We’ll need to assign names for the internal/intermediate signals in the design • Add the appropriate concurrent VHDL code for each block • What are concurrent semantics?
Example design: ALU • Let’s take a look at the generated VHDL... ARCHITECTURE struct OF Logical IS -- Architecture declarations -- Internal signal declarations SIGNAL ANDR : std_logic_vector(31 DOWNTO 0); SIGNAL NORR : std_logic_vector(31 DOWNTO 0); SIGNAL ORR : std_logic_vector(31 DOWNTO 0); SIGNAL XORR : std_logic_vector(31 DOWNTO 0); BEGIN -- Architecture concurrent statements -- HDL Embedded Text Block 1 ANDBlock ANDR <= A AND B; -- HDL Embedded Text Block 2 ORBlock ORR <= A OR B; -- HDL Embedded Text Block 3 XORBlock XORR <= A XOR B; -- HDL Embedded Text Block 4 NORBlock NORR <= A NOR B; -- HDL Embedded Text Block 5 Mux4B32 LogicalR <= ANDR when ALUOp="00" else ORR when ALUOp="01" else XORR when ALUOp="10" else NORR; -- Instance port mappings. END struct; LIBRARY ieee; USE ieee.std_logic_1164.all; USE ieee.std_logic_arith.all; ENTITY Logical IS PORT( A : IN std_logic_vector (31 DOWNTO 0); ALUOp : IN std_logic_vector (1 DOWNTO 0); B : IN std_logic_vector (31 DOWNTO 0); LogicalR : OUT std_logic_vector (31 DOWNTO 0) ); -- Declarations END Logical ;
Example design: ALU Drag/drop signals (or right click) • Once we’re done, we’ll generate VHDL and compile the design in order to simulate • The “M” button will perform the entire design flow • We’re now presented with the ModelSim window • Under the View menu option, open the signals and wave windows • Drag the signals from the signals window to the wave window Structure Right click to change radix
Example design: ALU • From this point, we can use force/run commands to simulate the design • Examples • restart –f • view wave • add wave /ALU/A • force ALUOp “0010” • force A X”000000FF” • force A 10#32 • run 10 • run • Default runlength is 100 ns • Turn off warnings • Note that the signals can be represented in hexadecimal • Right-click the signals in the wave window to change its properties • We can also write a text “.do” file to aid in simulation • Invoked using “do” command • example: • do “i:/alpha/alu/test_logical.do”
Example design: ALU • Let’s go back to the top-level ALU block diagram and create the Shifter subblock • We’ll implement the Shifter as a flowchart (useful for testbenches) • Flowcharts implement a behavioral VHDL architecture as a process • Processes are executed sequentially, not concurrently • Started when signal in sensitivity list changes • Allows programming constructs and variables • Primarily, we use: • Start/end points • Action boxes (also hierarchical) • Decision boxes • Wait boxes (not synthesizable) • Loop boxes • Flows • Operations are assigned to ALUOp(1:0) • SLL => 00 • SRL => 10 • SRA => 11
VHDL Process Example ARCHITECTURE REG4 OF REG4a IS BEGIN CLKD : process(D, CLK, EN, RST) begin if(RST = '1') then Q <= "0000"; elsif(CLK'event AND CLK = '0') then if(EN = '1') then Q <= D; end if; end if; end process CLKD; END REG4;
Example design: ALU • Add decision box to check whether this is a left shift or a right shift • If this is a left shift, add another decision box to check the least significant bit of SHAMT • Then add an action box to assign a variable the input value, shifted 1 bit • Note the syntax for assigning variables • We’ll have to add this variable to the variable declaration list • Under “Flow Chart Properties”, right-click the design • We’ll need LeftOne, LeftTwo, LeftFour, LeftEight, and LeftSixteen • Right-click, “Flow Chart Properties” • Idea: For each set bit n in the SHAMT value, shift the input value 2n positions to the left • Always shift in 0
Example design: ALU • For the right shift, there’s a complication • What about arithmetic shifts? • For this, we use a LOOP block to assign a 16-bit Fill variable the value we will shift in • From then on, we’ll follow the same procedure as with the left shift, but with new variables • RightOne, RightTwo, RightFour, RightEight, and RightSixteen • When we’re finished, we’ll simulate this block as we did before
Example design: ALU • Final variable declaration list: variable LeftOne : std_logic_vector(31 downto 0); variable LeftTwo : std_logic_vector(31 downto 0); variable LeftFour : std_logic_vector(31 downto 0); variable LeftEight : std_logic_vector(31 downto 0); variable RightOne : std_logic_vector(31 downto 0); variable RightTwo : std_logic_vector(31 downto 0); variable RightFour : std_logic_vector(31 downto 0); variable RightEight : std_logic_vector(31 downto 0); variable Fill : std_logic_vector(31 downto 0);
Example design: ALU • Things to consider for the Shifter • What can we use the Shifter for? • How can be divide, say, -13 by 4? • What result should we expect? Why? • Let’s test this in the simulator
Example design: ALU • Next, we’ll design the arithmetic subblock as another block diagram • We need to implement signed and unsigned addition and subtraction • We have a 32-bit adder component in the COELib library we can instantiate for use in this design • Use the green component button to add the ADD32 component from COELib • Wire up the design as follows… • Drag and drop components from component browser
Example design: ALU • Let’s note a few things about this design • How does the generated VHDL for the arithmetic block differ from the shifter block? • How is subtraction implemented using an adder? • What is the precise difference between signed and unsigned operations in this context? • How do we detect overflow in signed and unsigned arithmetic? • What reason would we have to detecting a zero result? • How well does our macro file test the unit?
Example design: ALU • Now let’s design the comparison subblock using the truth table view • Implementing signed and unsigned “set-on-less than” (A < B) • We need to utilize the subtraction results from the arithmetic subblock as inputs to the table • Need to make sure the two low-order bits match those for subtraction in the arithmetic unit • SLT => 10 • SLTU => 11 • Outputs from arithmetic unit used as inputs • The sign of the result • Carryout • Other inputs we need • Sign of A • Sign of B • Output • Single bit output in low-order bit • Rows and columns can be added by a right-click • Columns can be resized • Note: blank cells are considered “don’t cares” • Reminder: In VHDL, single bit literals (std_logic) are surrounded by single quotes, bit vectors (std_logic_vector) are surrounded by double quotes
Example design: ALU Initial truth table view • You will need to add rows • You might want to reorder the columns
Example design: ALU • Notes: • Keep in mind that we’re testing to determine if A is less than B • Keep in mind that our inputs assume that the operation being reflected by Rsign and CarryOut is A - B • (SLT) Why do we only consider Rsign when A and B’s signs match? • (SLTU) How do we use CarryOut to perform comparisons?