Download
1 / 35
350 likes | 594 Views
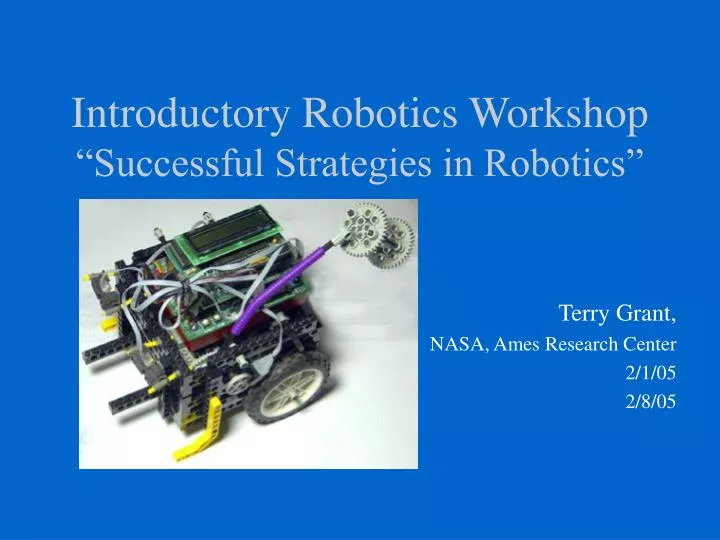
Introductory Robotics Workshop “Successful Strategies in Robotics”. Terry Grant, NASA, Ames Research Center 2/1/05 2/8/05. Outline. 2/1 Introductions Team Building & Strategy Robotics Hardware & Software Architecture Programming in C Introduction – with the HB 2/8

E N D
Introductory Robotics Workshop “Successful Strategies in Robotics” Terry Grant, NASA, Ames Research Center 2/1/05 2/8/05
Outline • 2/1 • Introductions • Team Building & Strategy • Robotics Hardware & Software Architecture • Programming in C Introduction – with the HB • 2/8 • Review: Robot Project Requirements & Example • Object Avoidance Mission • Go + Throw Example • Pre-Botball suggestions • Wrap-up
Team Development • Forming • Create Ground Rules/ Key Result Statement • Gain Buy-in on Code of Conduct • Discuss Roles • Storming • Establish Trust • Manage Conflict • Norming • Solve Problems • Make Decisions • Performing • Start competition strategy & plans
Team Strategy & Plans • Translating a Challenge into Requirements • Robot physical capabilities • Robot behavior (high level code) • Operator – robot interaction • Assigning tasks and milestones • Writing a total schedule (initial and revised) • Plan to test capabilities & behavior • Plan for full robot tests & re-planning • Plan for team coordination meetings
Robot Building & Coding • Completed LEGO robot from MLCAD • Ref: http://www.lm-software.com/mlcad/ • Art of LEGO Design • http://handyboard.com/techdocs/artoflego.pdf • Pictures and Code from the Jan ’03 Workshop • http://robotics.nasa.gov/edu/BBworkshop03 • IC5 Environment downloads: • http://www.botball.org/about_botball/ic5.html • Hands-on Challenges Ref: • http://robotics.nasa.gov/students/challenge.htm
Robotics H/W & S/W Architecture Bot Multi-tasking S/W Components Real-Time Operating System * P-code interpreter * Input/Output Drivers - Clock * Load/Run modes HB, Sumo11, RCX or XBC H/W *Central Processor * Random Access Memory * Special I/O Circuits * Battery & Power Conditioner Interactive C v. 4.10 * Editor * Debug Interpreter * Loader Other Apps Desktop Operating System Desktop Hardware IR for RCX* Serial Data Interface Charger (HB only) Lego Mechanical Lego Motors & Sensors
Robot Project Requirements • Hardware configuration and general environmental constraints • Operator Requirements • Controller requirements All Three Elements are needed and should be written down for a common team understanding
Programming in C - Introduction • IC5 provides an editing, compiling, Simulation and downloading environment for either RCX, Sumo11, Handy Board & XBC. • Follows C syntax (grammar) • Uses functions < xyz() > declared and called • Many functions for Input/Output are preloaded in a library • Good tutorial examples provided with the application • Multi-tasking capability in O.S. • allows sampling & holding multiple conditions in parallel: position, direction, and other sensors
General Syntax • declaring: output type Function(inputs e.g.int x, int y) {block ofstatements} • calling: Function(x, y); • types: int x, y, z; float a, b, c; all variables must have a declared type. • global types are defined at the top, outside of a function, and usable by all functions.
Introductory Checkout • This workshop will use the Handy Board (HB) controller and a pre-built demo robot. • Checkout your configuration and understanding of the concepts by entering and downloading the following one line program to send a message to the HB display screen: Void main() { printf(“Hello <your name> \n”); } • Open Interactive C to view the actual environment & write the above code, then run it.
Simple Example Make a Robot Go Forward and Return • H/W & Environment: Build a bot with the HB or other controller, wired to motors such that forward power moves wheels forward, and put on a demonstration table with enough flat surface • Operator: Write the code, load the microcontroller, and initiate the execution (running) of the code • The controller: Turn on the motors forward, wait 2 seconds, reverse the motors, wait 2 seconds, then stop.
IC4 voidmain() { fd(0); fd(2); sleep(2.0); bk(0); bk(2); sleep(2.0); off(0); off(2); } Open Interactive C & write the code Simple Code Example
The Development Cycle • Analogous to the action of a race car team • Initial requirements reflect conceptual performance objectives • After design and test, additional objectives are added, and a new design and test begins, etc. • What improvements in behavior are desired? [wait for start, balance motor power] • What code style improvements will aid maintenance? [use of defines, functions, comments] * See example improvements in code
More Programming Basics • Three modes: off, standby, run • Use of ‘Interaction’ window in IC • Test new functions for I/O, robot behavior • Check list of library functions, global variables • Download firmware • Upload Arrays for spread-sheet analysis • Edit aids • Auto-indentation • Parenthesis matching • Syntax checking (on download) • Use of ‘save as’ to file new, or trial code
Three Coding Behavior Scripts • Linear: • Do A; • then do B; • then do C; • then do D; • etc. • Branch: • - If(condititon){ • Do A; • then do B; • etc.} • - Else{ • Do C; • then do D; • etc.} • Loop: • while(condititon){ • Do A; • then do B; • etc.} • Then do C; • then do D; • etc.}
Notation of IC 5 IC notation is the same for all branches & loops if ("condition") { "statements" } else { "statements" } *condition example: (x>y) while ("condition") { "statements" }
Defining a function or task: xxx “name”() { "statements" } xxx = ‘void’ if no return variables = ‘int’ if integer return variables = ‘float’ if floating point return variables Notation of IC5 – con’d 2
Notation of IC5 – con’d 3 Starting and ending parallel tasks: pid = start_process(taskname()); kill_process(pid);
IC Outputs Motor outputs, ports 0 to 3 for HB, XBC(or A to C for RCX) To use port 1: fd(1); forward, positive voltage bk(1); backward, negative voltage Motor(1, x); x = -100 [backward] to 100 [forward] off(1); remove voltage;leave port ‘open’ Several new motor functions on XBC see manual Notation of IC5 – con’d 4
Notation of IC5 - 5 To display on Controller LCD e.g. printf(“Hello\n”); printf(“X= %d\n”, x); /*x is an integer */ printf(“X= %f\n”, y); /*y is floating point */ printf(“%d -%d\n”, a, b); /*a & b are integers */ In the XBC the display area is 14 rows of 28 characters. - New display functions add to display options. In the RCX only five characters total can be displayed, and “\n” is not needed.
Requirements • Robots with range sensors start facing each other about one foot apart. • Robots must start when a button is pushed or the light comes on. • Robots must stop after T (5-15) seconds. • The first robot to touch the barrier loses. Starting Light 4’ x 4’ barrier Bot 1 Bot 2
Object Avoidance Behavior • Display program title • Wait for start_button push, then beep • Wait 3 seconds to start • Go straight forward • while T is not exceeded, Turn if an object is sensed • When T is exceeded stop
Object Avoidance Code /* bang-bang control to avoid obstacles using rangefinders - Grant 1/27/04*/ /******************** Robot port configuration ***********/ #define R_MOTOR 2 /* motor port 2 */ #define L_MOTOR 0 /* motor port 0 */ #define L_RANGE 18 /* range sensor in analog 18*/ #define R_RANGE 16 /* range sensor in analog 16*/ #define THROW_DIST 195 /* sensor reading to throw the ball, avoid obstacles, etc*/ #define SPEED 70 #define DELTA 0 #define T 5000L /* run time in millisec */ /*********** globals for left and right sensors, bumper *****/ int L_Range, R_Range;
Object Avoidance Code - cond void main() { start_process(monitor_sensors()); printf("range avoid press start\n"); start_press(); sleep(3.); /* wait for start button press */ avoid(); } void monitor_sensors() {while(1){ L_Range= 255-analog(L_RANGE); /* range reading is big for big distances */ R_Range = 255-analog(R_RANGE); defer(); } }
Object Avoidance Code - cond void avoid() { int l_speed, r_speed; long time_s=mseconds()+T; while(!stop_button()&&(mseconds()<time_s)) { l_speed=SPEED,r_speed=SPEED+DELTA; if(L_Range<=THROW_DIST) r_speed=0; else { if(R_Range<=THROW_DIST) l_speed=0; } motor( L_MOTOR, l_speed); motor(R_MOTOR, r_speed); defer(); } ao(); }
Light Trigger Calibration • Hardware & Environment • L1 is the remote trigger light. • L2 is the room lighting. • Pd photodetector has a wide field of view. • The Controller display helps the operator measure both the dark and light response. • The controller sets the “light vs. dark” threshold and waits for the threshold to be exceeded to trigger the action.
Avoidance - Sensor Test Project • Change object avoidance requirement to use a light start: design a robust light trigger for the action which runs the avoidance behavior for 5 seconds after a light is turned on. • Discuss all requirements (total group) • Write a code design for each Bot. • Write and debug the code • Participate in a light-started Avoidance contest • Compare trigger and behavior designs and results
Avoidance - Sensor Test Behavior e.g. • Display program title [for a few seconds] • While start_button is not pushed, • Display sensor level and • Prompt for start_button push • While stop_button is pushed, display and increment the trigger threshold [or use knob() to set trigger threshold] • When start_button is pushed, • Display sensor level • Wait for sensor level to cross the trigger threshold, then go forward, etc as original object avoidance • When T is exceeded: stop, • display “done” for a few seconds
Go - Throw Requirements • Behavior Requirements: Assume a wall with the target basket and the robot pointed at the basket. Robot goes forward at a speed which slows to a minimum at the throwing distance and then throws a ping pong ball and stops. • Robot Characteristics: Handy Board robot with motor steering, a throwing arm with a motor that holds the ball, 2 range sensors, and shaft encoders on each drive wheel. • Operator sets the throw distance and arm height, points the robot and starts the processor action. • The controller powers the drive motors, reads the shaft encoders and adjusts the motors to go straight. It also reads the range sensors to set the speed to slow at the throw distance, then activates the throw motor and stop.
Code Design • Start sensors monitoring [monitor_sensors()] • Find selected behavior [Go+Throw] • Wait for ‘Start’ • Sound “beep” • wait for operator to remove hand • while(ave. range > throw distance) { • go straight [(ave. range- throw dist.) sets speed] • } • throw ball, then turn motors off • *See actual code
Testing, Tuning, Setting Parameters • Try it out! • See how straight the robot runs • Adjust the throw height • Adjust the throw distance (change #define THROW_DIST and reload) • How much uncertainty do you observe? • What could be changed to improve the throwing accuracy?
Pre-Botball Suggestions • See Botball 2005 Pre-Workshop Activities
Wrap-up Discussion • Did you learn what you expected? • What issues were not addressed? • What did you like? • What did you find less useful?