Download
1 / 1
130 likes | 654 Views
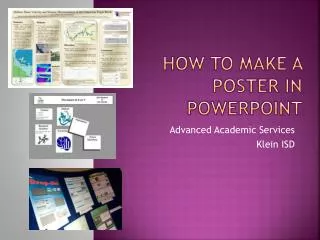
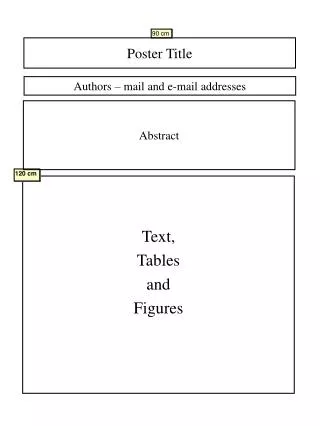
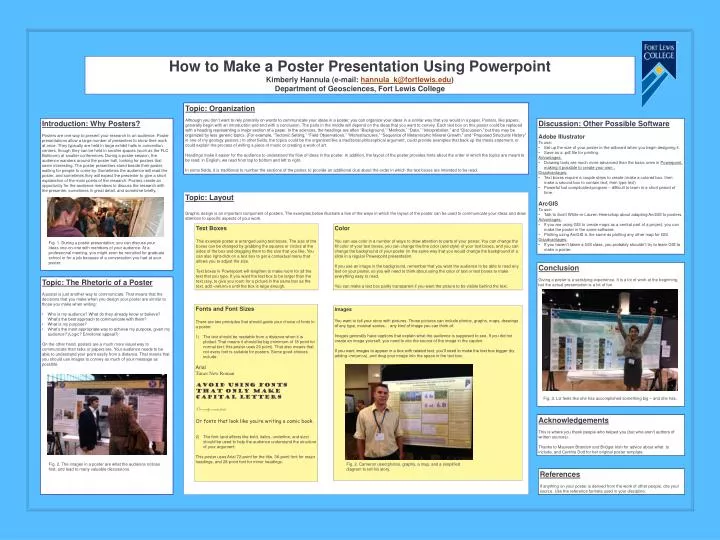
How to Make a Poster Presentation Using Powerpoint Kimberly Hannula (e-mail: hannula_k@fortlewis.edu ) Department of Geosciences, Fort Lewis College. Topic: Organization

E N D
How to Make a Poster Presentation Using Powerpoint Kimberly Hannula (e-mail: hannula_k@fortlewis.edu) Department of Geosciences, Fort Lewis College Topic: Organization Although you don’t want to rely primarily on words to communicate your ideas in a poster, you can organize your ideas in a similar way that you would in a paper. Posters, like papers, generally begin with an introduction and end with a conclusion. The parts in the middle will depend on the ideas that you want to convey. Each text box on this poster could be replaced with a heading representing a major section of a paper. In the sciences, the headings are often “Background,” “Methods,” “Data,” “Interpretation,” and “Discussion,” but they may be organized by less generic topics. (For example, “Tectonic Setting,” “Field Observations,” “Microstructures,” “Sequence of Metamorphic Mineral Growth,” and “Proposed Structural History” in one of my geology posters.) In other fields, the topics could be the organized like a traditional philosophical argument, could provide examples that back up the thesis statement, or could explain the process of writing a piece of music or creating a work of art. Headings make it easier for the audience to understand the flow of ideas in the poster. In addition, the layout of the poster provides hints about the order in which the topics are meant to be read: in English, we read from top to bottom and left to right. In some fields, it is traditional to number the sections of the poster, to provide an additional clue about the order in which the text boxes are intended to be read. Introduction: Why Posters? Posters are one way to present your research to an audience. Poster presentations allow a large number of presenters to show their work at once. They typically are held in large exhibit halls in convention centers, though they can be held in smaller spaces (such as the FLC Ballroom) at smaller conferences. During a poster session, the audience wanders around the poster hall, looking for posters that seem interesting. The poster presenters stand beside their poster, waiting for people to come by. Sometimes the audience will read the poster, and sometimes they will expect the presenter to give a short explanation of the main points of the research. Posters create an opportunity for the audience members to discuss the research with the presenter, sometimes in great detail, and sometime briefly. • Discussion: Other Possible Software • Adobe Illustrator • To use: • Set up the size of your poster in the artboard when you begin designing it. • Save as a .pdf file for printing. • Advantages: • Drawing tools are much more advanced than the basic ones in Powerpoint, making it possible to create your own . • Disadvantages: • Text boxes require a couple steps to create (make a colored box, then make a second box to contain text, then type text) • Powerful but complicated program – difficult to learn in a short period of time. • ArcGIS • To use: • Talk to Scott White or Lauren Heerschap about adapting ArcGIS to posters. • Advantages: • If you are using GIS to create maps as a central part of a project, you can make the poster in the same software. • Plotting using ArcGIS is the same as plotting any other map for GIS. • Disadvantages: • If you haven’t taken a GIS class, you probably shouldn’t try to learn GIS to make a poster. Topic: Layout Graphic design is an important component of posters. The examples below illustrate a few of the ways in which the layout of the poster can be used to communicate your ideas and draw attention to specific aspects of your work. Text Boxes This example poster is arranged using text boxes. The size of the boxes can be changed by grabbing the squares or circles at the sides of the box and dragging them to the size that you like. You can also right-click on a text box to get a contextual menu that allows you to adjust the size. Text boxes in Powerpoint will lengthen to make room for all the text that you type. If you want the text box to be larger than the text (say, to give you room for a picture in the same box as the text, add <return>s until the box is large enough. Color You can use color in a number of ways to draw attention to parts of your poster. You can change the fill color of your text boxes, you can change the line color (and style) of your text boxes, and you can change the background of your poster (in the same way that you would change the background of a slide in a regular Powerpoint presentation. If you use an image in the background, remember that you want the audience to be able to read any text on your poster, so you will need to think about using the color of text or text boxes to make everything easy to read. You can make a text box partly transparent if you want the picture to be visible behind the text. Fig. 1. During a poster presentation, you can discuss your ideas one-on-one with members of your audience. At a professional meeting, you might even be recruited for graduate school or for a job because of a conversation you had at your poster. Conclusion Giving a poster is a satisfying experience. It is a lot of work at the beginning, but the actual presentation is a lot of fun. • Topic: The Rhetoric of a Poster • A poster is just another way to communicate. That means that the decisions that you make when you design your poster are similar to those you make when writing: • Who is my audience? What do they already know or believe? What’s the best approach to communicate with them? • What is my purpose? • What’s the most appropriate way to achieve my purpose, given my audience? (Logic? Emotional appeal?) • On the other hand, posters are a much more visual way to communicate than talks or papers are. Your audience needs to be able to understand your point easily from a distance. That means that you should use images to convey as much of your message as possible. Fonts and Font Sizes There are two principles that should guide your choice of fonts in a poster. The text should be readable from a distance when it is plotted. That means it should be big (minimum of 18 point for normal text; this poster uses 20 point). That also means that not every font is suitable for posters. Some good choices include: Arial Times New Roman Avoid using fonts that only make capital letters Or overly ornate fonts Or fonts that look like you’re writing a comic book. The font (and effects like bold, italics, underline, and size) should be used to help the audience understand the structure of your argument This poster uses Arial 72-point for the title, 36-point font for major headings, and 28-point font for minor headings. Images You want to tell your story with pictures. Those pictures can include photos, graphs, maps, drawings of any type, musical scores… any kind of image you can think of. Images generally have captions that explain what the audience is supposed to see. If you did not create an image yourself, you need to cite the source of the image in the caption. If you want images to appear in a box with related text, you’ll need to make the text box bigger (by adding <return>s), and drag your image into the space in the text box. Fig. 3. Liz feels like she has accomplished something big – and she has. Acknowledgements This is where you thank people who helped you (but who aren’t authors of written sources). Thanks to Maureen Brandon and Bridget Irish for advice about what to include, and Cynthia Dott for her original poster template. Fig. 2. The images in a poster are what the audience notices first, and lead to many valuable discussions. Fig. 2. Cameron used photos, graphs, a map, and a simplified diagram to tell his story. References If anything on your poster is derived from the work of other people, cite your source. Use the reference formats used in your discipline.