Download
1 / 22
220 likes | 396 Views
Senteo Clickers. Part 1 of 3 Dustin O Worm Union Middle School. Why clickers?. Easy to use. Why clickers?. Easy to use. Quick results. Why clickers?. Easy to use. CFA’s. Quick results. Why clickers?. Easy to use. Less Stress. CFA’s. Quick results. Why clickers?. Easy to use.

E N D
Senteo Clickers Part 1 of 3 Dustin O Worm Union Middle School
Why clickers? Easy to use
Why clickers? Easy to use Quick results
Why clickers? Easy to use CFA’s Quick results
Why clickers? Easy to use Less Stress CFA’s Quick results
Why clickers? Easy to use Less Stress Going Green CFA’s Quick results
Why clickers? Easy to use Less Stress Students Love Them Going Green CFA’s Quick results
The Senteo Series 1. Creating Class Lists • Creating a “Clicker” Test 3. Interpreting the Data 4. Lecturing with Clickers Tags and Much More
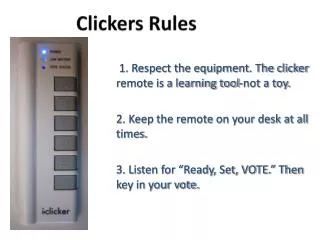
Step one: Student ID • The first step is to export your class lists from skyward • From any class click on the “Display Options” • Click “Student Display”
Student display • Make sure that “Student ID” is checked • This will be the number that students will use to sign in to the clickers
Step 2: Export • Step 2: Export class roster • Click on the “Excel Export” button • Click“Open the Export File”
MAC vs PC • MAC • It will automatically save it to your desktop as a Comma Separated Value CSV • PC • Option 1 • Open with Microsoft Excel • Save to a specified location • Save as a Comma Separated Value CSV • Option 2 • Click “Save File” ~ it will save it as a CSV ~ be sure you know where it default saves too
Repeat all the steps for all of your classes!!!(I promise this is the only bad part)
Step 3: Importing • Locate and click the ORANGE clicker on your toolbar • Under Teacher Tools click“Click Here To Start A Class”
First Time Sign On • Your first time doing this step it will ask you to enter a class name. • You only have 8 characters • Choose you last name, school name, or room # You will also enter Gradebook Information Ex. Your name, school, & district
Step 3A- Adding Classes • To add your classes click “add class” • Enter the Name and your Passing Grade • Within your name make sure to include the period * I would suggest doing all of your classes first
Step 3b- Importing students • Select any class • It does not matter which one you select • Click “add students to your class” • Click the class you want to import students into • Click “Next”
Select the “Students” tab • It should list all of your students • In the top left corner you will see this: • Click it • It should show Privacy: off • Now you can view student numbers
Select “CSV” • Select “Next” • Choose your CSV file you produced in Skyward It will tell you one or more fields are in correct IGNORE IT!!!!!!
Congratulations Hardest Step Finished 1 of 3 Complete Test Making Next
Any Questions? Any Problems? Contact: Dustin Worm Union Middle School History Teacher Secondary Tech Consultant (801) 412-2200 dustin.worm@canyonsdistrict.org