Download

1 / 23
230 likes | 389 Views
The Crime Scene. Unit 2 2013. As you arrive to class…. Pick up the rest of the notes pages to go with the first page on unit 2 that you got yesterday. In your notebook, sketch a layout of your living room.

E N D
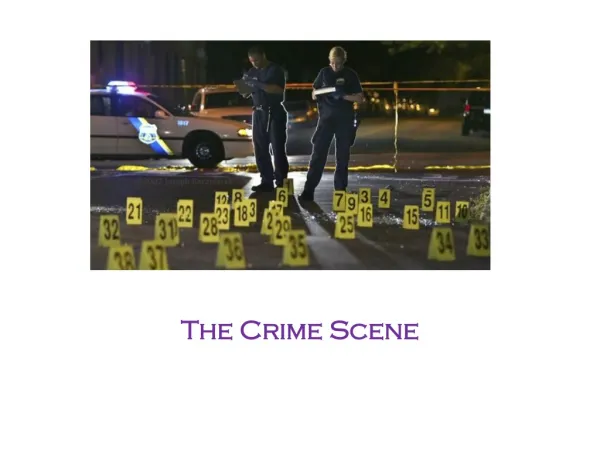
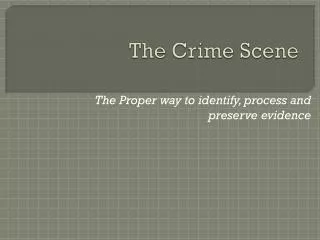
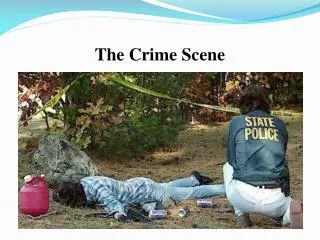
The Crime Scene Unit 2 2013
As you arrive to class….. • Pick up the rest of the notes pages to go with the first page on unit 2 that you got yesterday. • In your notebook, sketch a layout of your living room. Quiz on Unit 1 notes has been moved from tomorrow to Friday due to religious holiday. We will take it Friday and anyone who need to take the lab safety quiz can make it up at the same time.
Physical evidence • Any object that can establish that a crime has or has not be committed • Links crime to perpetrator (the one who commits the crime or suspect) • Links crime to victim • Must be found or recorded at the crime scene and carefully preserved for examination • Selection of objects/evidence is based on thecollectors knowledge of the techniques, capabilities and limitations of the crime lab • Only one aspect of a larger, team endeavor
1. Securing the Scene • First officer on the scene is responsible for securing the scene/protecting the area • Notes of anyone present; leaving area; hazardous materials, etc. • Persons needing medical assistance take priority and arresting the perpetrator • Record statements made by victim or any information provided • Process: • Exclude all unauthorized persons (including family members of victim) • Direct essential persons such as medical teams to the victim via a route that minimizes the disruption to the scene • Direct additional officers to isolate area • Identify all persons at the scene (bystanders, witnesses) and detain potential suspects/witnesses for interviews • Log name and time of day of everyone who enters/leaves • EVERY INDIVIDUAL IS A POSSIBLE DESTROYER OF PHYSICAL EVIDENCE AND THIS COULD AFFECT THE OUTCOME OF THE CASE IN COURT
Lead Investigator: evaluates the area; determines perimeter; establishes point of entry/exit of perpetrator • Document &photograph the scene • No smoking, drinking, eating, littering (alters scene) • Nothing should be moved (including bodies) or disturbed unless there is a specific threat (don’t turn on faucets, flush toilets, open or close windows, adjust heat or air, change temperature in any way)
2. Separate the Witnesses • Witnesses must be separated and asked for their account of the story. • When did the crime occur? • Who called in the crime? • Who is the victim? • Can the perpetrator be identified? • What did you see happen? • Where were you when you observed the crime scene?
3. Scan the Scene • Distinguish primary crime scene (where the crime actually occurred) from the secondary crime scene (contains evidence to the crime) • Determine what photographs should be taken
4. Seeing the Scene • Photographs with measuring rulers • Triangulation of stationary objects should be included in photos as reference points. • All markers should be included in photographs.
Recording the Scene • Document the original state of the scene • Provides useful information for later examination and presentation in court • 3 methods: notes, photographs, sketches • Notes: • time of call to scene, caller name, time, date, person taking call, investigator notification, case number, preliminary information given • Notes should include persons present, arrival times, exit times, time processing begins and ends • Lead investigator: does initial walk through and notes before processing begins • Don’t leave any notes to memory----write at scene • Audio tape recording or video recording (keeps hands free; avoid embarrassing conversations)
Photography • Scene must be UNALTERED!!! • Evidence markers used to locate objects, stains, fibers, etc. • Photograph objects from all necessary angles, close up and far away; showing locations of objects relative to other things • Do not introduce evidence to a crime scene that was previously removed before photographing---make notes of anything removed prior • Helpful for recording biological evidence like blood in its original condition because it will later be altered during testing • Bodies should be photographed in original positions from multiple angles and then the space underneath should be photographed after body is removed. • Film vs. digital (both are used; digital has pros/cons) • Some argue that digital can be enhanced and altered by computer programs • Digital photos can be stitched into panoramic photos revealing a three dimensional view of scene
5. Sketch the Scene • Sketches • Shows clearly the layout of an indoor or outdoor crime scene and the relationship in space of all significant items and features • Shows location of collected evidence • Shows possible paths of entry, exit and movement through the scene • Rough sketch: a draft representation of all essential information and measurements at a crime scene (drawn at the scene) • Finished sketch: a precise rendering of the scene drawn to scale • Computer aided drafting programs Sketches should note position of body (if any). All objects should be measured from two immovable landmarks. Directions and scale of distance should be noted.
6. Search for Evidence • Must be thorough • Must be factual and unbiased • Must happen immediately to eliminate suspicion of “covering up” something • Search pattern depends on locale and size of the area as well as actions of the suspect and victim • Types: • strip/line search and grid search (well defined boundaries for search) • spiral search (can be difficult and evidence can be missed) • wheel/ray search (not a preferred method because areas between the rays are often not searched) • quadrant/zone search: (best suited for scenes that cover a large area)
7. Securing and Collecting Evidence (Bagged and Tagged Separately) • Use latex gloves and forceps to collect evidence • Minute traces to large amounts; microscopic to massive objects • Victims clothing (each item wrapped separately) • Material from sweeping and vacuuming (package different areas separately) • Fingernail scrapings from victim and others in contain with victim • Hair samples from head and pubic areas • Blood samples • Swabs from vagina anus, mouth and penis (sex crimes) • Bullets • Hand and finger swabs (gunshot residue) • Fabric fibers, cigarette butts, insects, etc. (do not remove hairs or fibers from clothing—send entire garment) • Note: time is crucial as some lose forensic value over time due to decomposition, exposure to environment, etc. Once body is buried, efforts to obtain these samples can be futile.
Remember…….. • Do not cross contaminate evidence by putting different samples in the same container. • Clean any equipment that is not disposable after use. • Keep evidence in original condition to maintain integrity • Use disposable tools to collect biological evidence • Assume that all body fluids are infectious! • Change gloves frequently while collecting evidence • Use masks, and gowns (protective coverings) • Be sure all evidence is labeled and chain of custody is followed • Do not use ordinary mailing envelopes because fine powders and fibers can leak out. Use folded paper (druggist fold) to create a paper container.
Evidence Containers • Paper bags (for objects with blood, semen)in order to avoid moisture/mold problems • Unbreakable pill bottles with pressure lids (hair, fibers, glass, small/trace evidence) • Manila envelopes • Glass vials • Sealable plastic bags • Metal pill boxes • For items that have been burned (cases of arson), airtight containers must be used to prevent evaporation of volatile petroleum residues
Answer in your notebook….. • Officer Martin Guajardo is the first responder at an apparent homicide scene. After securing the area, interviewing the sole witness and calling for backup, he begins to search for evidence. He makes note of a bloody knife lying next to the body, with a small scrap of bloody cloth clinging precariously to the knife. Because it is a very windy day, Officer Guajardo removes the scrap of fabric and seals it in a plastic bag. A few moments later, a crime scene team, including a photographer, arrives to take over the investigation. What mistakes, if any, did Officer Guajardo make before the crime scene team arrived.
DNA evidence • Can be obtained from saliva, sweat, skin cells, blood • Stamps, envelopes, chewing gum, cigarette butts, sweatband of a hat, bedsheets, lipstick, • One key concern: contamination during collection • Contamination introduces foreign DNA through the coughing/sneezing process during collection • Transfer contamination: touches other objects • Wear facemask, gloves, use disposable forceps • Can wear shoe covers and coveralls
Label the Evidence • Case number • Inventory number • Description of evidence • Name of suspect • Name of victim • Date and time of recovery • Signature of person recovering the evidence • Signature of witnesses present during collection • Seal all containers with tape and signature of the packaging official
Chain of Custody • Continuity of possession • Must be established for evidence presented in court • Standard procedure for identification, marking, and completing evidence submission forms for lab analysis • Every person who has handled or examined the evidence must be accounted for. • Guarantees the authenticity and integrity of the evidence • Collectors initials, date, and time if necessary • Tag or label all items and containers • Containers are sealed with evidence tape bearing the collectors initials and date. • Someone removing evidence must then re-seal with tape and initial on the new seal. • Transfer of evidence form
Standard/Reference Samples • Many tests require comparison with a standard/reference standard • Physical evidence whose origin is known such as blood or hair that can be used to compare to a sample from the scene • Standard samples can come from the victim, suspect or other know source • Example: paint sample in hit & run accident • Buccal (cheek) swab serves as reference for blood DNA comparison • Substrate control: uncontaminated surface material close to an areas where physical evidence has been deposited.
Crime Scene Safety • OSHA (Occupational Safety and Health Administration) • Blood borne pathogens • Treat all specimens as hazardous and capable of transmitting HIV, Hepatitis, etc. • No food or drink in lab areas, crime scenes, etc. • International Association for Identification Safety Committee: • Double layers of latex gloves (minimal) • Shoe covers • Large contamination areas: liquid repellent suits • Particle mask/respirator or face shield when potentially infectious dust, mist, spray may be encountered through scraping, folding, and collection of samples • Be alert to sharp objects, knives, hypodermic needles, razor blades, etc. • Use red biohazard plastic bags for suspected biohazard items • Wear uncontaminated gloves while note taking. Pens, markers, etc. used while wearing contaminated gloves should be disposed using biohazard bag. • Remove torn or ripped contaminated equipment immediately and clean the affected areas with 10 percent bleach. • No eating, drinking, smoking or application of make-up • Label contaminated clothing, etc. that is not disposable and place in yellow infectious linen bags for cleaning.
4th Amendment • “The right of the people to be secure in their persons, houses, papers, and effects, against unreasonable searches and seizure, shall not be violated and no warrants shall issue, but upon probable cause, supported by oath or affirmation, and particularly describing the place to be searched, and the persons or things to be seized.” • Allowances: • Existence of emergency circumstances • Need to prevent the immediate loss or destruction of evidence • A search of a person and property within the immediate control of the person provided it is made incident to a lawful arrest • A search made by consent of the parties involved
Supreme Court Rulings • Mincey v. Arizona: police entered Mincey’s apartment after an undercover officer forced entry and was killed; four day search of scene and confiscation of drug paraphernalia, drugs, and bullets which were introduced as evidence. Mincey convicted but filed appeal on grounds of unlawful search and seizure • Michigan v. Tyler: Fire and police returned to scene of fire and collected evidence the morning after and then on 3 subsequent occasions. Tyler convicted of arson using evidence obtained but later conviction overturned because there was not consent or warrant issued for the 3 additional searches. • Lesson learned: when time and circumstances permit, obtain a search warrant before investigating and retrieving physical evidence at a crime scene.