Download
1 / 70
710 likes | 950 Views
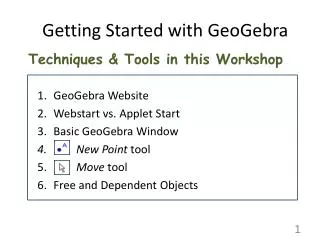
Getting Started with GeoGebra. Techniques & Tools in this Workshop GeoGebra Website Webstart vs. Applet Start Basic GeoGebra Window New Point tool Move tool Free and Dependent Objects. Getting Started with GeoGebra. Techniques & Tools in this Workshop Commands Save File

E N D
Getting Started with GeoGebra Techniques & Tools in this Workshop • GeoGebra Website • Webstart vs. Applet Start • Basic GeoGebra Window • New Point tool • Move tool • Free and Dependent Objects
Getting Started with GeoGebra Techniques & Tools in this Workshop • Commands • Save File • New vs. New Window • Grid and Axes – Turning on/off • Regular Polygon tool • Show Object / Show Label
Getting Started with GeoGebra Techniques & Tools in this Workshop • Object Properties - Changing • Label Options – Right Pane: Basic Tab • Category – Left Pane: Selecting Multiple Objects • Undo and Redo • Polygon tool • Animation
Getting Started with GeoGebra Techniques & Tools in this Workshop • Slider tool • Circle with Center and Radius tool • Play and Pause buttons • Zoom and Pan (Move Drawing Pad) • Object Properties • Fill – Right Pane: Style Tab • Color – Right Pane: Color Tab
Getting Started with GeoGebra Techniques & Tools in this Workshop • Line through 2 Points tool • Perpendicular line tool • Parallel line tool • Intersect 2 Objects tool • Insert Text tool • Dynamic Text
Getting Started with GeoGebra Techniques & Tools in this Workshop • Lines vs. Linear Functions • Spreadsheet View • Cell Addresses • Inputting formulas with numbers/functions • Copying • Create List of Points
Getting Started with GeoGebra Where is GeoGebra? • Open browser (Safari, FireFox, …) • Type in: geogebra.org • See Download link
First Time GeoGebra Tabs Download here CLICK NOW!
Getting started with GeoGebra Can you install a program on your computer? • Yes Choose appropriate platformProgram will download and you install it once. You get icon on desktop and you start from there. • No Use JAVA Applet Some school LANs do NOT allow you to install. So you will use Applet Start each time within your browser.
GeoGebra Window Command Line GeoGebra Tools
GeoGebra Window More GeoGebra Tools
GeoGebra Window Free Objects Dependent Objects Algebra View
GeoGebra Window DRAWING PAD Graphics View
GeoGebra Window Spreadsheet View
GeoGebra Window Command List Input Bar
Understanding Objects • Objects - Algebraic • Free objects (dark blue) you can click and drag them anywhere • Dependent objects • Semi-dependent (light blue) you can click and drag them within their parent object (i.e. the object on which they depend) • Dependent (black) you cannot drag them (they will move with their parent object)
Understanding Objects • Activate (click on) the New point tool • Click once inside the first quadrant. • You will get a free point A. • Click again somewhere along the x-axis. • You will get a semi-dependent point B. • Click again on (0,0). • You will get a (completely) dependent point C.
Object Values Current Values
Object Definitions Definitions
Moving Objects • Activate (click on) the Move tool • Click and drag point A. It will go anywhere. • Click and drag point B. It will only go along the x-axis. • Click and drag C. It won’t move. Important: GeoGebra is case-sensitive! A is NOT a.
Understanding Objects anywhere along x-axis cannot move
Save File – What’s next? • Save your file • Standard command with filename: file_one • File type is ggb • New Goal: Create a Dynamic Square • New File – 2 ways File -> New Window (Ctrl+N) opens new file without closing current file File -> New closes current file and opens new blank file
New Window vs. New New Window: Opens another “instance” of GeoGebra. Now you have 2 files open. New: Closes current file. Opens new (blank) file.
Dynamic Square • Command: File -> New • Turn on Grid • Right-click inblank spacein Drawing Pad. • SelectGrid
Dynamic Square • Definitions of a square? • Regular polygon with 4 sides • GeoGebra: Regular polygon tool
Dynamic Square • Regular polygon with 4 sides • Select and click once to get Point A. • Click again to get Point B. • Dialog box will open … 4 is there… click on OK.
Dynamic Square • Regular polygon with 4 sides Notice: The values ofa, b, c and d are their lengths. The value ofpoly1is its area. Points A and B are FREE objects. Segments a,b,c,d and poly1 are “together”.
Square Dynamics • What can you move? • Before moving, you need to select Move tool. • You can click and drag point A or point B. • Since these are free points, you can change the dimensions of the square – but notice that it is always a square!
Square Dynamics • You can click and drag point A or point B. • You can click and drag the square itself. This will only move the square - the dimensions of the square depend on A and B!
Labels, Names and Values • We want to “label” the square with its area.
Labels, Names and Values • Step 1: Turn on the label. • Right-click inside of square. • Click on Show Label. • By default, the label is the Name of the object. • Here the name is poly1
Labels, Names and Values • Step 2: Change the label from Name to Value. • Right-click inside of square. • Select Object Properties (bottom of list).
Labels, Names and Values • Object Properties: Basic Tab • Click on Close.
Object Properties • Let’s do that again. • Right-click on ANY object; select Object Properties. orEdit -> PropertiesorCtrl+E In the Object Properties windows … • Choose an object or category in the left pane. • Move this window off to the right so you see changes as you make them. • Try the options on other tabs! • Click on Close when you are done.
Object Properties Category:Segment
Undoand Redo • Forget to change to the Move tool? • Oops, I created objects I don’t want. • Don’t like your changes? • Undo • Redo Here:
Save File – What’s next? • Save your file • Filename: file_two(or whatever). • New Goal: When is a square not a square? Use Polygon toolto create a “square”. Use Move tool to move any of the vertices and change the shape of this quadrilateral.
Square – not a Square? • Command: File -> New • Polygon tool • Click at (-1,-1), (4,-1) (4,4), (-1,4) (or any 4 square points) • Click again onA. (Make it say PointA!) • You see a square. • But all 4 vertices are blue = free. • You have a quadrilateral (4-sided polygon).
Square – not a Square? • You have a quadrilateral (4-sided polygon). Now – not to be boring … too late . Please notice that we NEVER clicked on the axes! because we don’t want our points “tied” to the axes.
Save File – What’s next? • Save your file • Filename: file_three(or whatever). • New Goal: Create an Animation • Use Slider tool to define radius • Use Circle with center and radius tool … to make circles with various radii. • Animate the circles
Animation – Slider first • Command: File -> New • Turn off Grid(right-click in DP, click on Grid). • Turn off Axes(right-click in DP, click on Axes). • We create a slider – why? • Sliders can be animated - either manually (click & drag) or automatically (play & pause) • Slider is a number whose value can be changed.
Animation - Slider first • Make a slider afrom [0,2] increment 0.01. • Select Slider tool . • Click in the Drawing pad (upper right). • Type0 (min), 2 (max) and 0.01 (increment) • Click on Apply.
Circles from the slider • Want circles whose radii depend on the slider. • Select Circle with center and radius tool. • Click in the Drawing pad (to get center point A). • Typea in the dialog box and click on OK. • The radius of the circle is the value of the slider!
Automated Animation • Turn on animation • Right-click on slider. • Click on Animation on. • Slider will start to move. • Radius of circle will increase and then decrease. • Pause/ Play button is in bottom left of Drawing Pad.
Manual Animation • Press the Pause button • Activate the Move tool. • Click and drag the slider point to change the value of a manually. Sliders can be set to increase, decrease, oscillate orrandom. Both manual and automated animation work “better” if the width of the slider is a multiple of interval of the slider.
More circles from the slider • Again, select Circle with center and radius tool. • Click in the Drawing pad (to get center point B). • Typea/2 in the dialog box and click on OK. • Repeat 1-3 with radius a/3 • Repeat 1-3 with radius 2*a • Repeat 1-3 with radius 3*a • Press Play button to animate again. • Use Move tool to click and drag circles.
Zooming and Panning • Zoom • Use your mouse scroll buttonto zoom in and out. • Place mouse pointer in Drawing pad and scroll. • Use Zoom out tool and Zoom in tool. • Zooming is not “undoable”. • Pan • Use shift + mouse click & dragto pan • Place mouse pointer in Drawing pad, press and hold Shift key and then click & drag mouse. • Use Move drawing pad tool. • Panning can be “undone”. Use
Fill in the circles with color • Fill the circles • Right-click on any circle and choose Object properties. • Click and drag the Properties window to one side so you can see the Drawing pad. Click on category Point. • Click on the Basic tab and deselect Show Label Click on category Conic. • Click on the Basic tab and deselect Show Label. • Click on theColor tab and Click & drag Opacity to 50. • Click on each circle at left and then pick a color at right. • You can also use drop down tools in the Graphics menu
Fill in the circles with color • Drag Properties Window to side! Then you can see your changes!
Position Circles and Turn off Points • Position your circles before you turn off the points! • Right-click on any object and choose Object properties. • Click on the category Points and on the Basic tab and deselect Show object. • If you want to re-position the circles, you must first turn-on the points again. • To do this, right-click on any object and select Object properties. (Ctrl+E) • Now you have access to the Points again! Turn them on and then re-position.