Download
1 / 19
190 likes | 321 Views
Windows Kinect SDK. “The Kinect allows the physically impossible to become virtually possible” Art Simcoe 2011. Part 1 Recap - Introduction. Microsoft Research has released the first beta of Kinect for Windows SDK. You can find resources and download the SDK at:

E N D
Windows Kinect SDK “The Kinect allows the physically impossible to become virtually possible” Art Simcoe 2011
Part 1 Recap - Introduction • Microsoft Research has released the first beta of Kinect for Windows SDK. You can find resources and download the SDK at: • http://research.microsoft.com/kinectsdk • This SDK also install drivers for the Kinect sensors. However, be aware that the SDK will only install on Windows 7 (x86 and x64). The first point worth noting is that the latter is actually available in two versions: one for C++ developers and one for managed developers. • Regarding the licensing mode, this version released by Microsoft Research, is free for private use (basically, anything that is not commercial).
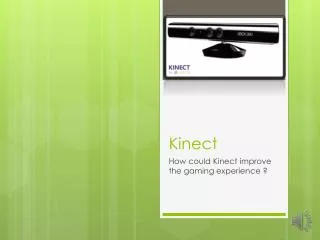
Part 1 Recap - Architecture • Basically, the Kinect sensors will send a set of three streams: • Image stream can be displayed like with any other camera (for example to do augmented reality). The Kinect video sensor can return a stream with 2 resolutions: one at 640x480 (at 30 frames per second) and one at 1280x1024 (but at 15 frames per second). The depth stream is the determining factor in our case. It will indeed add to each pixel a depth defined by the sensor. So in addition to the 2D position of each pixel (and color) we now have depth. This will greatly simplify the writing of shapes detection algorithms. A third stream is sent from the sensor: it is the audio stream from the four microphones (more on this subject at the end of the article).
Part 1 Recap - Architecture • Therefore, the key point here concerns the ability of Kinect to give us three-dimensional data. Using the NUI library (which comes with the SDK and stand for Natural User Interfaces) you will be able to detect the presence of humans in front of the sensor. Kinect can "see" up to 4 peoples and accurately track both of them. When Kinect precisely follows a person, it can provide a skeleton made up of key points detected on the user: • As shown in this diagram of the Vitruvian Man, there are 20 key points (which we call joints) that are detected and tracked by the NUI library. For best results, it is necessary to stand between 4 and 11 feet from the sensor. Beyond these limits, the sensors accuracy decreases quickly. It is also not possible (yet) to follow a user sitting in front of his computer.
Part 2 - Getting started • To use Kinect for Windows SDK in your .Net application, you only have to reference Microsoft.Research.Kinect.dll. • Then you have two new namespaces, one for accessing video streams and skeletons and one for audio. • To initialize the NUI library, you must instantiate an object from the Runtime class and configure the streams you want to receive: • In our example, we initialize the library with the support of depth stream, video stream and tracking of skeletons.
Part 2 - Video API • To use the video stream, you must first define the awaited format, To do so, we'll ask the library to retrieve the data in a given resolution with a defined pixel format: • Here, we ask for a resolution of 640x480 with a RGB pixel format. It is also possible to request a resolution of 1280x1024 (with lower performances) and pixel can be in YUV format. Resolution as mentioned earlier has an impact on performances. This is not the case of pixel format so it can be chosen according to what suits better for your application. • Subsequently, to be informed of the availability of each image, you must subscribe to an event of the library:
Part 2 - Video API In the handler of this event, we can simply produce a BitmapSource to display it in a WPF application:
Part 2 -Depth API • Besides the video stream, Kinect can send a stream coming from the infrared sensor that gives depth data. The initialization is similar to that of the video stream: • The depth data are stored as arrays of 16 bits integers. The depth stream can be retrieved at 320x240 or 80x60. • The 13 high-order bits of each pixel represent the distance from the depth sensor to the closest object, in millimeters. • The 3 low-order bits of each pixel represent the index of the tracked user who is visible at the pixel's x and y coordinates. • So if you want to view the depth stream while coloring the areas occupied by humans, it is possible to use this code: • This stream can be extremely useful to detect shapes. Thus, it is possible to monitor and detect hands or fingers movements to produce new ways to interact with the PC.
Part 2 - Skeleton tracking • One of the big strengths of Kinect for Windows SDK is its ability to discover the skeleton of joints of an human standing in front of the sensor. And unlike the hacks that have sprung up on Internet (like OpenNI), the Kinect for Windows SDK incorporates a very fast recognition system and requires no training to use. This is the result of a long training of a learning machine. Microsoft Research has given many examples to the recognition system to serve its apprenticeship. So once you pass behind the sensor (at the right distance of course), the NUI library will discover your skeleton and will raise an event with useful data about it. To enable skeleton tracking system, you must activate the depth stream and handle the appropriate event: • In the handler for this event, we can loop through all the skeletons found by the system: *Refer to project
Part 2 - Skeleton tracking • Several points are noteworthy here: • The NUI library cannot track more than 2 skeletons. It is the property TrackingState == SkeletntrackingState.Tracked that defines whether a skeleton is 'tracked' or not. The untracked skeletons only give their position. • Each joint has a Position property that is defined by a Vector4: (x, y, z, w). The first three attributes define the position in camera space. The last attribute (w) gives the quality level (between 0 and 1) of the position. This allows you to filter and take only the data that the library is almost certain. • Each skeleton has a property TrackingID which remains the same on every frame. This allows us to uniquely identify the skeletons between each call. • Each joint is identified by an enum which define its reference position (hands, head, etc.). • It is also possible to pool the current skeletons with the SkeletonEngine.GetNextFrame() method.
Part 2 - Skeleton tracking • It is also possible to pool the current skeletons with the SkeletonEngine.GetNextFrame() method. Finally, the NUI library provides an algorithm for filtering and smoothing incoming data from the sensor. Indeed, by default, the skeletons data are sent without smoothing or filtering. However, the Kinect depth sensor has not sufficient resolution to ensure consistent accuracy over time. Thus, the data seem to vibrate around their positions. To correct this problem, you can call this code:
Part 2 - Skeleton tracking • As we can see, it is possible to smooth and correct data. Depending on what you need, you should manipulate these parameters to provide the best experience possible. It is now your imagination’s turn to propose future applications. Thus, it is possible to look for gestures to control applications (the famous PowerPoint Jedi control) or even to make fun with augmented reality...
Part 2 - Audio API • Kinect comes with a group of four microphones (microphone array) that capture sound at very high quality. Indeed, directly on the sensor, a signal processor (DSP) is used to remove background noise and cancel echo effects. Moreover, thanks to its group of microphones, Kinect can provide the direction of the recorded sound source (beamforming). Then it becomes possible to know who is speaking in a meeting for example. The Kinect for Windows SDK is also able to be a source for Microsoft.Speech API and thus it becomes possible to do voice recognition using Kinect. So to use all of these services, simply instantiate an object of class KinectAudioSource:
Part 2 - Audio API • So to use all of these services, simply instantiate an object of class KinectAudioSource: • This instantiation can select microphone array mode or single microphone mode with or without echo cancellation (Audio Echo Cancellation: AEC). • To start capturing, we'll just ask our KinectAudioSource to start providing us the audio stream: • The audio is in 16-kHz, 16-bit mono pulse code modulation (PCM).
Part 2 - Audio API • To use the beamforming services, use this code: • There are several ways to detect the sound beam. Here, we let the system itself selects the appropriate beam. It would also be possible to make the selection manually, or take only the central beam or use the average of all beams. Then, the system can raise an event when the beam moves: • The returned angle is in radians and is relative to the center of your Kinect. If you are in front of it: an angle of 0 indicates that the sound comes across the sensor, an angle <0 indicates that the sound comes from left and an angle> 0 indicates that the sound comes from the right.
Part 2 - Audio API • At any time, it is also possible to request the current value of the angle by calling source.SoundSourcePosition: • Like the positions of the skeletons joints, we can get a data level of quality to decide if we want to use it. Regarding filters (anti-echo and noise reduction) the KinectAudioSource class provides updatable parameters to achieve the expected results.
Part 2 - Conclusion • So we could see that the Kinect for Windows SDK provides many tools to play with. We are about to discover a lot of new kinds of interaction between man and machine.
Resources • Visit http://artdude.net to download.... • This PowerPoint • Reference material used in the power • Links to Kinect templates, MSDN videos and more. • THANKS!
POP Quiz • 1st Prize: Name the 3 type of sensors in the Kinect device? • 2nd Prize: What are the two namespaces used when accessing video and audio streams? • 3rd Prize: What are the 20 points in the human body that Kinect uses for skeletal tracking? • Bonus: What is the term used to describe when the Kinect device provides the direction of the recorded sound source?