Download
1 / 60
610 likes | 771 Views
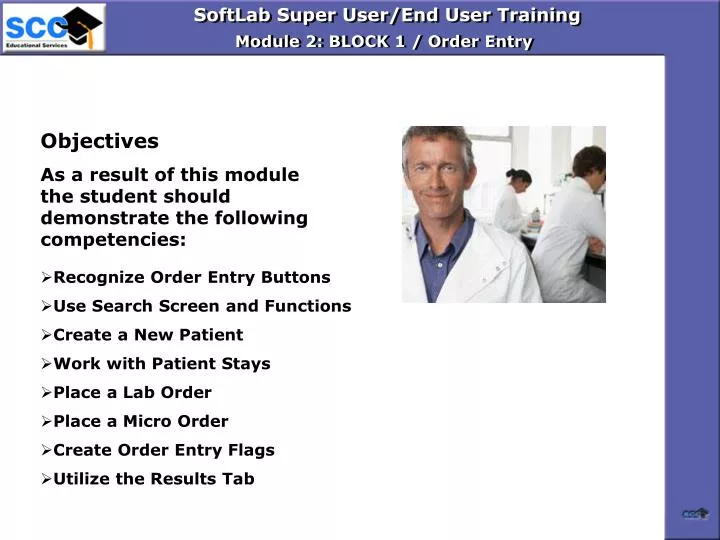
SoftLab Super User/End User Training. Module 2: BLOCK 1 / Order Entry. SoftLab Super User/End User Training. Module 2: BLOCK 1 / Order Entry. Objectives As a result of this module the student should demonstrate the following competencies:. Recognize Order Entry Buttons

E N D
SoftLab Super User/End User Training Module 2: BLOCK 1 / Order Entry SoftLab Super User/End User Training Module 2: BLOCK 1 / Order Entry Objectives As a result of this module the student should demonstrate the following competencies: • Recognize Order Entry Buttons • Use Search Screen and Functions • Create a New Patient • Work with Patient Stays • Place a Lab Order • Place a Micro Order • Create Order Entry Flags • Utilize the Results Tab Page 1 of 28
SoftLab/Mic Block 2 - Order Entry Buttons SoftLab/Mic Block 2 - Order Entry Buttons Open - To open an existing record, click the Open button, press CTRL + O, or select File > Open. Edit Mode - You can edit records if you have the security access. To enable the editable fields, click the Edit Mode button, select Edit> Record, or press F7. The fields will display as editable by changing color. Save - To save the information you have added or edited, click the Save button, select File > Save, or press CTRL + S. Add Next Order - To add a new order to the current patient record, click the Add Next Order button. Print- To print the currently displayed record to a specified printer, click the Print button or select File > Print. Click each individual enlarged button to display it’s function. Another click on the same button will hide it’s function.
SoftLab/Mic Block 2 - Order Entry Buttons SoftLab/Mic Block 2 - Order Entry Buttons Move Order to New Stay - To move an order to a new stay, click the Move Order to New Stay button. Verify Order - To verify an order, click the Verify Order button. Delete - To delete the current record from the database, click the Delete button. The system will then display a message box prompting you to confirm the deletion. Click Yes to delete the record or click No to retain the record. Send Order – To send an order, test(s), SC (Status Change) message or batch to the HIS. In an HIS, an example of status change is when a specimen has been collected, or a specimen has been received, etc. Click each individual enlarged button to display it’s function. Another click on the same button will hide it’s function.
SoftLab/Mic Block 2 - Order Entry Buttons SoftLab/Mic Block 2 - Order Entry Buttons Help Topics - To display overview help information for the current window, click the Help Topics button or select Help > Help Topics. What’s This? - To display help information for any field, button, check box, or option button, click the Help button, press F1, or select Help > What’s This. Run New Report - To display the Available Reports window, click the Run Report button or press CTRL + R, or select Tools > Run Report. Select the report that you want to generate and click OK. View Existing Report - To view reports that have been generated and then saved in electronic format, click the View Existing Report button or press SHIFT + F2, or select Tools > View Existing Report. Lab Results Query - To bridge to the Lab Results Query option, click the Lab Query button or select Tools > Lab Results Query. The system queries the database and displays lab results information for the current record. Click each individual enlarged button to display it’s function. Another click on the same button will hide it’s function.
SoftLab/Mic Block 2 - Order Entry Buttons SoftLab/Mic Block 2 - Order Entry Buttons Specimen Tracking - To bridge to the Specimen Tracking option, click the Specimen Tracking button or select Tools > Specimen Tracking. Check Printers - To clear a printer or stop a print job, click the Check Printers button. Printer Status - To view the current status of all printers, click the Printer Status button. Find/View Test Formulary - Clicking this button opens up a Test Catalog. This allows the user to search for the formulary for any test defined in the SoftLab, SoftMic and SoftBank database. Run Pathology – To bridge to Pathology, click the Run Pathology button. Click each individual enlarged button to display it’s function. Another click on the same button will hide it’s function.
SoftLab/Mic Block 2 - Order Entry Buttons SoftLab/Mic Block 2 - Order Entry Buttons Run Radiology - To bridge to Radiology, click the Run Radiology button. Run Patient Maintenance - To bridge to the Patient Maintenance option to add/edit patient records, click the Run Patient Maintenance button or select Tools > Patient Maintenance. Run Pharmacy - To bridge to Pharmacy, click the Run Pharmacy button. Run Micro Result Entry - To run Microbiology’s Results Entry, click the Run Micro Result Entry button, press CTRL + M, or select Tools > Micro Results Entry. Click each individual enlarged button to display it’s function. Another click on the same button will hide it’s function.
SoftLab/Mic Block 2 - Order Entry Buttons SoftLab/Mic Block 2 - Order Entry Buttons Hotkeys (when available) are listed to the right of the function. Functions for OE buttons can also be initiated through the menu bar.
SoftLab/Mic Block 2 - Search Screen and Functions SoftLab/Mic Block 2 - Search Screen and Functions To return to a recent order, simply exit out of the Search screen and select File > Recent Orders> and then select the order to which you want to return. Click Recent Patients when you are finished reading.
SoftLab/Mic Block 2 - Search Screen and Functions SoftLab/Mic Block 2 - Search Screen and Functions To return to a recent order, simply exit out of the Search screen and select File > Recent Orders> and then select the order to which you want to return.
SoftLab/Mic Block 2 - Search Screen and Functions You can search orders by patient, stay or order by entering the required information. SoftLab/Mic Block 2 - Search Screen and Functions Upon opening Order Entry, the Search screen will appear.
SoftLab/Mic Block 2 - Creating a New Patient SoftLab/Mic Block 2 - Creating a New Patient To create a New Patient: From the SoftLab Desktop, click the OE icon. From the Order Entry screen, select New > New Patient Result: The OE Search window will display. Click this check box when you are finished reading.
SoftLab/Mic Block 2 - Creating a New Patient SoftLab/Mic Block 2 - Creating a New Patient In order to create a new patient, you must: Check Open in Edit Mode (based on customizations) Select New > New Patient Now select New Patient. NOTE: Edit in Edit Mode – when this is checked, it displays the Order Entry window in edit mode, once searching is completed.
SoftLab/Mic Block 2 - Creating a New Patient You would now need to provide required information (these fields are backlit in yellow ) per local directives. In this case, we will complete these fields for you upon your next click. SoftLab/Mic Block 2 - Creating a New Patient Click in the Last name field to simulate completion of this window.
SoftLab/Mic Block 2 - Creating a New Patient SoftLab/Mic Block 2 - Creating a New Patient Click Patient Comm.
SoftLab/Mic Block 2 - Creating a New Patient SoftLab/Mic Block 2 - Creating a New Patient Click CanMesg. Notice that besides canned messages (F5), you can add the date (F6), the time (^F6) and perform a spell check (F11).
SoftLab/Mic Block 2 - Creating a New Patient SoftLab/Mic Block 2 - Creating a New Patient Canned message are available. We will not use any here. Click CanMesg. Click Cancel.
SoftLab/Mic Block 2 - Creating a New Patient SoftLab/Mic Block 2 - Creating a New Patient Click here to add a message to this text field.
SoftLab/Mic Block 2 - Creating a New Patient SoftLab/Mic Block 2 - Creating a New Patient Patient Comments; Once you enter them, they become a permanent part of the record. You can type free text comments or utilize canned comments. Click OK.
SoftLab/Mic Block 2 - Patient Stays SoftLab/Mic Block 2 - Patient Stays The green check shows that there is a patient comment. The Stay Com in this Stay section works the same as the Patient Comment in the above Patient section. When you are finished reading, click down arrow of the Priority field.
SoftLab/Mic Block 2 - Patient Stays SoftLab/Mic Block 2 - Patient Stays Select the Insurance tab. Notice that the requesting physician and the priority fields must be selected. If Mixed priority is selected, and additional field will be added to the order tab allowing you to specify the priority of each test.
SoftLab/Mic Block 2 - Patient Stays SoftLab/Mic Block 2 - Patient Stays Click Add.
SoftLab/Mic Block 2 - Patient Stays SoftLab/Mic Block 2 - Patient Stays Select choice 2. From the list that appears, you can select the patient’s insurance. The remainder of the insurance information can now be entered.
SoftLab/Mic Block 2 - Patient Stays SoftLab/Mic Block 2 - Patient Stays From the list that appears, you can select the patient’s insurance. The remainder of the insurance information can now be entered. Click OK.
SoftLab/Mic Block 2 - Placing a Lab Order SoftLab/Mic Block 2 - Placing a Lab Order We have entered the insurance information for you. Click Insert.
SoftLab/Mic Block 2 - Placing a Lab Order SoftLab/Mic Block 2 - Placing a Lab Order The Insert button can be used to look up infrequently used tests. In this module we will utilize the more frequently used tests. In Type column I = Individual test G = Group test Click Cancel when finished reading.
SoftLab/Mic Block 2 - Placing a Lab Order SoftLab/Mic Block 2 - Placing a Lab Order Click Keypad.
SoftLab/Mic Block 2 - Placing a Lab Order SoftLab/Mic Block 2 - Placing a Lab Order The Order Entry Keypad is essentially a file of frequently ordered tests. There are three ways for you to select tests from Keypad: • Place a check in blue box next to test by clicking • Highlight desired test using arrow down button and press Enter key • Type in letter next to desired We will utilize the first method here. Click G Basic Metabolic Panel when done reading.
SoftLab/Mic Block 2 - Placing a Lab Order SoftLab/Mic Block 2 - Placing a Lab Order The selected test appears in Ordered table. Collect and receive in the Specimen tab. Click the Specimens tab when you are finished reading. Notice that the Specimen tab now has a (1), indicating the presence of one test.
SoftLab/Mic Block 2 - Placing a Lab Order SoftLab/Mic Block 2 - Placing a Lab Order Notice that the Specimen tab now has a (2) instead of a (1). If the Modify button does not appear, click here to get a drop down list. You would right click to accomplish this in SoftLab.
SoftLab/Mic Block 2 - Placing a Lab Order SoftLab/Mic Block 2 - Placing a Lab Order Select Modify. Notice that the Specimen tab now has a (2) instead of a (1).
SoftLab/Mic Block 2 - Placing a Lab Order SoftLab/Mic Block 2 - Placing a Lab Order Click the now available Modify button. Notice that the Specimen tab now has a (2) instead of a (1).
SoftLab/Mic Block 2 - Placing a Lab Order SoftLab/Mic Block 2 - Placing a Lab Order If you were to select the Collected and Received check boxes and click OK, both the Collect and Receive buttons would be unavailable. You can adjust collected/received times and or flags as desired in this window. Click the x. Notice that the Specimen tab now has a (2) instead of a (1).
SoftLab/Mic Block 2 - Placing a Lab Order SoftLab/Mic Block 2 - Placing a Lab Order Notice that the Specimen tab now has a (2) instead of a (1). Now select the Comment button.
SoftLab/Mic Block 2 - Placing a Lab Order SoftLab/Mic Block 2 - Placing a Lab Order The History tab allows the recording of any history and/or any relevant comments pertaining to the specimen. The Comment tab allows either free text or select desired canned message, date, time or spell check. Click to simulate typing. Notice that the Specimen tab now has a (2) instead of a (1).
SoftLab/Mic Block 2 - Placing a Lab Order SoftLab/Mic Block 2 - Placing a Lab Order The History tab allows the recording of any history and/or any relevant comments pertaining to the specimen. Click the Tags tabs. The Comment tab allows either free text or select desired canned message, date, time or spell check.
SoftLab/Mic Block 2 - Placing a Lab Order SoftLab/Mic Block 2 - Placing a Lab Order Click here to simulate typing. Notice that the Specimen tab now has a (2) instead of a (1). Click OK
SoftLab/Mic Block 2 - Placing a Lab Order SoftLab/Mic Block 2 - Placing a Lab Order Any modification of specimen comments would be documented in the Tags tab. Notice that the Specimen tab now has a (2) instead of a (1). Click OK
SoftLab/Mic Block 2 - Placing a Lab Order SoftLab/Mic Block 2 - Placing a Lab Order Click Save. Notice that the Specimen tab now has a (2) instead of a (1).
SoftLab/Mic Block 2 - Placing a Lab Order SoftLab/Mic Block 2 - Placing a Lab Order The label printing dialogue box will appear. The printer to which this print job will be sent can be seen. Notice that the Specimen tab now has a (2) instead of a (1). Click OK when finished reading.
SoftLab/Mic Block 2 - Placing a Micro Order SoftLab/Mic Block 2 - Placing a Micro Order We will now consider how to place a Micro order. Select the Micro tab. NOTE: If you are logged onto SoftMic, the Order Entry Micro tab is automatically selected. Notice that the Specimen tab now has a (2) instead of a (1).
SoftLab/Mic Block 2 - Placing a Micro Order SoftLab/Mic Block 2 - Placing a Micro Order Click the check box of Culture Respiratory.
SoftLab/Mic Block 2 - Placing a Micro Order SoftLab/Mic Block 2 - Placing a Micro Order Notice that the Micro tab has appeared. Click to activate drop down menu in Source field. Click Yes.
SoftLab/Mic Block 2 - Placing a Micro Order SoftLab/Mic Block 2 - Placing a Micro Order Select #2 Bronchial Washing. Click Yes.
SoftLab/Mic Block 2 - Placing a Micro Order SoftLab/Mic Block 2 - Placing a Micro Order Click Yes. Click OK.
SoftLab/Mic Block 2 - Placing a Micro Order SoftLab/Mic Block 2 - Placing a Micro Order Bronchial Washing has now been added to the Source field. The Site field is now active. The window that appears on the upper right will give you options for this field. Click Left to add this to the Site field. Click Yes.
SoftLab/Mic Block 2 - Placing a Micro Order SoftLab/Mic Block 2 - Placing a Micro Order Click Upper to add this also to the Site field. Click Yes. Left has now been added to the Site field. Your next choice will add Upper also.
SoftLab/Mic Block 2 - Placing a Micro Order SoftLab/Mic Block 2 - Placing a Micro Order Click the Add button. Click Yes. Upper has now been added to the Site field also.
SoftLab/Mic Block 2 - Placing a Micro Order SoftLab/Mic Block 2 - Placing a Micro Order Click the second Add button. The time has been added to this Collected by field. Click Yes.
SoftLab/Mic Block 2 - Placing a Micro Order SoftLab/Mic Block 2 - Placing a Micro Order Click Current antibiotic therapy to activate the drop down window. Click Yes.
SoftLab/Mic Block 2 - Placing a Micro Order SoftLab/Mic Block 2 - Placing a Micro Order Select #10 Amoxicillin. Click Yes.