Download
1 / 23
300 likes | 632 Views
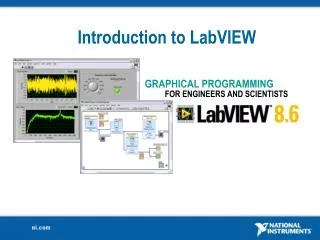
LabVIEW an Introduction. Alan Holloway. What is LabVIEW. Getting started with LabVIEW http://www.ni.com Introduction to LabVIEW in 3 Hours http://www.ni.com. LabVIEW is a graphical programming language that uses icons instead of lines of text to create applications.

E N D
LabVIEW an Introduction Alan Holloway
What is LabVIEW Getting started with LabVIEW http://www.ni.com Introduction to LabVIEW in 3 Hours http://www.ni.com LabVIEW is a graphical programming language that uses icons instead of lines of text to create applications. In contrast to text-based programming languages, where instructions determine program execution, LabVIEW uses dataflow programming, where data determine execution.
Using LabVIEW Getting started with LabVIEW http://www.ni.com Introduction to LabVIEW in 3 Hours http://www.ni.com In LabVIEW, you build a user interface by using a set of tools and objects. The user interface is known as the front panel. You then add code using graphical representations of functions to control the front panel objects. The block diagram contains this code. If organized properly, the block diagram resembles a flowchart.
Virtual Instruments (VI) LabVIEW programs are called virtual instruments, or VIs, because their appearance and operation imitate physical instruments, such as oscilloscopes and multimeters.
Front Panel Getting started with LabVIEW http://www.ni.com Introduction to LabVIEW in 3 Hours http://www.ni.com The front panel is the user interface of the VI. You build the front panel with controls and indicators, which are the interactive input and output terminals of the VI, respectively. Controls are knobs, push buttons, dials, and other input devices. Indicators are graphs, LEDs, and other displays. Controls simulate instrument input devices and supply data to the block diagram of the VI. Indicators simulate instrument output devices and display data the block diagram acquires or generates
LabVIEW front panel Getting started with LabVIEW http://www.ni.com Introduction to LabVIEW in 3 Hours http://www.ni.com
Block diagram After you build the front panel, you add code using graphical representations of functions to control the front panel objects. The block diagram contains this graphical source code. Front panel objects appear as terminals on the block diagram. You cannot delete a terminal from the block diagram. The terminal disappears only after you delete its corresponding object on the front panel.
Block diagram Getting started with LabVIEW http://www.ni.com Introduction to LabVIEW in 3 Hours http://www.ni.com Every control or indicator on the front panel has a corresponding terminal on the block diagram. Additionally, the block diagram contains functions and structures from built-in LabVIEW VI libraries. Wires connect each of the nodes on the block diagram, including control and indicator terminals, functions and structures.
Front panel & corresponding block diagram Getting started with LabVIEW http://www.ni.com Introduction to LabVIEW in 3 Hours http://www.ni.com
Tools palette Getting started with LabVIEW http://www.ni.com Introduction to LabVIEW in 3 Hours http://www.ni.com The Tools palette is available on the front panel and the block diagram. A tool is a special operating mode of the mouse cursor. When you select a tool, the cursor icon changes to the tool icon. Use the tools to operate and modify front panel and block diagram objects. Select View»Tools Palette from the taskbar to display the Tools palette.
Controls palette Getting started with LabVIEW http://www.ni.com Introduction to LabVIEW in 3 Hours http://www.ni.com The Controls palette is only available on the front panel. The Controls palette contains the front panel controls and indicators you use to create the user interface. Select View» Controls Palette or right-click the front panel workspace to display the Controls palette.
Functions palette Getting started with LabVIEW http://www.ni.com Introduction to LabVIEW in 3 Hours http://www.ni.com The Functions palette is available only on the block diagram. The Functions palette contains the objects you use to program your VI, such as arithmetic, instrument I/O, file I/O, and data acquisition operations. Select View» Functions Palette from the taskbar or right-click the block diagram workspace to display the Functions palette.
Status Toolbar • Click the Run button to run the VI. While the VI runs, the Run button appears with a black arrow if the VI is a top-level VI, meaning it has no callers and therefore is not a subVI. • While the VI runs, the Abort Execution button appears. Click this button to stop the VI immediately. • Note:Avoid using the Abort Execution button to stop a VI. Either let the VI complete its data flow or design a method to stop the VI programmatically Getting started with LabVIEW http://www.ni.com Introduction to LabVIEW in 3 Hours http://www.ni.com
Elements of typical programs Getting started with LabVIEW http://www.ni.com Introduction to LabVIEW in 3 Hours http://www.ni.com • A - Loops • While loop • For loop • B - Decision making & file I/O • Case structure (if statement) • Event structure • C - Functions & sub VIs • Built in LabVIEW functions • Creating sub VI's
Loops Getting started with LabVIEW http://www.ni.com Introduction to LabVIEW in 3 Hours http://www.ni.com Nearly all programs involve some sort of loop where all or sections of the program must be repeated. Both the While and For Loops are located on the Functions»Structures palette. The For Loop differs from the While Loop in that the For Loop executes a set number of times. A While Loop stops executing the subdiagram only if the value at the conditional terminal exists.
Drawing loops • 2 Enclose the code to be repeated (looped) • 3 Wire the appropriate loop conditions Getting started with LabVIEW http://www.ni.com Introduction to LabVIEW in 3 Hours http://www.ni.com 1 Select the structure required
Loops • While loops • Runs until the stop condition is met • Always runs at least once • Counts number of iterations
Loops • For loop • Runs according to input N number of iterations • Counts the number of iterations
LabVIEW Functions • What types of function are available • Analysis • Signal processing • Statistics • Advanced math & formulae • Storage • File I/O • Zip • ARM specific • Simulation • Read digital I/O • +Many more!
Decision making Getting started with LabVIEW http://www.ni.com Introduction to LabVIEW in 3 Hours http://www.ni.com The case structure has one or more subdiagrams, or cases, one of which executes when the structure executes. The value wired to the selector terminal determines which case to execute and can be Boolean, string, integer or enumerated type. Right-click the structure border to add or delete cases. Use the Labeling tool to enter value(s) in the case selector label and configure the value(s) handled by each case.
Case statement Getting started with LabVIEW http://www.ni.com Introduction to LabVIEW in 3 Hours http://www.ni.com Boolean - True/False Numeric 0,1,2,3 …..n String "Alan", "Mark", "Graham" etc
Timing While loop executes every 250ms Getting started with LabVIEW http://www.ni.com Introduction to LabVIEW in 3 Hours http://www.ni.com It may be necessary to add some sort of timing to your program. You can add a timing delay using the Wait Until Next ms Multiple Function Waits until the value of the millisecond timer becomes a multiple of the specified millisecond multiple.
Summary Getting started with LabVIEW http://www.ni.com Introduction to LabVIEW in 3 Hours http://www.ni.com • LabVIEW programs are called virtual instruments (VIs). • Controls are inputs and indicators are outputs. • Each VI contains three main parts: • Front panel – How the user interacts with the VI • Block diagram – The code that controls the program • Icon/connector – The means of connecting a VI to other VIs