Download
1 / 69
710 likes | 1.02k Views
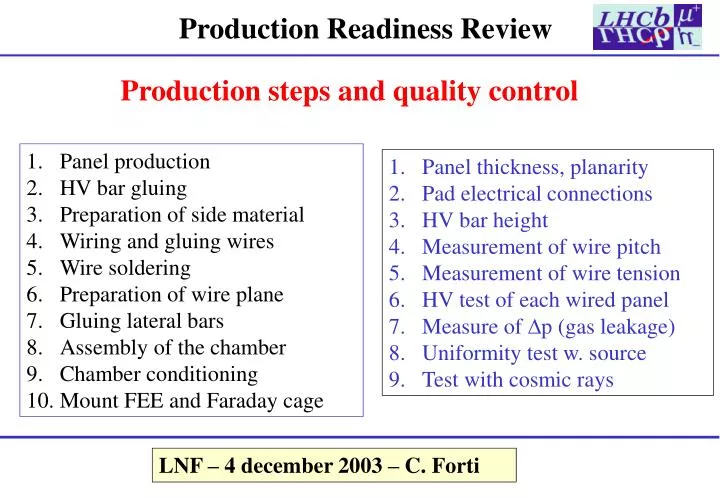
Production Readiness Review. Production steps and quality control. Panel production HV bar gluing Preparation of side material Wiring and gluing wires Wire soldering Preparation of wire plane Gluing lateral bars Assembly of the chamber Chamber conditioning Mount FEE and Faraday cage.

E N D
Production Readiness Review Production steps and quality control • Panel production • HV bar gluing • Preparation of side material • Wiring and gluing wires • Wire soldering • Preparation of wire plane • Gluing lateral bars • Assembly of the chamber • Chamber conditioning • Mount FEE and Faraday cage • Panel thickness, planarity • Pad electrical connections • HV bar height • Measurement of wire pitch • Measurement of wire tension • HV test of each wired panel • Measure of Dp (gas leakage) • Uniformity test w. source • Test with cosmic rays LNF – 4 december 2003 – C. Forti
Copper - Gold Pad - Pad Copper - Gold Gold - Gold Pad - Pad Pad - Pad Gold - Copper Gold - Copper Type and number of panels needed Quadrigap M3,5R3 • Quadrigaps: • M3R3 (48 ch)+10% • M5R3 (48 ch)+10% • Bigaps: • M1R3 (48 ch)+10% • M1R4 (120 ch)+10% Total = 290 chambers 794 panels with wires Time needed: 10 panels/week 80 weeks ~ 1.8 yrs 6 panels/week 132 weeks ~ 2.9 yrs BAD Bigap M1R3,4 I will show that 10 panels/week is a reachable production rate
Clean HV bars PREPARATION Visual inspection Check planarity Check pad contacts Clean panel POST-GLUING Visual inspection Measure bar height Solder connectors Clean panel HV BAR GLUING Production steps: panels and HV bars Produce HV bars PANEL PRODUCTION Measure panel thickness Mount R, C Conformal coating
Description of panels Sandwich panel 4 gaps
Description of panels A small quadrigap prototype Cathode pads Lateral bar Closing bar
Panel thickness and planarity • According to simulations (Riegler), the requirements on the gain: • G0/1.25 < G < G0*1.25 over 95% of the detector area • G0/1.50 < G < G0*1.50 over 5% of the detector area • where G0 is the nominal gain translate into the following requirement: • Gap = 5 mm ± 90 mm (95% of detector area) ± 180 mm (5% of detector area) Since the gap is provided by the 5mm spacers placed between the panels, along their frames, the gap uniformity is related to the uniformity of the panel thickness and to its planarity. The absolute value of the panel thickness is crucial when a panel is wired on both sides, because the distances between the wire planes and the panel surfaces depend on thickness. The requirement is T=9.0 ± 0.2 mm In LNF chambers, where we wire only one side of the panel, the absolute value of the thickness is not crucial, while its uniformity is. At the company the panel thickness is measured with a tooling based on inductive sensors.
Device for thickness measurement 7 sensors Device designed and realised by Roma 2 group
Status of device The device is well calibrated for Cu-Cu panels. Some more work is needed for precise ABSOLUTE measurement of Gold panels. Anyway, the system is very precise to thickness fluctuations and is sensitive to variation of planarity along panel width (the most important). All panels measured within specs for thickness absolute value. Thickness and Temp. vs. Time Down to 1 mm jump appreciable Fine structure due to air conditioning cycles 10 hrs measurement RMS = 70 nm 8 mm
Comparison Autom. device vs. Micrometer 9.16 Device calibrated 9.07 < t < 9.15 All measurements within ± 40 um 9.06 9.14 Device not calibrated Device: 8.99 < t < 9.04 Micrometer: 9.06 < t < 9.12 8.98
Manual check of thickness The more recent production: 50 panels over 130 total has been measured manually with a micrometer. 5500 measurements provide: < T > = 9.1 mm s(T) = 21 mm Even at max production rate (~ 20 panels/day with 3 moulds) a relevant fraction of ~10-15% of the panels will be checked with micrometer.
Manual check of planarity A check of panel planarity will be performed at LNF on ALL panels , before gluing the HV bars. 50 mm planarity < 90 mm (95% of detector area) < 180 mm (5% of detector area)
Clean HV bars PREPARATION Visual inspection Check planarity Check pad contacts Clean panel POST-GLUING Visual inspection Measure bar height Sold connectors Clean panel HV BAR GLUING Layout of HV bar gluing room SHELVES FOR PANELS BEFORE GLUING GLUING SOLDERING PREPARE PANEL AFTER GLUING GLUING GLUING CUPBOARD GLUING SHELVES FOR PANELS AFTER GLUING
HV bar gluing machine HV bar without R,C Suction cups HV bar with R,C
Schedule of operations in HV bar gluing room The most pessimistic estimate: production rate=2 panels per day One operator free, any 2 days: can help in final chamber assembly in clean room.
Traveler for “Panel Preparation for gluing of HV bars” Must come with: Version 2 (4-dec-03) Take panel from shelf: UNPREPARED Plot of panel thickness Panel number : Gold - Gold M1R3 M3R3 Chamber : Gold - Copper M1R4 M5R3 Layer : Pads - Pads VISUAL INSPECTION Operator Date Time OK Hospital List pad # and defects: PANEL PLANARITY Operator Date Time OK Hospital Requirements: 95% of area within +- 90 um / 5% of area within +- 180 um Comments: Traveler for “Panel Preparation for gluing of HV bars” (I)
PANEL CLEANING PAD CONTACTS Operator Operator Date Date Time Time OK OK Hospital Hospital Comments: Comments: Ready for bar gluing ? Operator Date Time Put panel on shelf: READY FOR GLUING YES NO Traveler for “Panel Preparation for gluing of HV bars” (II) 100 <p< 140 mm
Layout of clean room WIRE TENSION ASSEMBLY LEAKAGE TEST TABLE SHELVES CONDITIONING DRESSING ROOM TABLE CUPBOARD LATERAL BARS HV TEST PREPARATION WIRE PITCH SOLDERING WIRING WIRE GLUING
Clean room LNF Gluing of lateral bars and HV test Pitch control soldering Wiring Wire gluing
Clean room LNF Cut wires, solder connectors Chamber assembly Gas leakage test Gluing of lateral bars and HV test
Wiring and wire gluing It is feasible to wire 2 panels/day, corresponding to 2.5 (4-gaps)/week The critical point is the waiting time needed before turning the machine and gluing the 2nd panel. We will test if a local increase of temperature shortens this time. We measured the wire tension at 2 different temperatures: Temp = 22 degrees T = 69.08 gTemp = 26 degrees T = 70.41 g D = 0.33 g/degree we will increase temperature of ~ 3 degrees
Wire pitch control • According to simulations (Riegler), the requirements on the gain: • G0/1.25 < G < G0*1.25 over 95% of the detector area • G0/1.50 < G < G0*1.50 over 5% of the detector area • where G0 is the nominal gain translate into the following requirement on the wire pitch: • Pitch = 2 mm ± 50 mm (95% of wires) ± 100 mm (5% of wires) The check is performed with an automatic measuring device, based on 2 cameras scanning the panel, positioned on the same structure supporting the laser heads for wire soldering. The time for the test is ~ 1 h/panel for the largest chambers and requires one operator.
Wire pitch control • Results are expressed in pixels: 211 pixels correspond to 2 mm. • We require: 206 < pitch < 216 for 95% of wires • 201 < pitch < 221 for 5% of wires • All panels checked up to now satisfy these requirements • (except one wire of one panel)
Wire soldering The wire soldering is performed with 2 lasers on each wire side and 2 cameras displaying the work of the soldering heads. Here we count on the reliability of the automatic system. The operator can only seldom have a look to the monitors. The time of the soldering procedure is ~ 1 hr/panel for the largest chambers and requires one operator to execute the procedure. Check of soldering and (eventual) retouching is performed on the next table (panel preparation).
Panel preparation • After soldering, the panel is moved to another table for: • Retouching of soldering • Cut wire edges • Clean bars • Turn panel upside down • Soldering of HV connectors (for pad-pad panels) • Check pad integrity • Final cleaning of panel (opposite side respect to wires) • Time = 1 hr 30 min with 1 operator (for big pad-pad panels)
Wire tension measurement The wire tension has to be verified (in order also to detect early possible anomalies in the wiring machine). The wire elastic limit is ~130 g. For stability requirement, no wire should have a tension less than 50 g (Riegler). We measure the wire tension with an automatic device providing an oscillating HV to a reference wire placed just above the measured wire (at ~1 mm). The system detects the resonance corresponding to the maximum oscillation of the relative capacity between the reference and the measured wire. For a given wire length and density (13.6 mg/m for our wire), the frequence of the resonance corresponds to a mechanical tension. Typical value is ~ 330 Hz. Estimated time of the test: approximately 1 hr 30 min per panel for the largest chambers. One operator is needed to place the panel and start the software. The procedure is completely automatic. A data file is provided in output, together with a plot.
Wire tension measurement Wire Tension Meter developed by Roma 1 group
Wire tension measurement <T>=68 ± 3 g
Traveler for “WTM, lateral bar gluing and HV test” WIRE TENSION Operator Date OK Time Hospital Must come with: Version 2 (20-nov-03) Take panel from WTM machine Requirements: NO wire with T < 50 g or T > 90 g < T > = s (T) = Plot of panel thickness Traveler for “Panel preparation…” Traveler for “HV-BAR gluing” Traveler for “Panel wiring” Traveler for “Panel soldering and preparation” Number of files: Panel number : Gold - Gold M1R3 M3R3 Chamber : Gold - Copper M1R4 M5R3 Layer : Pads - Pads Traveler for “WTM, gluing of lateral bars and HV test” (I)
Gluing of lateral bars and HV test in air After wire tension measurement, the panel is moved on table for gluing of lateral bars and high voltage test in air. We have chosen to perform these operations together on the same table because they both require a relevant amount of time (the night is used). On this table, 2 panels can be glued and HV-tested at the same time.
Gluing of lateral bars and HV test in air Gluing of lateral bars: ~ 30 min needed for 2 panels together (1 operator) HV test: at 2 kV in ~2-3 hours (at 40% rel. humidity) the current usually decreases and reaches less than 100 nA/per plane. Current limitation is set to 200 nA per plane in order to not damage the panel. Estimated time of the test: approximately 12 hrs including both glue drying and HV test. The whole night will be used if the gluing starts in the afternoon. This is compatible with the production schedule of 2 panels/day
HV test in air At HV=2 kV, the current reaches ~ 100 nA within ~ 2-3 hrs for most panels. In 1 case over 7, one whole night was needed.
HV TEST IN AIR LATERAL BAR GLUING Operator Requirement: I < 100 nA @ 2 kV after few hours Date Time OK OK Hospital Hospital Comments: Operator Date Time HV I (nA) % Hum. Traveler for “WTM, lateral bar gluing and HV test” (II) In the future, probably the test will be automatic
Final chamber assembly and gas leak test After gluing of lateral bars and HV test, the panels are ready to be assembled in the chamber.On the table of chamber assembly we also glue the gas connectors and perform the gas leakage test. Time: assembly = one full day (2 operators) leakage =1 hr 30 min (1 oper.) 8 9 10 11 12 13 14 15 16 17 18
Final chamber assembly glue Lateral bar Closing bar spacer
Final chamber assembly Total measured height: 65.2 < h < 65.3 mm Expected:5 panels + 4 gaps = 5*9 + 4*5 = 65 mm
ASSEMBLY Operator Date Time OK Hospital Height (mm) O O O O O O O O O O Height (mm) O O Traveler for “Chamber assembly and leak test”
Gas leakage test FIT: Dp = Dp0 e-at Dp 0 = 4.99 mbar a= -0.29 hr -1 Automatic measurement of Dp, p and T vs. time recently set up. Corrections for T and P variations still not included.
Conditioning and tests SHELVES CONDITIONING CONDITIONING UNIFORMITY TEST RACKS PC DRESSING ROOM WIRING WIRE GLUING COSMIC RAY STAND MOUNT SPB We have to decide if doing (gas+HV) conditioning in clean room or in the test room. We don’t know exactly how much time is needed for conditioning, however the shelves can allocate 6 chambers (>2 weeks production). Uniformity and cosmic ray tests are described in D.Pinci’s talk
Preparation/check of side material • In the laboratory: • Check and preparation of HV bars • Visual inspection, check of integrity, cleaning of the HV bars • Cleaning of the lateral bars • Cleaning of the closing bars • Check of wire quality samples (15 min/spool) • Visual inspection of wire quality using a microscope (one sample per spool) • Cleaning of the spacers and of the plastic rings (used to avoid that glue goes • under the spacers) One person can prepare in one work day the material needed for 5 M3R3 chambers, corresponding to ~10 days of wiring (at 2 panels/day rate).
Manpower needed 9/10 people is the need to insure a 2 panel/day production rate
Conclusions Production and quality control procedures are defined in detail The time needed for each operation is decreasing rapidly during last weeks of intense work we can reach soon a production rate of 10 wired panels/week Come to visit our clean room: you will find one panel or chamber in each production/(quality control) step. We will be glad to receive your suggestions. LNF – 4 december 2003 – C. Forti
Wire quality check At the moment, we only weigh the wire spool to verify the constancy of wire density (13.6 mg/m). In the future we plan to check the wire quality samples (~15 min/spool) Visual inspection of wire quality using a microscope (one sample per spool). The wire in a spool will be ~ 4.2 km, enough for wiring of 10 panels M3R3 (i.e. 2.5 full chambers). This corresponds to 5 days of wiring.
The moulds small prototypes M3R3 prototypes
FR4 foils fixed Both FR4 foils fixed