Download
1 / 58
960 likes | 2.01k Views
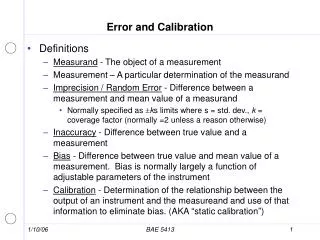
Audiometer Verification and Calibration. Biologic Listening Checks. When should you do this? Before using new equipment Daily or some other regular interval Why should you do this? To detect problems prior to obtaining clinical data To monitor the status of your equipment. Preparation.

E N D
Biologic Listening Checks • When should you do this? • Before using new equipment • Daily or some other regular interval • Why should you do this? • To detect problems prior to obtaining clinical data • To monitor the status of your equipment
Preparation • Turn on all equipment and let it all warm up for a few minutes. • This lets the circuits warm up • Do this as you walk through the clinic in the morning, while you are turning on the lights, etc. • Have a checklist at each sound booth on which you mark the listening check results. • Some parts of the listening check are easier to do in teams of two people.
Step One: Phone Check • Play a continuous pure tone: • Set to 50 dB HL. Scroll across frequencies. They should all be roughly the same loudness. • Reduce intensity to threshold, listening for any hum or static, clicks or pops, intermittency, and appropriate level changes. • Increase to 70 dB HL and listen for distortion. • Wiggle the cords all the way from the transducer, back to the wall. You should not hear intermittency or static. • Check for cracks, splits, wear & tear.
Step Two: Phone check, continued • Broad band noise at 50 dB HL, narrowband noise at 1kHz, 50 dB HL, speech, at 50 dB HL. • Listen for static & distortion for each. • Check for crosstalk: • Unplug one phone. Set the other to 70 dB HL. You should not be able to hear any signal in the unplugged phone. • Sanity check: How could there be any?
Step Three: Bone Oscillator • Listen across frequencies at 30 dB HL to check for level and distortion. Also increase to 50 and listen for distortion. • At 1000 Hz, check the cord for intermittency & static.
Step Four: Check the Audiometer • Loose dials? • General physical condition of all equipment. • No audible clicks when controls are manipulated (a normal hearing listener should not detect any at 1 meter).
Step Five: Threshold Check • For new equipment, and somewhat regularly with existing equipment: • Test yourself, or someone in your office to see if thresholds are consistent. • If there is a problem: • Check the levels with a SLM or your real-ear equipment. If you are out of tolerance, have the equipment recalibrated.
Step Six: Other Equipment • As part of your daily check, run a tympanogram and an OAE on yourself and/or using a false 2cc cavity. • Your tympanogram should look the same each day, unless you have a middle ear problem. • The 2cc cavity should show: • Exactly 2cc on volume measures on tymps, and should easily obtain a seal • No otoacoustic emissions • Also check the equipment for cracked tubing, broken parts, insufficient tips, etc.
From the ANSI 2004 S3.6 Standard • “The purpose of this standard is to ensure that tests of hearing, and particularly tests of hearing threshold, performed on the same individual with different audiometers complying with this standard, shall give equivalent results when used under comparable test conditions. • Further, the test results shall accurately and validly represent the level difference, if any, that may exist between the threshold of the individual tested and the reference threshold of hearing.”
From the ANSI 1996 S3.6 Standard • “Reference equivalent threshold sound pressure level: • The mean equivalent threshold sound pressure level at a specified frequency, as measured in a specified acoustic coupler, artificial ear, or ear simulator based upon hearing threshold data from a sufficiently large number of otologically normal individuals of both genders ranging in age from 18 to 30 years. Abbreviation, RETSPL.” • This is the calibration equivalent of the minimum audible field (MAF) curve.
What gets standardized? • The parameters vary with type of equipment, but for audiometers: • Must comply with electrical safety standards for medical equipment • General equipment function • Audiometric functions (called facilities) • The frequency, bandwidth and level of each signal, for each transducer • The linearity of the attenuator • The amount of distortion • The onset/offset of the signals
Audiometer Types • Categories: pure-tone, speech, high-frequency, or free-field equivalent • Can have >1 per audiometer • Within each category, they are typed based on their “facilities”, which are: • transducer types, • maximum hearing levels and test frequencies • test signal switching, reference tones, speech inputs, masking types, routing of masking, • subject response system, signal indicator, audible monitoring of test signals, talkover, and talkback.
Type 1: 4 transducer types Test frequencies: 125-8000 (air) High max test levels Type 4 Only supra-aural headphones Only 500-6000 Hz test frequencies Only up to 70 dB HL Pure-tone Audiometer Types • Why wouldn’t they all just be made as Type 1 audiometers? • What might you use a Type 4 audiometer for?
Type A & B Mic input Electrical input for CD or Tape Phone & loudspeaker outputs Type C No mic Electrical input for CD or Tape No loudspeaker output. Speech Audiometer Types • Typing across categories can be combined. • What would a Type 1A audiometer be?
Parameter Frequency Linearity Distortion Rise-fall time Level per transducer Equipment needed: Frequency counter or oscilloscope SLM SLM Oscilloscope SLM + couplers and an “artificial mastoid” Measurable, standardized parameters of audiometers:
Transducer-independent parameters Attenuation Frequency Rise/fall Transducer-dependent parameters Level Distortion Where is the parameter?
Transducer-independent variables: Level control (attenuation) Signal Presentation Signal SourcesLevel monitoring
Checking Linearity • If you change the attenuation value on the audiometer, the actual output should also change, by the same amount. • This should happen across the entire range of the attenuator. • Measure output with a SLM & manipulate the attenuator across all possible settings.
On/Off Ratio • Measure at 60 dB HL or less • Set audiometer to 60 dB HL. • Set the presentation to “off”. • Measure: should be at least 10 dB below the RETSPL. • Above 60 dB HL, the increase in level while “off” shouldn’t increase any more than 10 dB for each 10 dB increase in dial position.
Rise/Fall time • Measure at 60 dB HL or less • Need to use an oscilloscope with memory • Rise: duration to rise from –20 dB to –1 dB from the steady-state value • Fall: -1 to –20 dB from steady-state value • Both should be between 20 and 200 msec. • Overshoot should not exceed 1 dB.
Pulsed Tones • There must be a switch that lets you select pulsed vs. continuous. • Rise time between 20 and 50 ms & smooth • Fall time between 20 and 50 ms & smooth • Duration no less than 150 ms • Why? • Symmetrical on/off times of 225ms, +/- 35ms • On/Off Ratio of at least 20 dB.
Checking frequency content of pure tones • Play a pure tone & measure it to see if it is really being produced at the stated frequency. • Measure with a frequency counter • Tolerances around the stated frequency tell you if the audiometer is close enough. This is type-dependent: • For type 1: 1% tolerance • e.g. 1000 Hz must be between 990 and 1010 Hz.
Standardized frequency content of FM tones • The modulation waveform must be sinusoidal or triangular & symmetrical • Rate should be from 4 to 20 Hz • Should produce a total frequency deviation between 5 and 25% of the carrier. • The carrier must be within 3% of the nominal frequency • E.g.: ___1000 Hz____ carrier ______________deviation (max)
Standardized frequency content of narrowband maskers • Should be slightly wider than critical bands to reduce the perceived tonality of the signal. • Exact bandwidths are specified. • Should fall at a rate of at least 12 dB per octave, for at least 3 octaves. • The frequency content of narrowband maskers is not usually measured in annual calibration checks.
Standardized frequency content of broadband maskers • White noise: • The spectrum level across frequencies from 250 to 5000 Hz should be within 5 dB of the level at 1000 Hz. • “Speech” noise: • Should be weighted random noise. Should have a flat spectrum from 100 to 1000 Hz, then fall at 12 dB per octave from 1000 to 6000 Hz. Tolerance is 5 dB. • The frequency content of broadband maskers is not usually measured in annual calibration checks.
Speech Signal Sources • Pre-recorded speech: • Must be reproduced within +/-1 dB of the recorded level from 250-4000 Hz, and 2 dB outside that range. • Microphone for live speech: • Must have a flat frequency response (within +/-3 dB) from 125-8000 Hz. • These parameters are not usually measured in annual calibration checks.
Speech Signal Level Control • Is relative to a reference tone: • There must be a VU meter that precedes the HL control (i.e., it monitors the input signal, before attenuation). • It must be calibrated in decibels. • It must be a fast needle (response w/in 350 ms) • The 0 dB point of this meter gets calibrated to a steady-state tone. The meter must have a flat frequency response from 250 to 8000 Hz (+/- 0.5 dB). • Live voice signals should be presented with a carrier phrase spoken so that the VU meter is at zero.
Audiometric transducers – features summary: • Standardized features (next slides) • Nonstandardized but important issues: • Retention on the head • Attenuation of external sounds • Interaural attenuation • Ease/speed of placement • Cost of use
Checking Distortion • Measure Total Harmonic Distortion for each audiometer/transducer combination. • Test level varies with frequency: • 125 Hz: 75 dB HL. Etc. see next slide. • Max permissible THD: • 2.5% for phones • 5.5% for bone oscillators
Checking Level • This checks that the MAP curve is programmed into the audiometer. • Each transducer has a “RETSPL”, defined in the standard. • Reference Equivalent Threshold Sound Pressure Level • Use a sound level meter to measure the output of the transducer, at 70 dB HL. • Results are specific to that transducer!! • If you unplug it & replace with another one you may be out of calibration.
Checking Level: Insert Phones • Connect the insert phones to a 2cc coupler (specific type – not the same as the one used for hearing aids). • Put a microphone in the coupler & connect to a sound level meter. • Set audiometer to 70 dB HL and measure output at each frequency.
Checking Level: TDH phones • Connect the TDH phone to a 6cc coupler (specific type – not the same as the one used for hearing aids). • Put a microphone in the coupler & connect to a sound level meter. • Set audiometer to 70 dB HL and measure output at each frequency.